


Halloween only comes once a year, but your front door is the one spot that gets seen by every trick-or-treater, neighbor, and passing car. That makes it prime real estate for some seriously spooky decorating. Whether you have a $10 budget or a weekend to craft, there are so many ways to turn your door from forgettable to hauntingly memorable. From classic jack-o-lantern clusters to dramatic cemetery scenes, this list gives you 27 Halloween door decoration ideas that range from quick and cheap to full-on spectacular. Pick one, pick five, or go all in — your neighborhood won’t know what hit them.
1. Giant Spider Web Door Cover

A giant spider web stretched across your door is one of the easiest Halloween looks you can pull off.
You can buy a pre-made web cover for under $5 at any dollar store or big-box retailer. They’re made of stretchy white mesh that you drape and pin into place. Add a handful of plastic spiders in different sizes to make it look more realistic.
The key is variety. Use big spiders near the center and scatter smaller ones toward the edges. It makes the whole thing look more natural — like something actually lives there.
To make it look even better, let some of the web drape over the door handle or spill onto the frame. That little touch makes it feel three-dimensional instead of flat.
If you want to go DIY, grab white yarn and hot glue. Zigzag the yarn across a foam wreath frame and attach it to your door with a Command hook. It takes about 20 minutes and costs next to nothing.
This works on any door color, but it pops especially well on dark green, black, or navy doors. The contrast is striking even from across the street.
2. Glowing Jack-O-Lantern Cluster
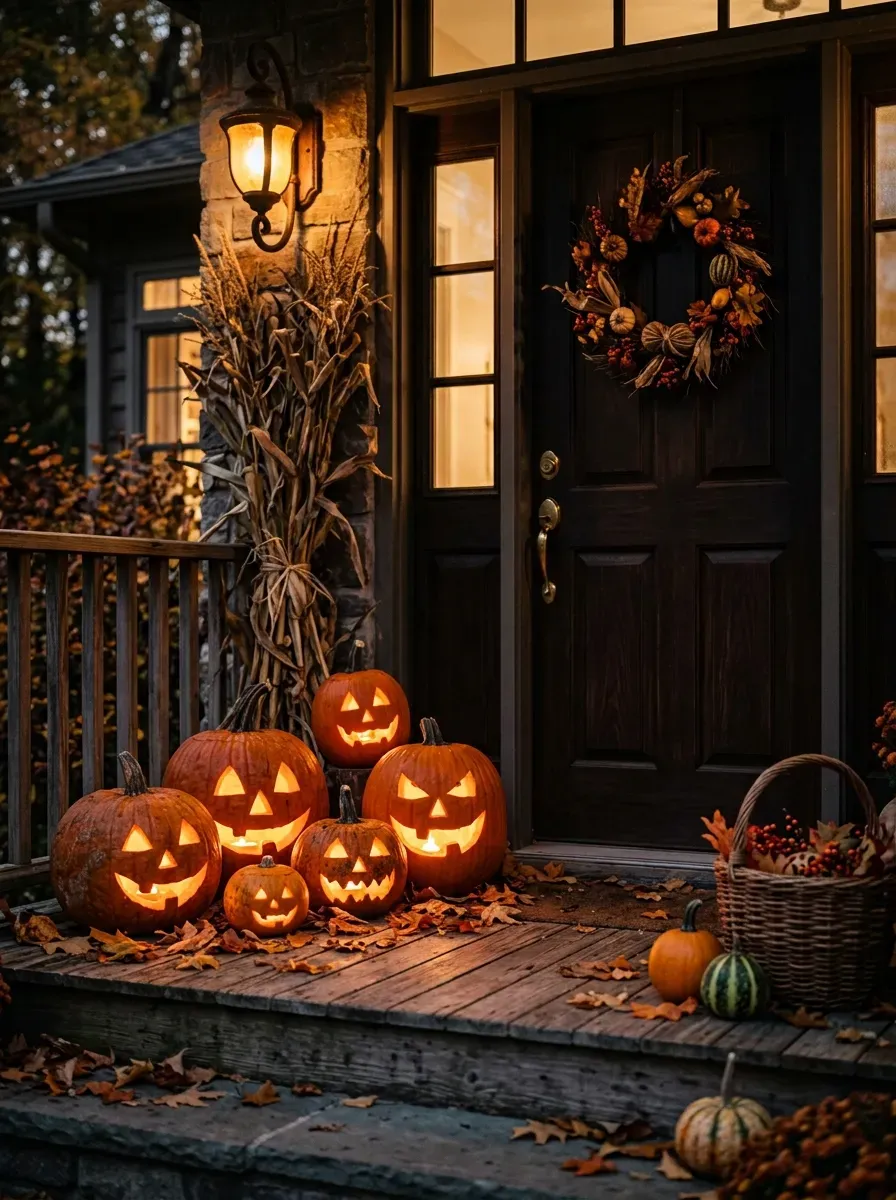
A cluster of carved pumpkins around your door beats a single pumpkin every time.
The trick is not matching them. Carve different expressions — one menacing, one goofy, one with triangle eyes, one with a screaming mouth. Mix sizes too. Nestle a tiny pumpkin between two large ones for a more organic, collected look.
You don’t need real candles to make them glow. Battery-operated tea lights are safer and last longer. They flicker just like real flames and won’t set your porch on fire.
For a budget-friendly setup, grab pumpkins from a grocery store or farm stand. Smaller pumpkins are cheaper and easier to carve. You can also use fake foam pumpkins from craft stores — they last for years and never rot.
Arrange the cluster right in front of your door or on the steps leading up to it. Add a few loose gourds, dried corn stalks from a garden center, or even hay bales to fill the space around them.
At night, the warm glow from multiple pumpkins is genuinely eerie. It’s one of the most timeless Halloween door looks and still turns heads every year.
3. Creepy Cauldron Entrance
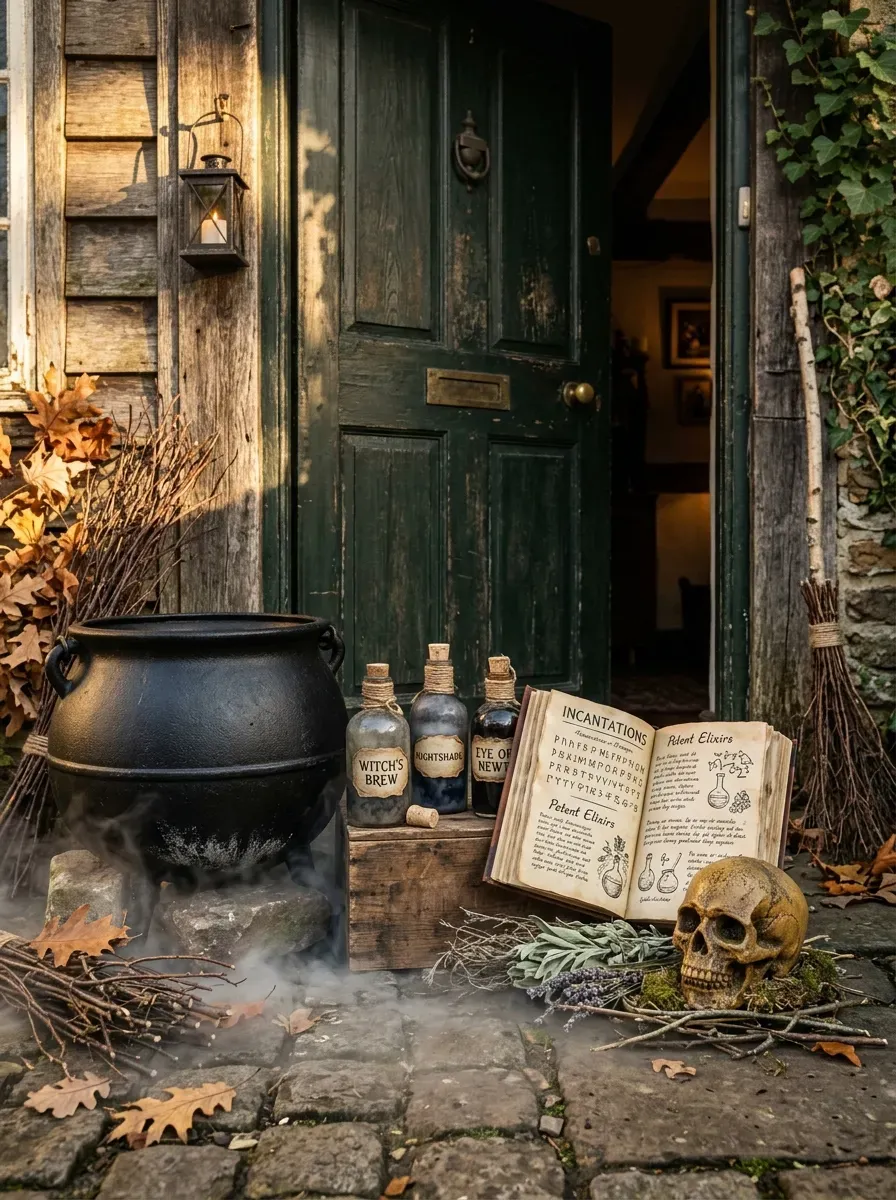
Turn your doorstep into a witch’s lair with a bubbling cauldron setup.
You can find large black plastic cauldrons at Halloween stores for around $10–$15. Set it just beside your door so it doesn’t block trick-or-treaters. Fill it with dry ice and warm water for a smoky effect on Halloween night — just pick up a small chunk from a grocery store or party supply shop.
No dry ice? No problem. A battery-powered fog machine sold at party stores works just as well and runs all night on its own. They’re usually under $25 and reusable every year.
Surround the cauldron with small touches that build the scene. Think glass bottles filled with colored water and labeled as potions. A fake spell book left open on the steps. A plastic skull or two peeking out from a pile of faux autumn leaves.
You can find most of these props at the dollar store. Spray painting old bottles black or green and tying twine around the necks makes them look aged and intentional.
This idea works especially well if you dress the whole porch — it transforms your entrance into a full scene, not just a decoration.
4. Mummy Door Wrap
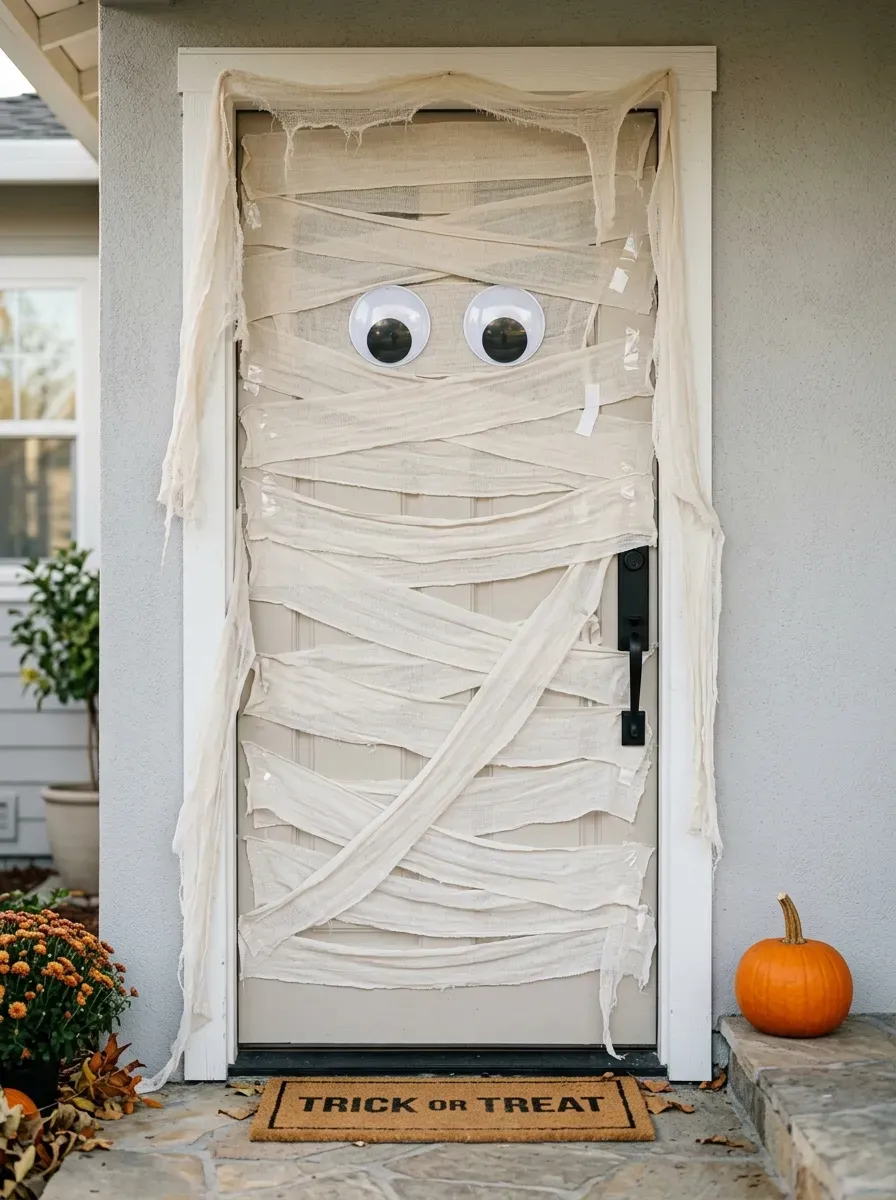
The mummy door wrap is wildly popular — and for good reason.
All you need is white streamers or white gauze fabric, tape, and two large googly eyes. Start at the top of your door and layer strips of white across it horizontally, leaving small gaps to mimic the look of bandages. Tape each strip to the door frame so they don’t sag.
Stick two oversized googly eyes near the top third of the door, between the strips. That’s it. The effect is instant and unmistakably Halloween.
Streamers are the cheapest option and cost about $1–$2 per roll. You’ll need two or three rolls for a standard door. Gauze fabric from a craft store gives a more dramatic, layered look if you want to step it up.
This decoration goes up in under 15 minutes and takes about the same to tear down. It won’t damage your door if you use painter’s tape or Command strips instead of regular tape.
The googly eyes are what make the whole thing work. Go big — at least 4 to 6 inches across — so they’re visible from the street. You can find jumbo googly eyes at craft stores or online for a few dollars.
5. Haunted Cemetery Door Scene
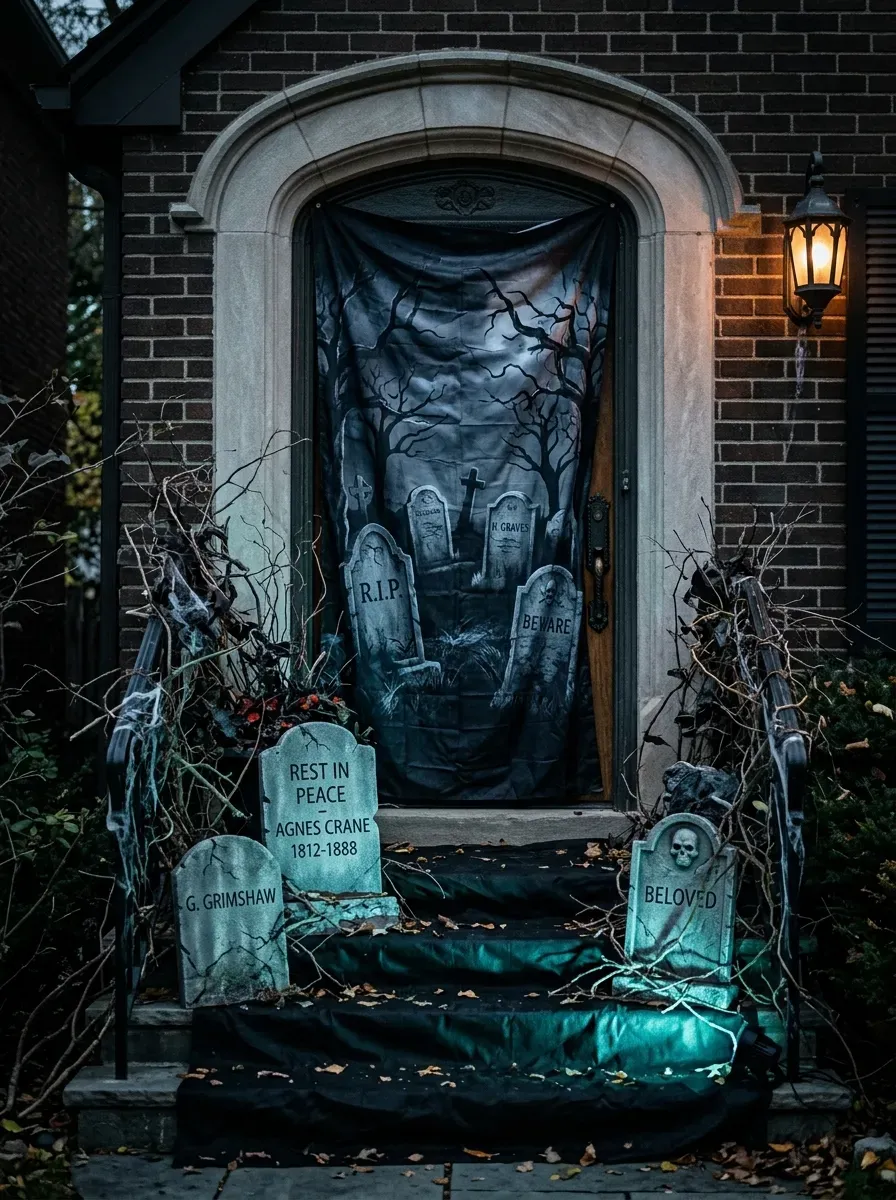
Set the scene before anyone even knocks with a full cemetery tableau on your door.
The fastest way to do this is with a cemetery scene door cover — these are sold at Halloween stores for under $10 and show pre-printed tombstones, bare trees, and a spooky sky. They stick right onto your door with tape.
If you want something more custom, cut tombstone shapes from black foam board or gray cardboard. Write RIP or silly names on them with silver paint markers. Mount them directly onto your door with removable adhesive strips.
Add depth by layering props in front of the door. Place small fake tombstones from the dollar store on your porch. Add black fabric draped like a ground cover, and use battery-powered LED lights with a cool blue or green filter to light it up at night.
Twisted bare branch arrangements from a craft store or your own yard look incredible propped against the doorframe. Paint them black with spray paint for maximum effect.
If you have a few nights to prep, this is one of the most dramatic looks you can build. It photographs beautifully too, so don’t be surprised if neighbors stop to snap a picture.
6. Scary Scarecrow Door Greeter
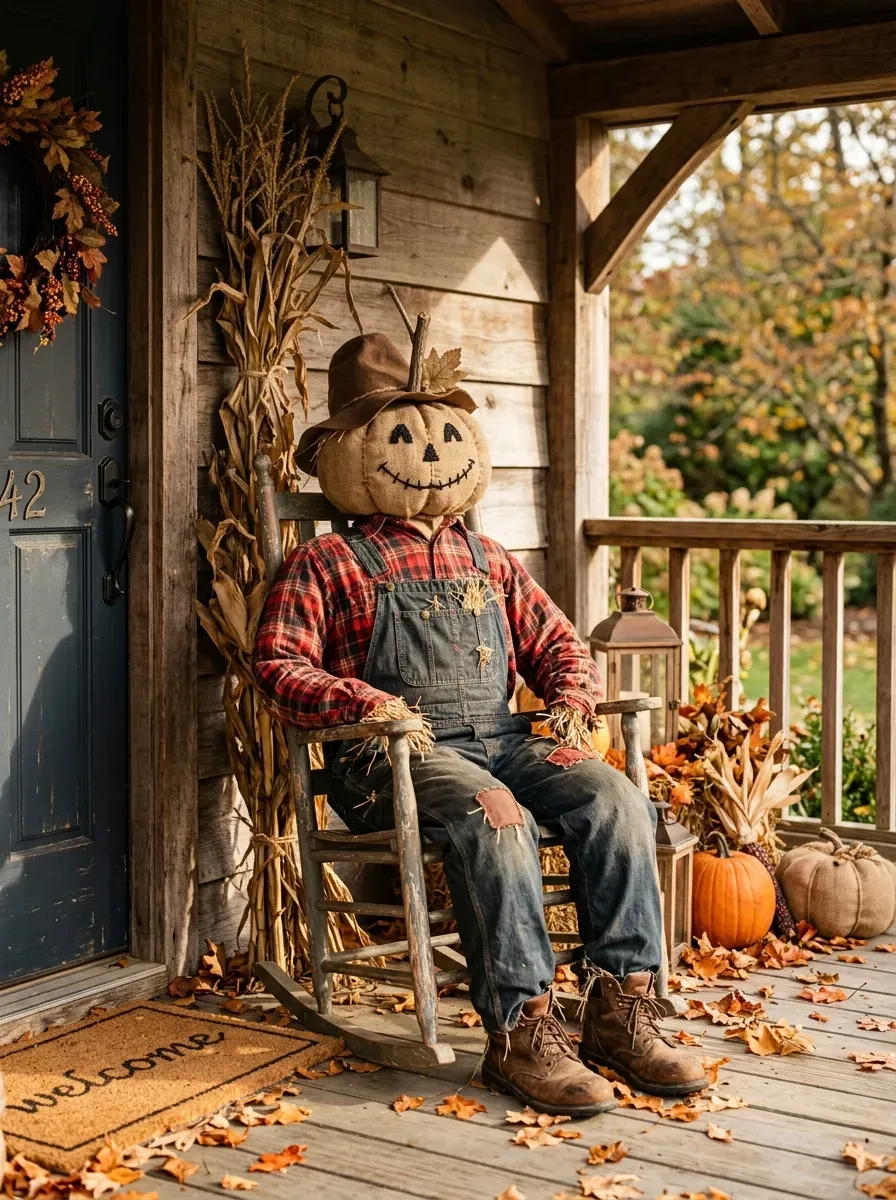
A life-size scarecrow sitting beside your door will startle more than a few visitors.
Start with old clothes you don’t mind stuffing. Button-up flannel shirt, overalls or jeans, boots, and a hat work best. Stuff them with plastic bags, old newspapers, or cheap poly-fill from a craft store. Use safety pins to close off the ankles and wrists so the stuffing stays in.
Prop it in a chair, lean it against the wall, or hang it from a hook. Sitting in a chair is the most realistic and most unsettling position. Add a burlap or pumpkin head — either a real carved pumpkin or a foam head with a painted face.
Pair the scarecrow with a few dried corn stalks zip-tied to the porch post. You can find those at garden centers or farm supply stores for a few dollars per bunch.
The reason this works so well is the life-size element. People genuinely aren’t sure if it’s real until they’re close. That half-second of uncertainty is pure Halloween gold.
Total cost to pull this off: usually under $15 if you use clothes you already own and dollar store accessories.
7. Black Balloon Door Curtain

A curtain of balloons hanging in your doorway is cheap, fast, and surprisingly dramatic.
Buy a bag of black and orange balloons from the dollar store or party supply shop. Inflate them to slightly different sizes so the arrangement looks natural instead of rigid. Tie them in clusters of two or three, then attach the clusters to a piece of string or thin dowel rod hung above your door.
Let them hang down so they fill the whole doorway. Trick-or-treaters love walking through them, and it makes even a plain door feel like an event.
You can customize the color combo. All black looks sleek and modern. Black and purple gives more of a witch vibe. Add a few glow-in-the-dark balloons for a subtle night-time effect.
For a quick upgrade, use a silver metallic marker to draw faces or small spiders onto the black balloons before hanging them. It takes five minutes and adds a lot of personality.
This entire setup usually costs under $5 and takes about 20 minutes to put together. Balloons are also easy to pop and bag when Halloween is over, making cleanup a breeze.
8. Glowing Eyes in the Bushes (Bonus Door Effect)

This one isn’t on the door itself — it’s around it, and it makes the whole entrance feel alive.
Take empty toilet paper rolls or paper towel tubes and cut pairs of eyes into them. Shapes can vary — slanted, round, wide-open, narrow. Slide a battery-powered LED tea light or glow stick into each tube, then tuck them into the bushes, shrubs, or pots flanking your door.
At night, the effect is incredible. Multiple glowing eyes staring out from the darkness makes your entryway genuinely creepy. Guests notice it before they even reach the door.
The whole project costs almost nothing if you save cardboard tubes over the weeks leading up to Halloween. Pick up a pack of battery tea lights for around $3–$5 for a set of 10 or 12.
Color matters here. Red eyes feel demonic and dramatic. Yellow eyes look more animalistic. Green eyes give a classic monster feel. Mix them for a full creature crew hiding in your yard.
Pair this with a few other door decorations and your entrance becomes a full haunted experience rather than just a decorated door.
9. Witch Hat Door Garland
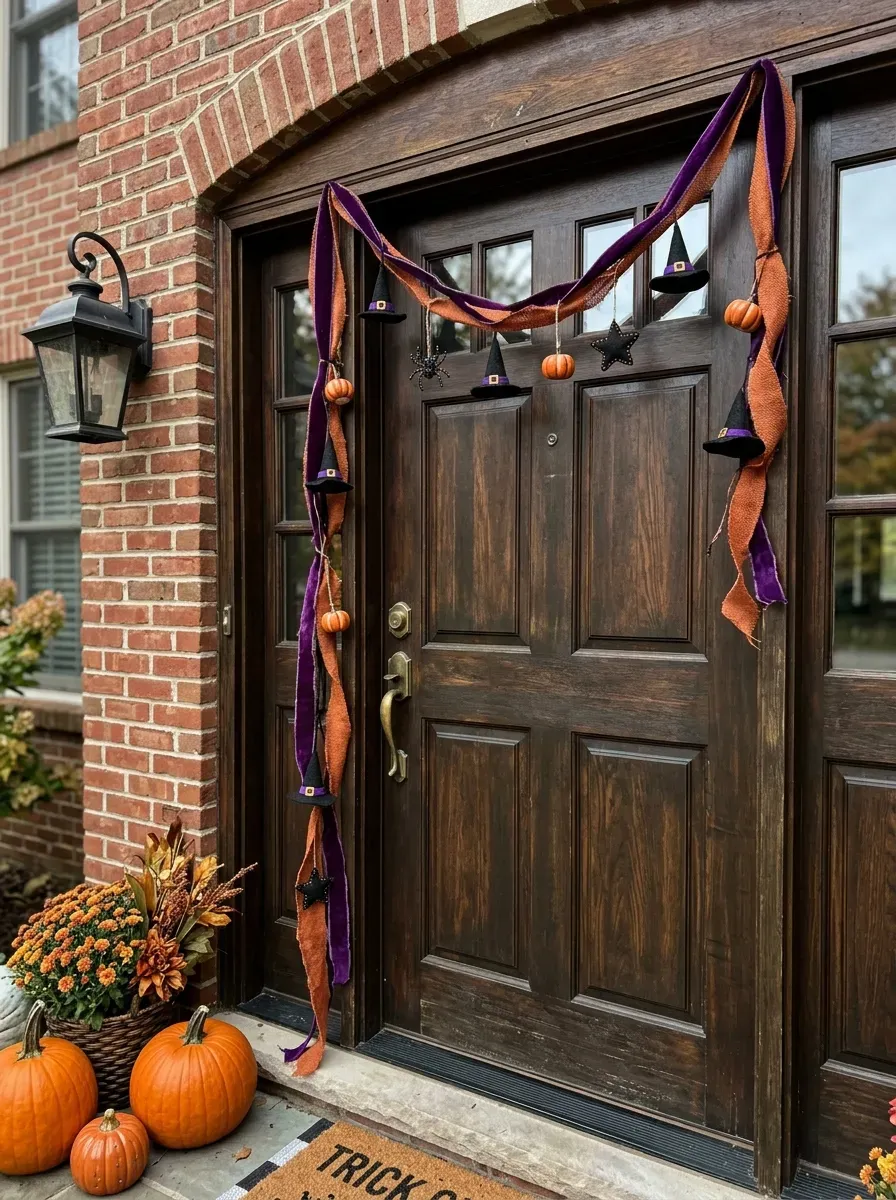
A garland of miniature witch hats strung across your door is charming and quick to make.
Buy a pack of small plastic or foam witch hats at a dollar store or party supply shop. They usually come in sets of 5–10 and cost a few dollars. Thread them onto a piece of black or purple ribbon, spacing them evenly. Then drape the ribbon across the top of your door in a gentle swag and tape or pin the ends to the frame.
Add small accents between the hats to fill the space — mini pumpkins, black stars cut from foam paper, or even small plastic spiders. The variety keeps the eye moving along the garland.
If you want to go the DIY route, cone-shaped witch hats are easy to make from black cardstock. Roll a square into a cone, secure with tape, and add a brim cut from the same sheet. Takes about 5 minutes per hat.
This works especially well on white or light-colored doors where the black hats pop with high contrast. At night, add a string of small orange lights behind the garland to make it glow.
Witch hat garlands are reusable year after year if stored flat or in a bag.
10. Caution Tape Crime Scene Door

Caution tape is one of the most attention-grabbing, budget-friendly Halloween door ideas out there.
Grab a roll of “Caution” or “Do Not Enter” tape from a hardware store or Halloween shop. It typically costs $1–$3 per roll. Crisscross it over your door in multiple directions — a big X from corner to corner, then a few horizontal strips across the middle.
Add a skeleton or zombie hand pressing against the tape from the inside for a creepy “something is in there” look. A cheap plastic skeleton arm works perfectly. You can find these at dollar stores or Halloween shops for a couple of dollars.
If you want to build the scene further, write a note on a small card taped to the door: “Beware — Do Not Enter” or “Danger: Contents Unknown.” It adds a story element that makes guests laugh or shudder.
This setup is entirely removable with zero damage to your door, assuming you tape the caution tape to the frame rather than the door surface itself.
It’s bold, visible from across the street, and takes less than 10 minutes to set up. Great for renters who can’t do anything permanent.
11. Wreath of Bones and Skulls
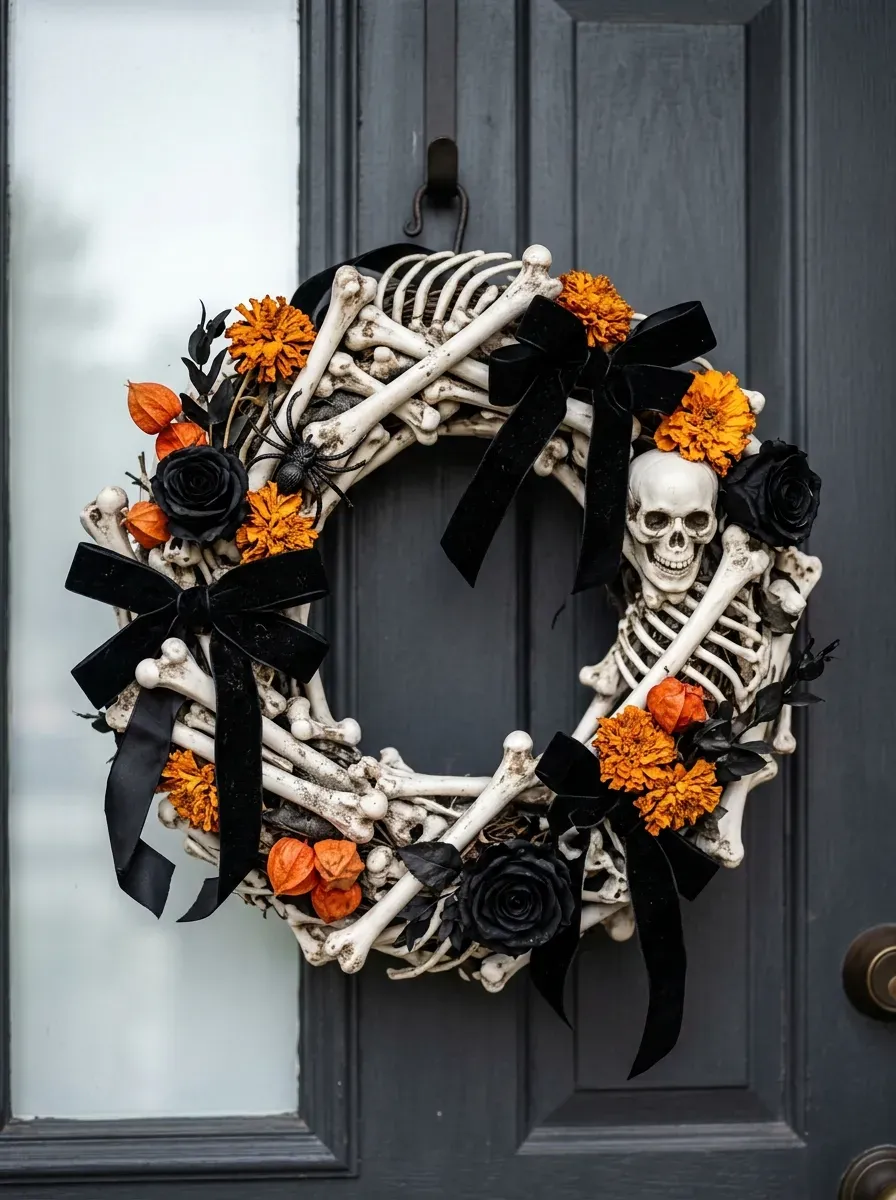
A wreath is a year-round door staple, and the Halloween version can be genuinely eerie.
Start with a foam wreath form from a craft store — usually $2–$4. Wrap it entirely in black ribbon or black fabric to cover the base. Then hot glue small plastic skulls and bone pieces across the surface. Leave some gaps so you can see the black base beneath them.
You can find bags of mini skulls and bones at dollar stores, usually labeled as Halloween filler or party decor. One bag of 20–30 pieces is usually enough to fill a standard 12-inch wreath form.
For texture, add dried flowers in orange or deep purple, faux black roses, or even small rubber spiders. These fill gaps and add visual depth to what could otherwise be a flat, uniform look.
Add a wide black or orange ribbon bow at the bottom for a finished, polished look. Hot glue it securely so it doesn’t flop over in the wind.
This wreath can hang on a door hook or Command hook with no damage to the door. It stores flat in a plastic bag between seasons and holds up for multiple years if stored carefully.
12. Ghostly Window Silhouette Behind the Door

If your door has a glass panel or sidelight window, this idea is perfect.
Cut a ghost shape from black cardstock or craft foam. Keep it simple — an oval head with a wavy bottom is the classic ghost form. Tape it to the inside of the glass panel so it faces outward. When your interior light is on, the ghost will appear as a glowing silhouette from outside.
It looks like something is standing just inside your door, which gives visitors that split-second double-take. That’s the goal.
You can make the same effect with a witch, bat, skull, or full skeleton. For a skeleton, cut each bone piece separately and arrange them in position on the glass. It takes longer but looks incredible when lit from behind.
Use a blue or green light bulb in your entry hall light instead of the standard white or yellow. It makes the silhouette effect feel more dramatic and shifts the color of the glow through the glass.
This idea costs under $2 if you use materials you already have. Black construction paper, scissors, and tape are all you need. It’s one of the most impactful door decorations for the least amount of money.
13. Dripping Blood Door Panels
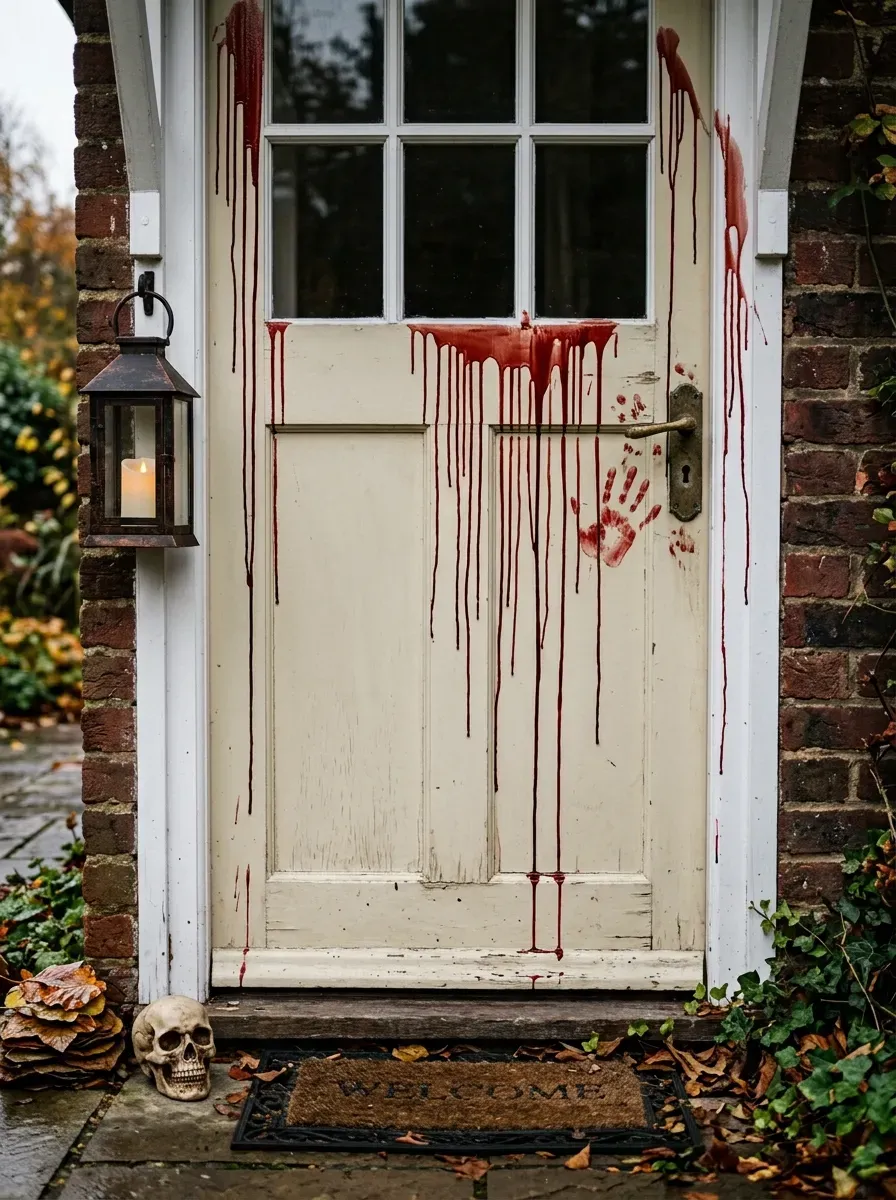
Fake dripping blood on your door is one of the most dramatic effects you can do.
You have two options: washable red paint or Halloween blood gel. Blood gel (sold at Halloween stores for about $3–$5) is the better choice because it’s thick, drips slowly, and looks realistic. It also washes off cleanly.
Apply it at the top of your door and let it run naturally. Start in a few spots — corners, the frame edge, the top center — and allow gravity to create the drip pattern. Don’t try to control it too much. Natural drips look more convincing than neat, uniform ones.
Add a bloody handprint near the door handle using a rubber glove dipped in blood gel, or just press your gloved hand against the door. The handprint adds a story — it implies someone grabbed the door trying to escape.
This works best on light-colored doors where the red contrast is sharp and visible. On a dark door, use brighter red or add a streak of it on the door frame instead.
Make sure to test washability on a small hidden spot before applying to the full door, especially on painted wood. Most blood gels clean up with warm water.
14. Gothic Archway of Branches
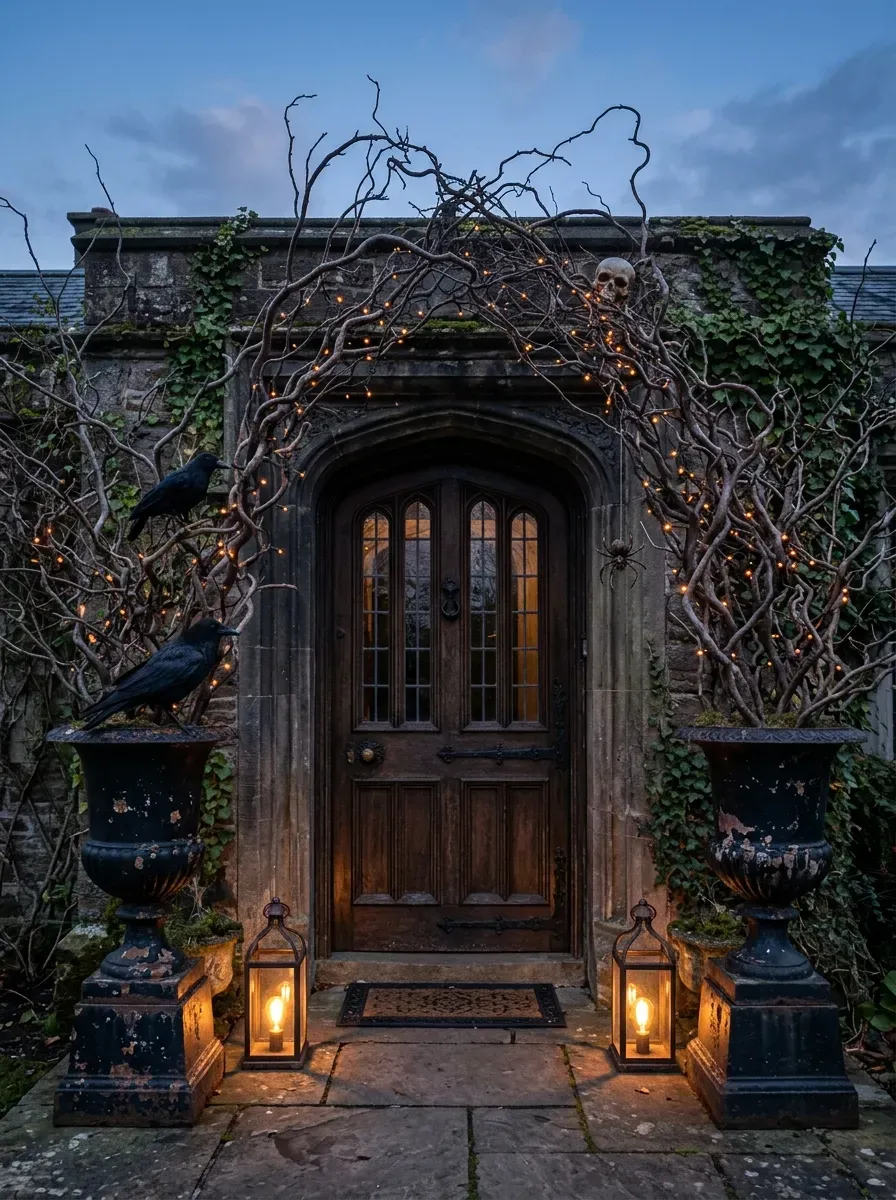
Bare branches turned into a dramatic archway make your door look like the entrance to a haunted manor.
Gather long, twisty branches from your yard or a park (check local rules). Cut them to a height slightly taller than your door. Spray paint them black with basic craft spray paint. Let them dry completely.
Prop them in tall, heavy containers on either side of your door — large black pots, galvanized buckets, or even terracotta planters painted black work well. Fill the container with dry sand, pea gravel, or floral foam to hold the branches upright.
Angle the tops of the branches toward each other so they create an arch effect over the door. You don’t need to connect them — just leaning them toward each other reads as an arch from a normal viewing distance.
Add small accents to the branches: fake crows perched on the limbs, dangling plastic spiders on fishing line, small skulls nestled at branch forks.
At night, wrap the branches with orange or purple fairy lights to make them glow. The combination of bare black branches and warm glowing lights is deeply atmospheric and works beautifully in photos.
Total cost: around $5–$15 depending on whether you already have containers.
15. Porch Monster Mouth Door Frame

Turn your entire doorframe into a monster’s open mouth — so every visitor walks in through the jaws.
Cut large triangle fangs from white foam board or thick cardstock. You’ll need about 8–10 for the top and 6–8 for the bottom. Mount the top fangs along the top edge of the door frame and the bottom fangs along the threshold edge or bottom frame.
The effect is best when the fangs alternate in size — big, small, big, small — like real teeth.
Cover the surrounding door frame with green, gray, or purple crepe paper or wrapping paper to simulate monster skin. Add googly eyes cut from poster board above the door, or use oversized foam stickers.
Use Command strips or double-sided removable tape to attach everything, so you don’t damage the door frame.
This project takes about an hour and costs around $5–$10 in materials. The visual payoff is enormous — it photographs incredibly well, and kids absolutely love walking into the “mouth.”
For extra drama, cut a long red tongue from red felt or fabric and let it hang from the lower edge of the door, draping onto the porch.
16. Haunted Knocker and Mail Slot Upgrades

The hardware on your door is often overlooked, but it’s one of the most noticed details up close.
Replace your standard door knocker with a skull or raven-shaped knocker for the season. These are available on craft sites and Halloween retailers for $8–$20. They’re usually designed to hang over your existing knocker or mount separately.
Can’t replace the knocker? Dress what you have. Tie a small piece of black ribbon through the ring. Hot glue a plastic spider on top. Wrap the base in black washi tape or electrical tape for a quick, damage-free transformation.
Your mail slot is another easy win. Cut a small bat or skeleton hand from black foam and position it so it looks like it’s peeking out of the slot. Use a small piece of double-sided tape to hold it in place.
Even your door handle can get the treatment. Wrap it loosely in gauze or black ribbon, or drape a small cluster of fake black flowers around the base.
These micro-details reward the people who come closest — trick-or-treaters who reach for the handle, neighbors who walk up to chat. They make your door decoration feel thorough and intentional rather than slapped together.
17. Coffin-Shaped Door Silhouette

Turn your door into a coffin and it becomes an instant statement piece.
The easiest approach is a door-sized coffin poster or cover — these are sold at Halloween retailers for about $5–$8 and tape right onto your door. They typically have a lid-style cut and creepy printed graphics.
For a DIY version, cut the coffin shape from large black foam board panels taped together. A coffin is widest at the shoulders (roughly one-third from the top), narrowing both upward and downward. Tape it over your door and frame with black duct tape for clean edges.
Add a cross in the center using silver or gold card stock, poster board, or foil tape. Even a simple plus sign shape reads clearly as a gravestone cross.
Write “Rest in Peace” on a banner across the coffin using a silver or white paint marker. It ties the theme together and is visible from the street.
For extra drama, hinge a rubber zombie arm to the top edge of the coffin so it looks like something is pushing the lid open. Use a stick and some wire to prop the arm at the right angle.
This is one of the most full-coverage door decorations on this list — it transforms the door completely.
18. Oversized Bat Swarm
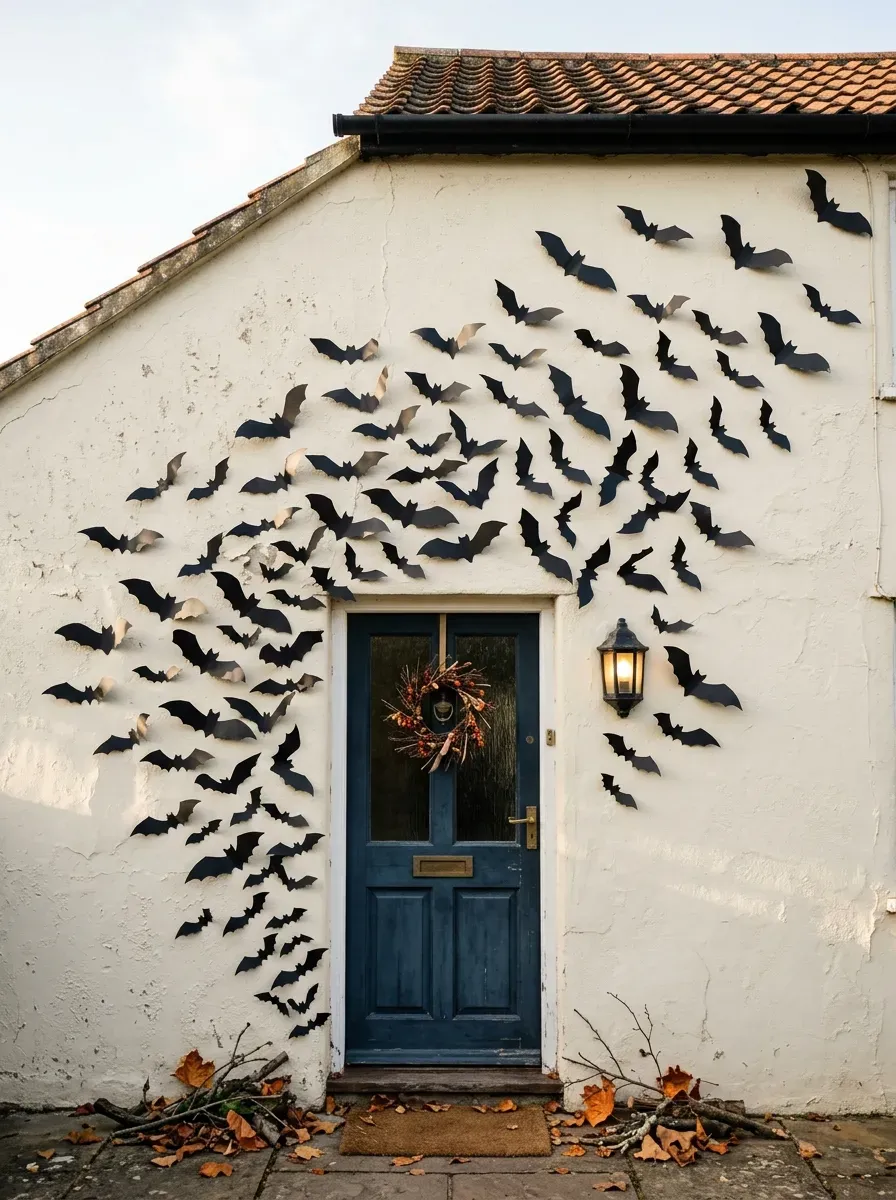
A swarm of black bats spreading out from your door is dramatic, easy, and costs almost nothing.
Cut bat shapes from black card stock or craft foam. You need a variety of sizes — from palm-sized down to thumbnail-sized — to create the illusion of perspective and movement. A swarm looks like it’s flying toward you, so the bigger bats should be near the center of your door and the smaller ones spread out toward the edges and onto the wall.
Attach them with removable Command strips or mounting putty so nothing damages your wall or door paint. Mounting putty is especially good because it allows you to reposition bats until the arrangement looks right.
Curl or fold the bat wings slightly on each cutout before mounting. Even a small curve makes them look three-dimensional and like they’re actually mid-flight.
You can buy pre-cut foam bat packs at dollar stores, craft stores, and party supply shops — usually 12–20 bats per pack for $1–$3. Or cut your own from black poster board for even less.
This decoration photographs brilliantly from across the street. It’s one of those ideas that looks like a lot of effort but takes about 30 minutes to assemble.
19. Vintage Apothecary Shelf Display

A shelf of potion bottles beside your door sets a full witchy mood without taking up floor space.
Mount a narrow shelf or use a pre-existing ledge, windowsill, or porch rail near your door. Arrange glass bottles and jars filled with colored water. Add a few drops of food coloring to get rich hues — dark purple, swamp green, blood red, murky brown.
Label the bottles with potion names written on small tags or strips of masking tape. “Eye of Newt,” “Dragon’s Blood,” “Witch’s Brew” — handwritten in a scratchy font adds charm. Burn the edges of the labels slightly with a lighter for an aged look (be careful).
Surround the bottles with other small props: a couple of tea light candles in iron holders, dried herb bundles from a craft store, a small mortar and pestle, or a fake raven perched on the edge of the shelf.
You can build this entire display for $10–$20 if you shop the dollar store and use old glass bottles from your recycling bin. Spray-paint the bottle caps black for a more finished look.
At night, battery tea lights inside or beside the bottles give the whole display a flickering, atmospheric glow that looks incredible.
20. Cemetery Fence Door Panel

Iron cemetery gates on your door transform the entrance into something from a Gothic novel.
Cemetery fence door panels are widely sold at Halloween stores and online — they’re printed on lightweight poster board or vinyl and tape directly onto your door. They usually show ornate iron bars with spires at the top and a glimpse of fog and tombstones beyond.
To make this look more layered, weave thin artificial vines or fake ivy through the design. It adds a sense of texture and looks like something has been growing over the gate for decades.
For a DIY version, cut vertical strips of black foam board and attach them in an evenly-spaced row across the door. Add small triangular or fleur-de-lis shapes at the tops of each bar using extra foam. Paint everything black. It takes longer but looks far more dimensional than a flat poster.
Mount a sign above the door reading “No Trespassing” or “Abandon All Hope” on a small plaque cut from wood scraps or foam board. Spray it bronze or aged gold for a metal appearance.
At night, shine a green or blue light from below upward onto the door. Underlighting creates shadows that make the fence bars look almost real.
21. Black Cat Door Wreath

A black cat wreath is classic Halloween imagery done in a way that’s both spooky and charming.
Start with a foam wreath base wrapped in orange and black ribbon. You can alternate the colors or stripe them diagonally for a bold look. Hot glue the ribbon in place as you go.
Cut a black cat silhouette from black foam board or thick card stock and mount it at the center of the wreath. A simple sitting cat profile — pointed ears, curved tail — is recognizable from across the yard. Don’t overcomplicate the shape.
Fill the wreath frame with small accents: mini foam pumpkins, black ribbon rosettes, orange and black feathers, and small plastic spiders tucked into the folds.
Add a pair of small yellow or green googly eyes to your cat cutout so it appears to be staring out from the wreath. That small detail makes the whole decoration feel alive.
Hang with an over-the-door hook (the kind designed for standard door thicknesses) so no hardware is required. Most hold up to 3–5 pounds, which is more than enough for a standard foam wreath.
Total cost: $8–$15 depending on what you already have. Stores well year to year in a bag or shallow box.
22. Haunted House Shadow Box Door
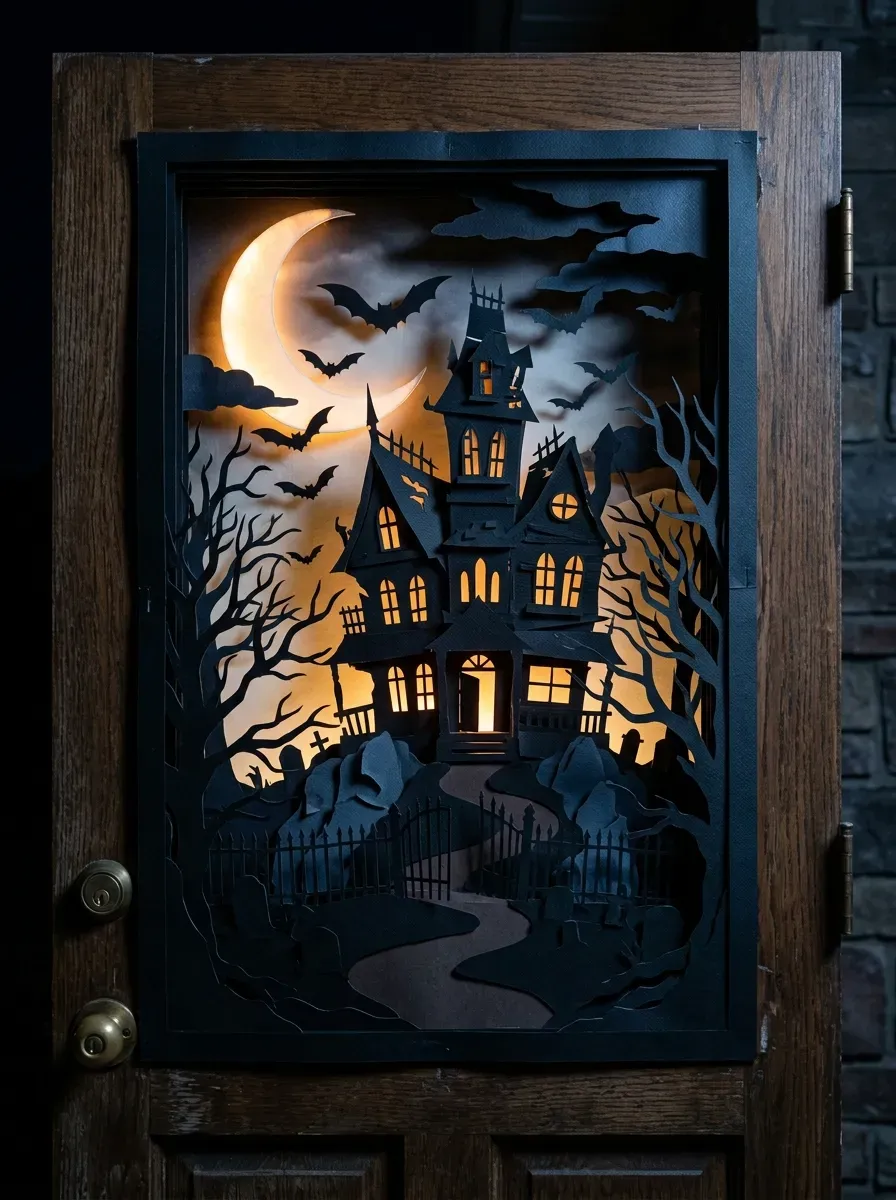
A layered silhouette scene turns your door into a tiny piece of spooky theater.
Cut a haunted house shape from black foam board — a multi-story house with jagged roof lines, crooked chimneys, and narrow windows. Mount it in the lower center of your door. Behind the windows, place small battery-powered tea lights that glow through the cutouts.
For the sky above the house, cut a large circle from white or yellow tissue paper. Back it with a piece of wax paper or vellum for a soft, glowing look. Mount it above the house as a moon. Put an LED light behind it for a glowing effect.
Add a black silhouette of bare trees on either side of the house, cut from the same foam board. A few flying bats cut from black card stock scattered across the upper portion of the door complete the night sky.
Layer everything slightly off the surface using foam tape or foam mounting squares. This creates shadows and depth that make the whole scene look dimensional.
At night, this is one of the most stunning door decorations possible. The glowing windows and moon against the black silhouette look like a paper-cut art installation.
23. Wrapped Mummy Urns Flanking the Door

You don’t have to stop the Halloween theme at the door itself — flanking it with mummy urns doubles the impact.
Take two large planters or urns (terracotta, plastic, or even galvanized metal buckets all work). Wrap each one from bottom to top with strips of white gauze fabric or white bandage material. Overlap the strips slightly and secure the ends with a dab of hot glue.
Stick a pair of googly eyes near the top of each wrapped urn, peeking out between the strips. The eyes make the urns look like they’re watching every visitor who approaches.
Fill the urns with tall dead branches or twisty sticks spray-painted black. This gives height to the display and frames the doorway.
For lighting, tuck a battery tea light or small LED spotlight inside or at the base of each urn. The light shining up through the wrapped fabric creates an eerie glow at night.
This is a reusable display. Store the wrapped urns in a dry place after Halloween. The gauze holds its shape after wrapping and will look good again next year without needing to redo the whole thing.
Budget: $10–$20 total using secondhand or dollar store pots, gauze from a pharmacy, and spray paint you may already own.
24. Glowing Pumpkin Door Hanger
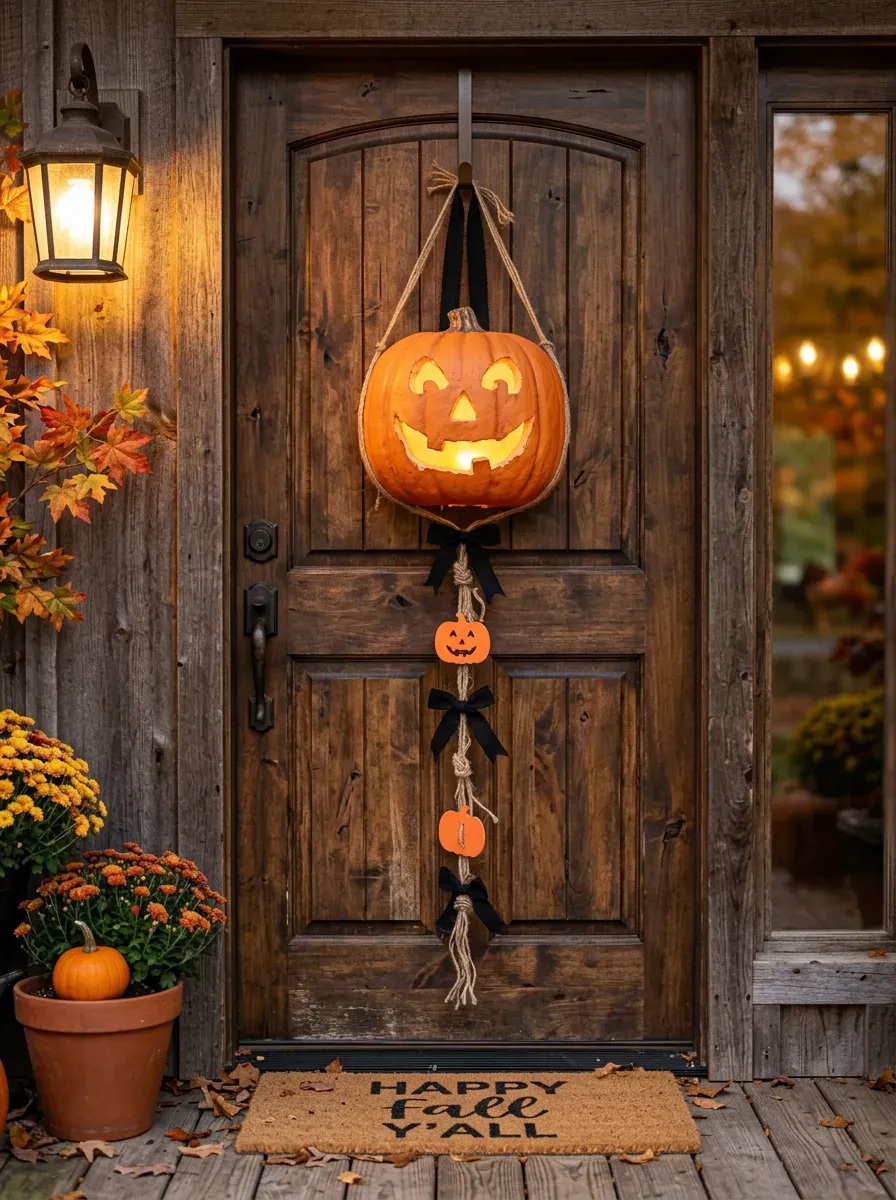
A glowing pumpkin hanging on your door at eye level beats any flat poster or banner for pure visual impact.
Use a large foam pumpkin from a craft store — the kind you can carve just like a real pumpkin. These are available in various sizes, with 12–14 inch versions being ideal for a door. Carve a face with a linoleum carving tool or serrated knife, then insert a battery-powered tea light.
Hang it from an over-door hook using orange or black ribbon through a small hole you poke in the stem area. You want it to sit at roughly eye level for a visiting adult — that way the glowing face greets people directly.
Beneath the main pumpkin, cut smaller pumpkin shapes from orange card stock in decreasing sizes. Punch a hole in each and connect them with lengths of jute twine, creating a dangling chain. Hang this chain below your main pumpkin for a layered, mobile-like effect.
Foam pumpkins can be repainted and recarved in future years. A little orange craft paint and a re-carve extends the life of each one.
This is a stand-alone decoration that works on its own without needing to decorate the rest of the door.
25. Chalkboard Door Panel
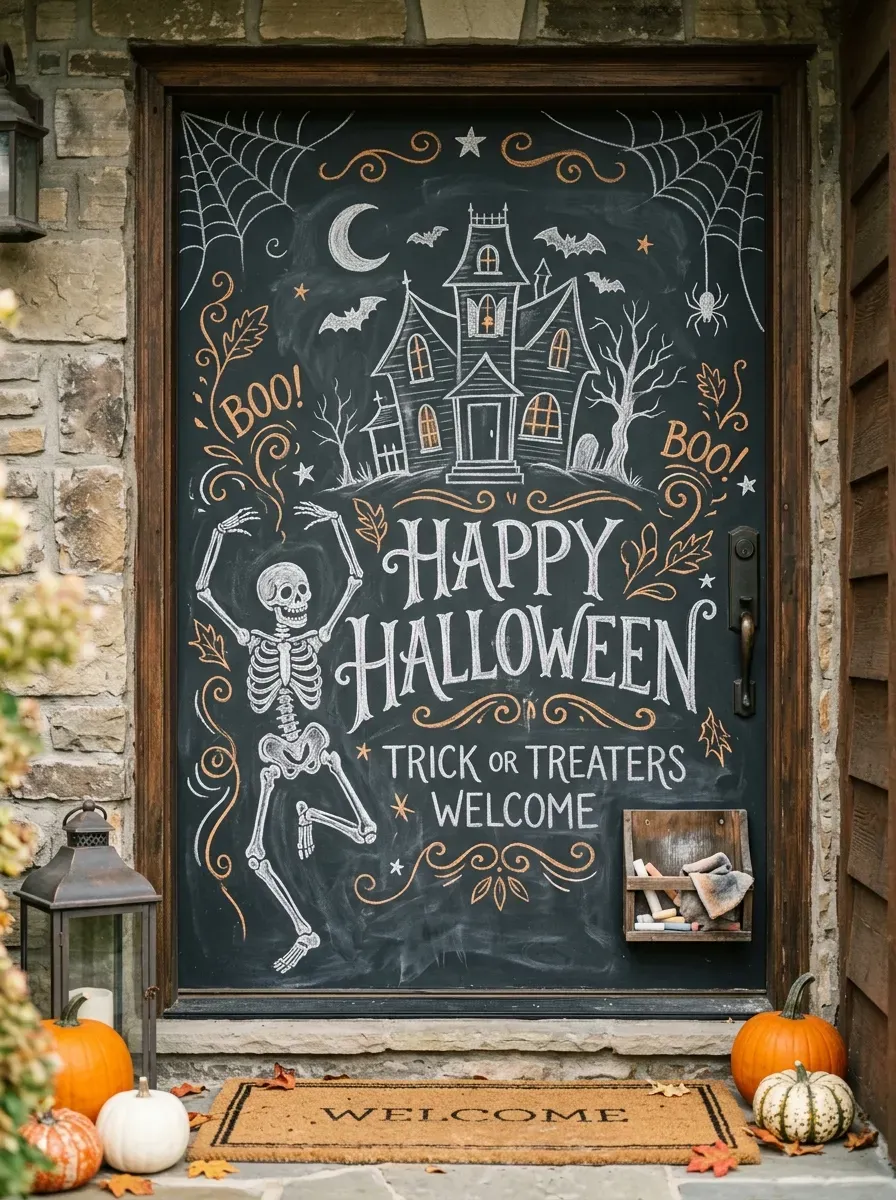
A chalkboard panel on your door lets you get creative with hand-drawn Halloween art — and you can change it anytime.
Use chalkboard contact paper (available at craft and home stores for around $10–$15 per roll) to cover your door temporarily. It applies like a sticker, goes on smoothly with a credit card to avoid air bubbles, and peels off completely without damage.
Draw anything you like directly onto the surface with regular chalk or chalk markers. Sketch a haunted house, write your own “Beware” messages, draw a skeleton, or fill the panel with spider webs and bats.
Chalk markers (the kind that look like regular markers but use chalk ink) give more control than chalk sticks and don’t smear as easily. White chalk markers on the dark panel look striking and professional.
Change the design partway through the month. Start with a simple web early in October and build toward a full graveyard scene by Halloween night.
This works especially well for people with artistic kids who want to be involved in the decoration process. Give them chalk and let them create their own haunted scene on the door panel.
It’s also one of the few ideas on this list that’s completely personalized every time.
26. Floating Ghost Mobile Above the Door
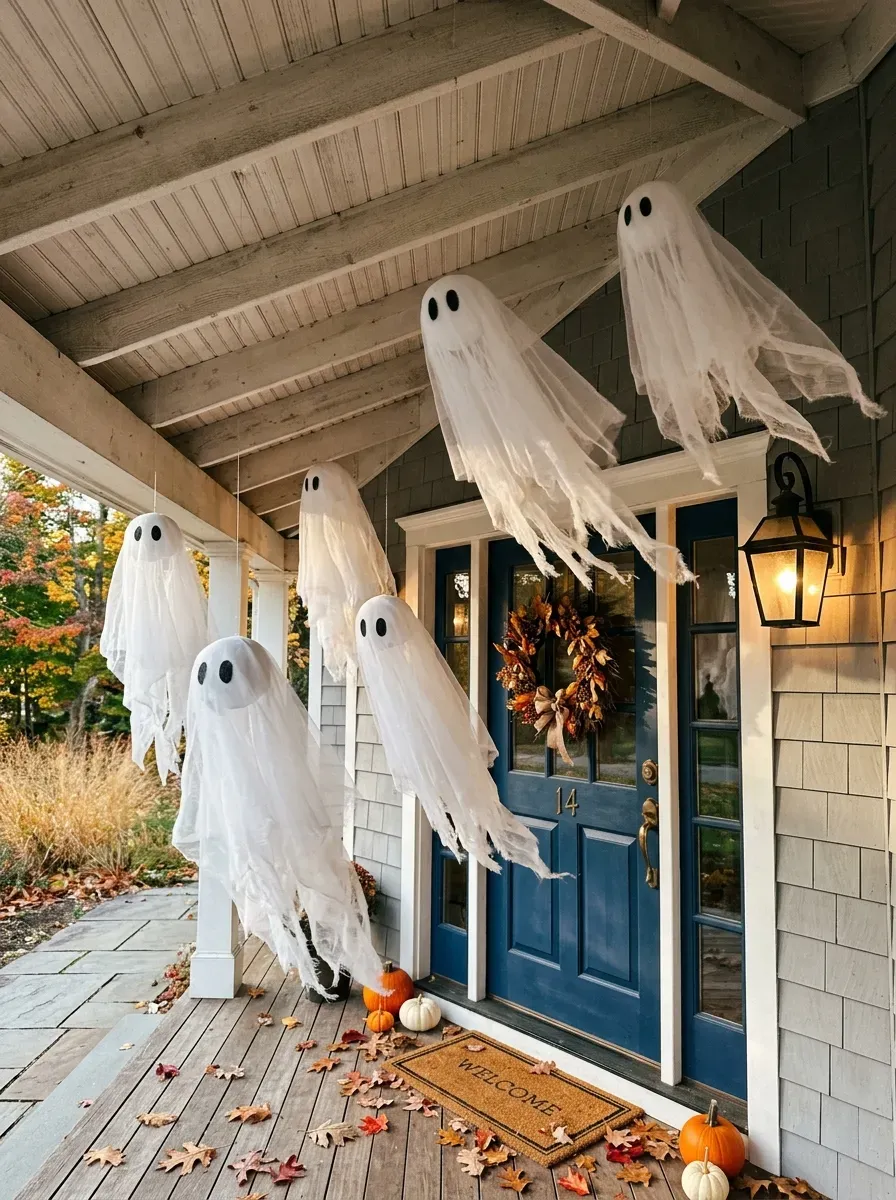
Hanging ghosts bobbing overhead as visitors approach your door adds movement and dimension that flat decorations can’t match.
Make ghosts by stuffing white tissue paper or white fabric loosely into a ball shape. Secure the ball with a rubber band for the head. Let the remaining fabric hang loose as the ghost’s body. Tie a length of clear fishing line through the rubber band for hanging.
Draw or paint simple black circle eyes on the head with a marker. Keep the faces simple — two dots is all you need. More complex faces actually look less creepy than minimal ones.
Hang multiple ghosts from your porch ceiling, overhang, or door frame using thumbtacks or small hooks. Vary the heights so they’re staggered — some near face level, some higher, creating a floating crowd effect.
White tulle fabric (the kind used for wedding veils and tutu skirts) makes especially good ghost material. It’s lightweight, so it moves with even the slightest breeze, and it’s completely translucent. A yard of tulle at a fabric store costs around $2–$4.
On a windy October night, these ghosts sway and drift in ways that genuinely feel alive. It’s one of the most atmospheric door decorations on this list.
27. Full-Door Haunted Portrait
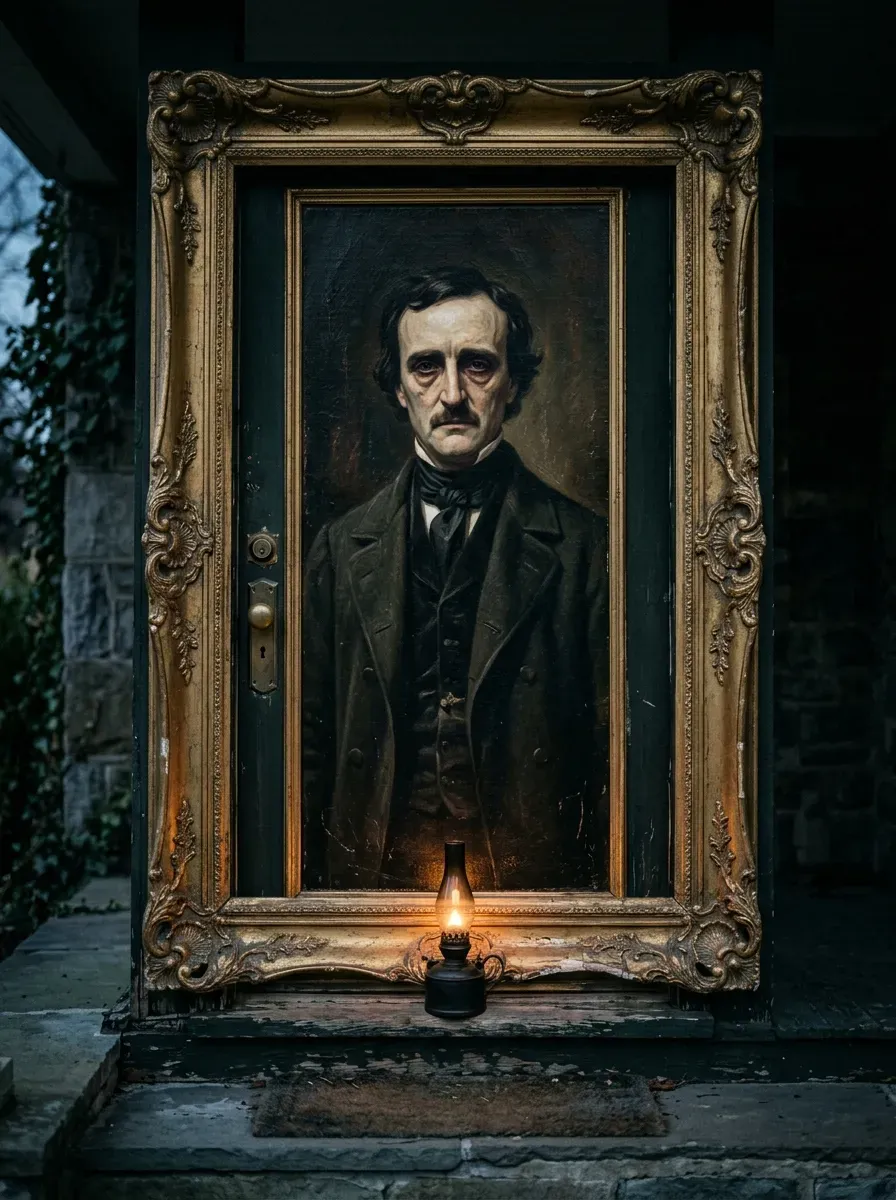
Turn your door into a life-size haunted portrait — one of the most conversation-stopping decorations possible.
Print or buy a large-format haunted portrait poster. Many Halloween stores sell door-sized portraits featuring Victorian ghosts, creepy clowns, or malevolent figures. Online print services can also print a custom image to door size for $20–$40.
Attach ornate-looking foam trim pieces (sold as decorative molding at craft stores) around the edges of the poster to create a picture frame effect. Spray paint the trim gold or bronze. The framed portrait effect makes the whole thing look like a painting hanging on a wall.
Choose a portrait where the eyes seem to follow the viewer. This effect is easier to achieve than it sounds — any forward-facing portrait photograph will do it because of how human eyes perceive eye contact in images.
For extra unsettling effect, add a small battery-operated light aimed upward at the portrait from below the door. Underlighting on a human face is one of the most psychologically unsettling visual cues that exists, and it makes the portrait look genuinely sinister.
This is one of the higher-effort ideas on the list, but the payoff is a door that stops people in their tracks and makes them genuinely uncertain about what they’re looking at.
Conclusion
Your front door is the first and last thing every Halloween visitor sees — and as these 27 ideas show, it doesn’t take a big budget or a lot of time to make it unforgettable. Whether you spend $2 on black balloons or an afternoon assembling a layered silhouette scene, the impact is real. Pick the ideas that match your time, budget, and style — and don’t be afraid to mix two or three together for a bigger effect. A spider web door cover, a pair of mummy urns, and a ghost mobile overhead is already a full scene. Start simple if you need to, and build from there. Halloween happens once a year, but a genuinely decorated door creates memories that stick around long after the candy is gone. Get out there and make your door the one the whole neighborhood talks about.
