
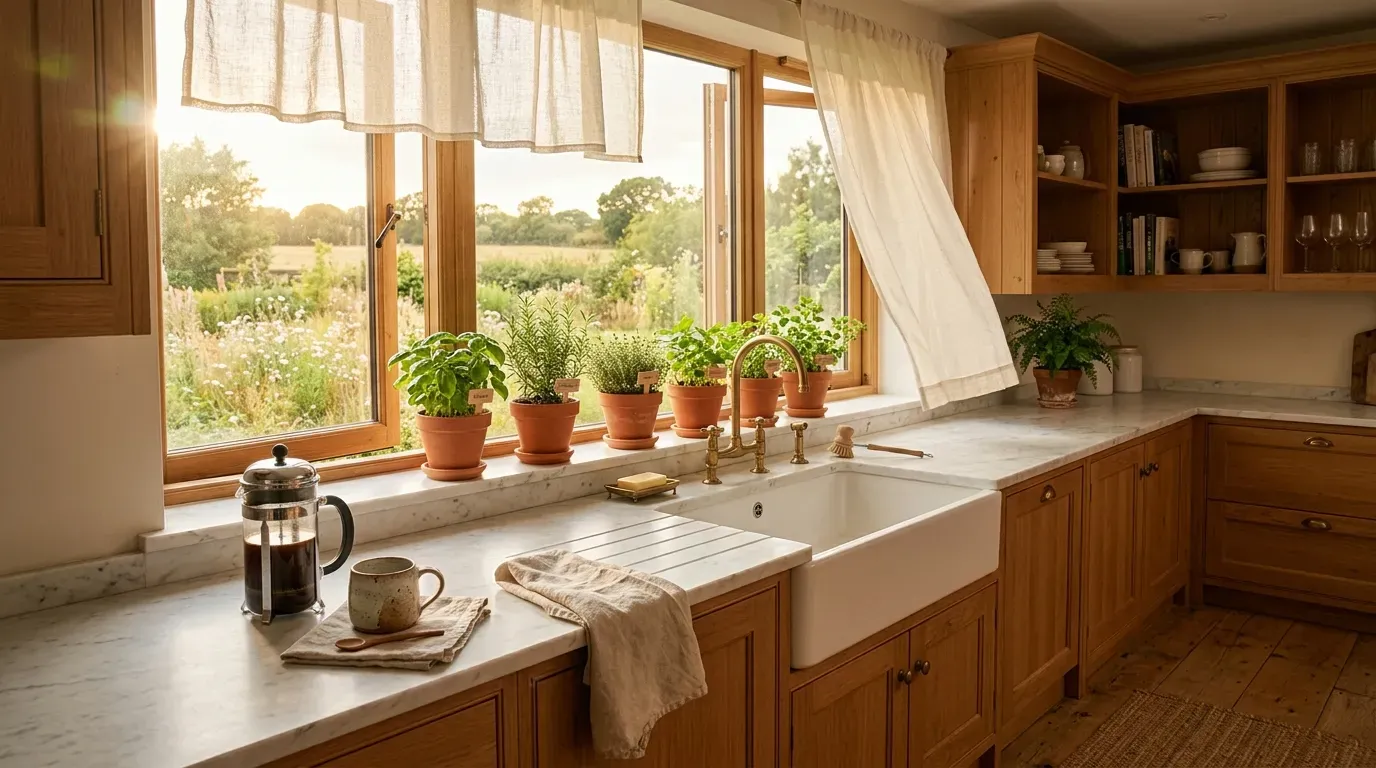
Your kitchen window is one of the most underrated design opportunities in the entire home. It brings in natural light, frames a view, and sets the mood for the whole room — yet most people leave it completely bare or slap up whatever curtain was on sale. Whether you have a tiny apartment window above the sink or a wide picture window overlooking the backyard, the right treatment can make your kitchen feel bigger, brighter, and more put-together. These 27 ideas cover every style, every budget, and every window size — so you can find what actually works for your space.
1. Roman Shades for a Clean, Tailored Look
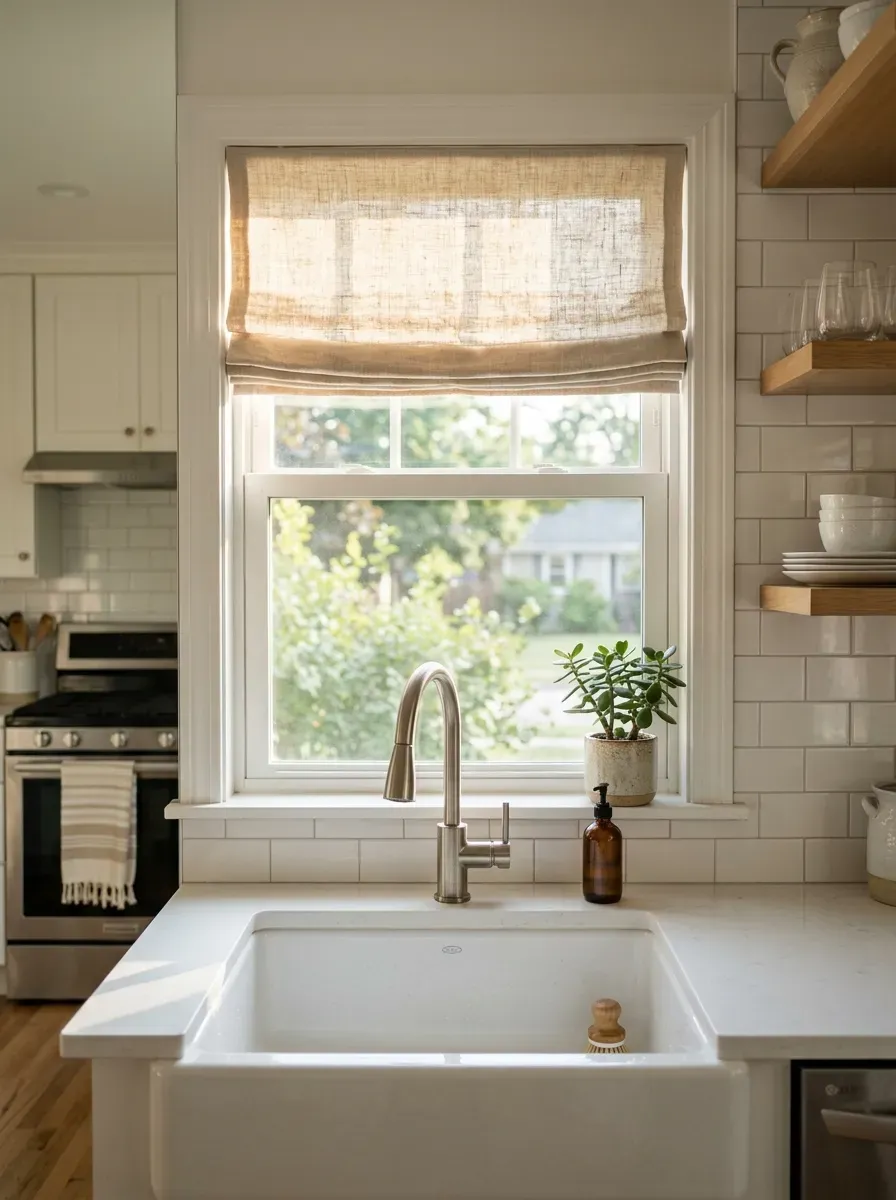
Roman shades are one of the most popular kitchen window choices — and for good reason.
They fold up neatly when raised, letting in maximum light. When lowered, they give you privacy without blocking the whole window.
Why they work so well in kitchens:
- They don’t collect grease or dust the way fabric drapes do.
- You can wipe down waterproof versions easily.
- They come in hundreds of fabrics and colors.
Budget tip: IKEA and Amazon both carry roman shades under $40. You can also buy a plain white shade and use iron-on fabric tape to add a patterned border at the bottom for a custom look.
For a DIY version, purchase a tension rod and a piece of fabric you love. Fold and stitch the fabric into pleats, attach rings to the back, and thread through a cord. It takes an afternoon and costs less than $20 in materials.
Choose a linen or cotton blend for a relaxed look. Go with a blackout liner if your kitchen faces east and morning sun makes cooking difficult. Roman shades work in farmhouse, modern, and traditional kitchens equally well.
2. Café Curtains for a Charming Half-Window Cover

Café curtains cover only the bottom half of your window.
That means you get privacy at eye level while still letting natural light pour in through the top. It’s a smart, practical solution — especially in kitchens that face a street or neighbor’s yard.
How to hang them:
- Buy a tension rod that fits your window frame.
- Choose a short curtain panel — around 24 inches is standard.
- Press onto the rod and center in the lower half of the window.
No drilling required. You can swap them out seasonally without any damage to the window frame.
Style ideas:
- Red and white gingham for a classic farmhouse kitchen
- Solid white linen for a clean, airy look
- Blue ticking stripe for a coastal or cottage feel
Budget tip: A yard of fabric from a craft store costs $5–$12. Hem the edges, fold over the top to create a rod pocket, and you’ve made a café curtain for under $15 total. No sewing machine? Use iron-on hem tape.
Café curtains look especially good in older homes with narrow double-hung windows. They give the kitchen a warm, personal feel without overwhelming the space.
3. Sheer Curtains for Soft, Dreamy Natural Light

Sheer curtains are the secret weapon of light-filled kitchens.
They don’t block your view. They don’t darken the room. They simply soften the light coming in and add a layer of texture and elegance that bare windows can’t offer.
Best situations for sheer curtains:
- Windows that face a garden or backyard with a beautiful view
- Kitchens that already lack enough natural light
- Spaces where you want a romantic, airy feel
Sheers work best in pairs, hung on a rod just above the window frame and let fall to the floor or just past the sill.
Budget tip: IKEA’s LILL sheer curtains are $4 a pair. For something more elevated, try a cotton voile from a fabric store and make your own rod-pocket panels with iron-on tape.
Pro styling trick: Hang the rod 4–6 inches above the window frame and extend it 6 inches on each side. This makes your window look larger than it actually is — a great hack for small kitchens.
Layer sheers under a heavier curtain or roller blind if you need more privacy or light control at night. On their own, they’re perfect for daytime kitchens where cooking happens in natural light.
4. Frosted Window Film for Privacy Without Curtains
Sometimes curtains just get in the way.
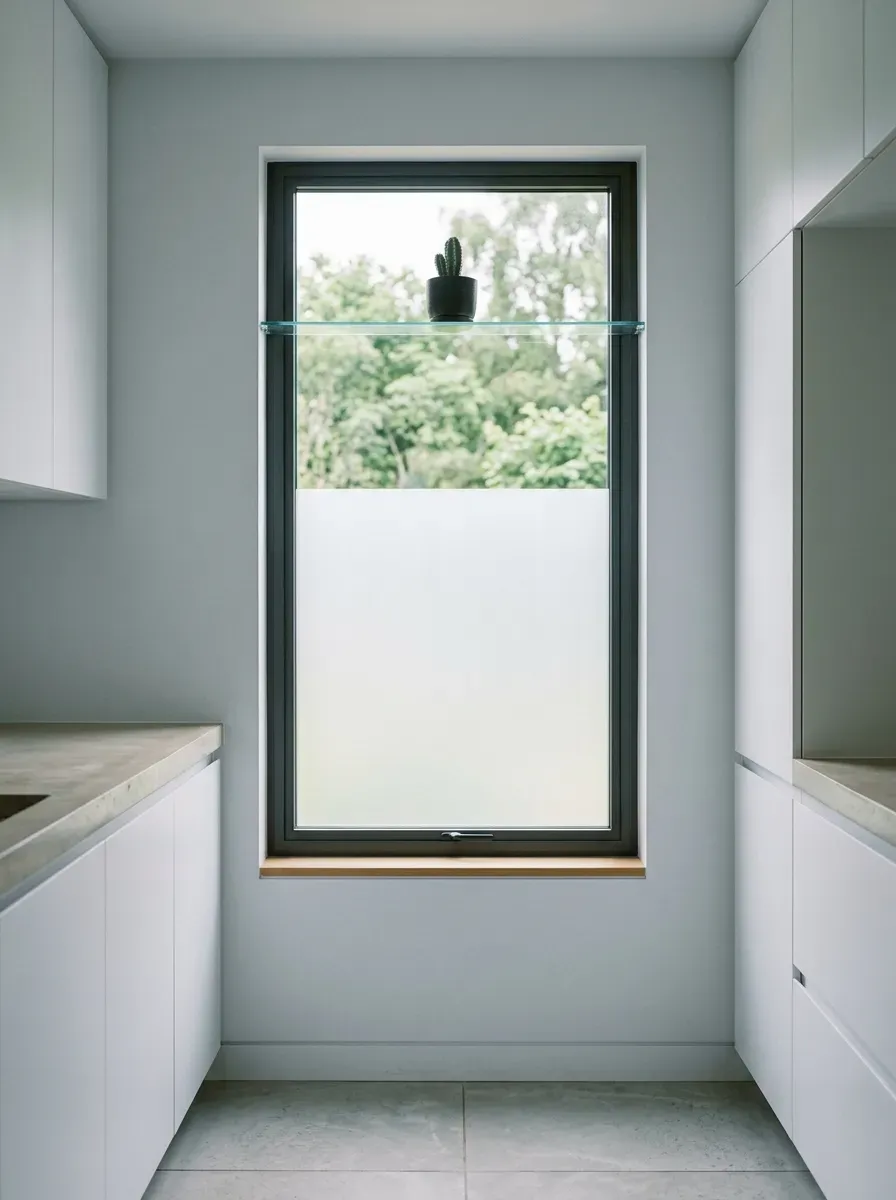
If you’re cooking near an open window or have limited counter space, hanging fabric can feel like a hassle. Frosted window film is a no-curtain alternative that gives you privacy without blocking light.
You apply it directly to the glass. It diffuses incoming light, creates a soft, glowing effect, and blocks views from outside — all without a rod, curtain, or any hardware.
Types of frosted film:
- Full frost — completely opaque from the outside
- Partial frost — applied to just the lower section
- Patterned film — geometric or floral designs etched into the film
How to apply it:
- Clean the glass thoroughly.
- Cut the film to size.
- Spray the glass with water, apply the film, and use a squeegee to remove bubbles.
The whole process takes 20–30 minutes. Most films cost $10–$25 for a standard-size window.
Budget tip: You can find decorative frosted film on Amazon that mimics expensive etched glass for a fraction of the cost. Some designs look genuinely upscale.
It’s completely removable if you change your mind — making it perfect for renters.
5. Wooden Shutters for Timeless Character
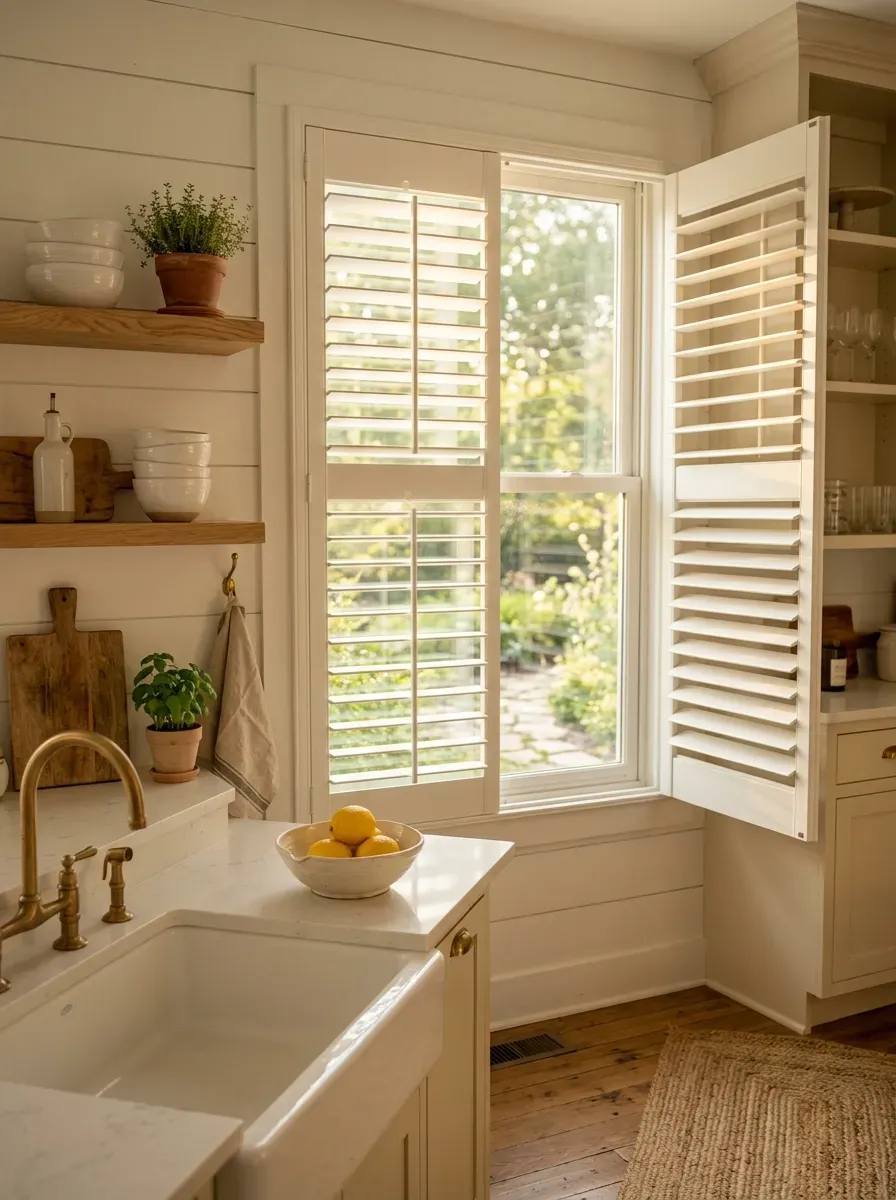
Plantation shutters are one of the most classic kitchen window choices — and they hold their value in ways curtains don’t.
They’re durable, easy to clean, and they work in nearly every design style from farmhouse to contemporary.
Why shutters make sense in kitchens:
- You can adjust the louvers for light and privacy without opening or closing the whole shutter.
- They wipe clean with a damp cloth — no laundering required.
- They add architectural interest and can increase home value.
Solid wood shutters can run $200–$500+ per window installed. But faux wood shutters from big box stores offer a nearly identical look for 40–60% less.
DIY option: Many online retailers sell unfinished MDF shutters in standard sizes. Sand, prime, and paint them yourself for significant savings. Installation requires basic screwdriver skills and about two hours.
Style note: White or off-white shutters work in almost any kitchen. If you want warmth, choose a stained wood finish. If you want drama, go for a deep charcoal or black.
Pair shutters with a simple Roman shade above for a layered look that gives you full light control throughout the day.
6. A Kitchen Herb Garden on the Windowsill

Your kitchen window doesn’t just have to be covered — it can be planted.
A windowsill herb garden is one of the most practical and beautiful things you can do with a south- or east-facing kitchen window. Fresh herbs at arm’s reach while you cook. Greenery that makes the space feel alive. And the smell alone is worth it.
Best herbs for a kitchen windowsill:
- Basil (loves sun, use often)
- Mint (grows fast, great for drinks and dishes)
- Chives (low maintenance, fast to snip)
- Rosemary (drought-tolerant, smells incredible)
- Parsley (steady grower, use it in everything)
Budget setup:
Buy seed packets for $1–$2 each. Plant in small terracotta pots ($0.99 at dollar stores). Place a tray underneath to catch water. Total cost: under $15.
Pro tip: Group odd numbers of pots together — three or five looks more intentional than two or four.
If your window doesn’t get much direct sun, try pothos, trailing ivy, or a small philodendron instead. They thrive in indirect light and still add the same lush, lived-in feel.
Water consistently and snip regularly — herbs grow thicker when you harvest them often.
7. Woven Wood Shades for Warmth and Texture

Woven wood shades bring texture into a kitchen in a way that fabric curtains and hard blinds simply can’t.
They’re made from natural materials — bamboo, jute, reeds, or grasses — woven into a flat panel. Light filters through the gaps in the weave, creating a warm, golden glow in the room.
Why they work so well:
- They add organic texture that softens hard kitchen surfaces like stone, tile, and stainless steel.
- They roll up neatly at the top, just like a standard roller shade.
- They’re available in dozens of weave patterns, colors, and materials.
Budget tip: Look for woven wood shades at IKEA or on Amazon — you can find good-looking options for $30–$60 per shade. For larger windows, check HomeGoods or Wayfair during sales.
Styling tip: Pair woven shades with linen, leather, ceramic, and wood accents for a cohesive natural, earthy kitchen aesthetic. They look especially beautiful in boho, coastal, and Japandi-style kitchens.
One thing to know: woven shades don’t block light completely. If you need total blackout coverage (e.g., morning sun in your eyes), add a roller liner behind.
8. No-Curtain Window with a Layered Plant Display
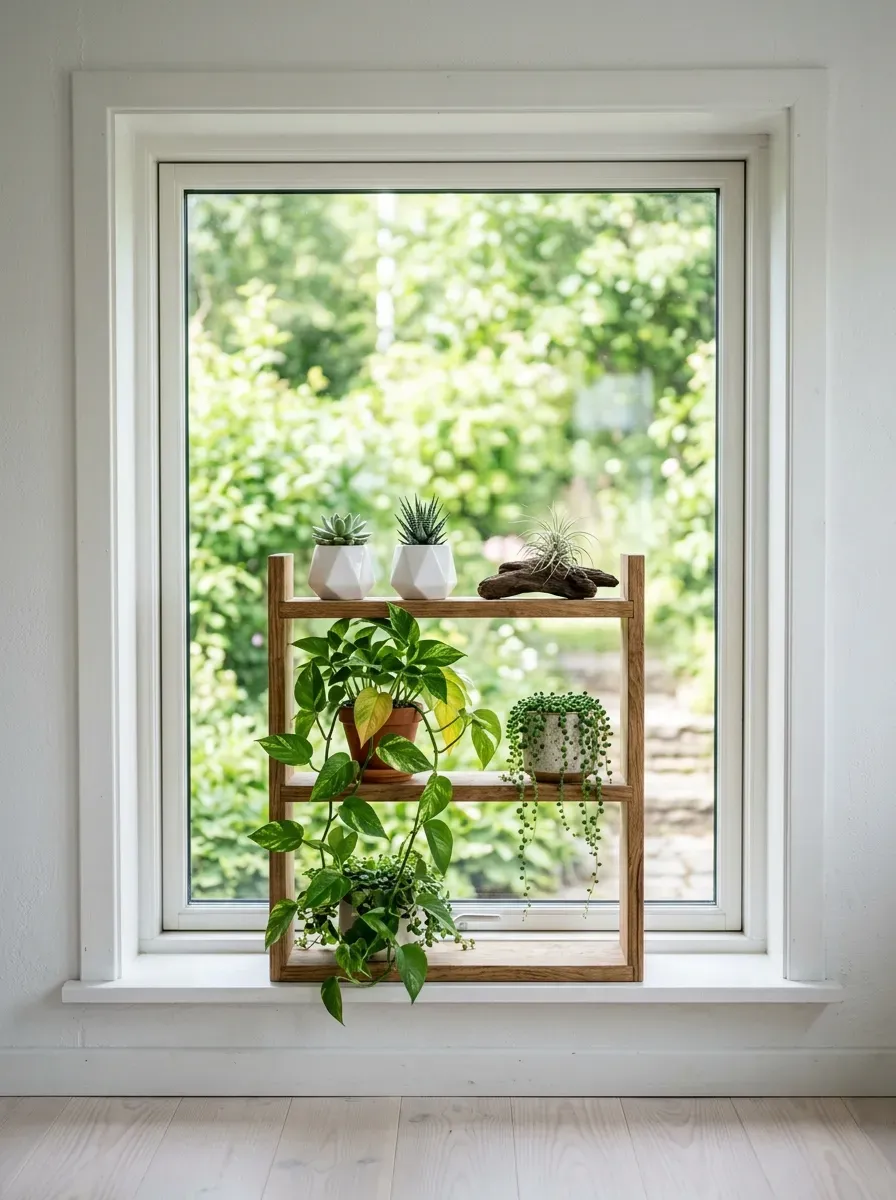
Sometimes the best kitchen window treatment is no treatment at all — just plants.
If you have a beautiful view, great natural light, and decent privacy, leave the glass bare and use the window ledge and surrounding wall to create a living plant display.
How to build a plant window display:
- Add a floating shelf just inside the window frame to hold small pots.
- Use a tiered plant stand on the counter below.
- Hang a small macramé plant hanger from a tension rod across the window.
Best plants for this setup:
- Pothos (trails beautifully, survives almost anything)
- String of pearls (cascades down the front of pots)
- Small ferns (lush and full in indirect light)
- Air plants (no soil needed, very easy)
- Snake plants (upright, structural, easy care)
Budget tip: Propagate new plants from cuttings of ones you already own. Place stems in a glass of water on the sill until roots grow — free plants and a pretty display at the same time.
Rotating your plants slightly every week keeps all sides growing evenly in the window light. This display is genuinely low cost and endlessly customizable.
9. Roller Blinds for the Most Versatile Option
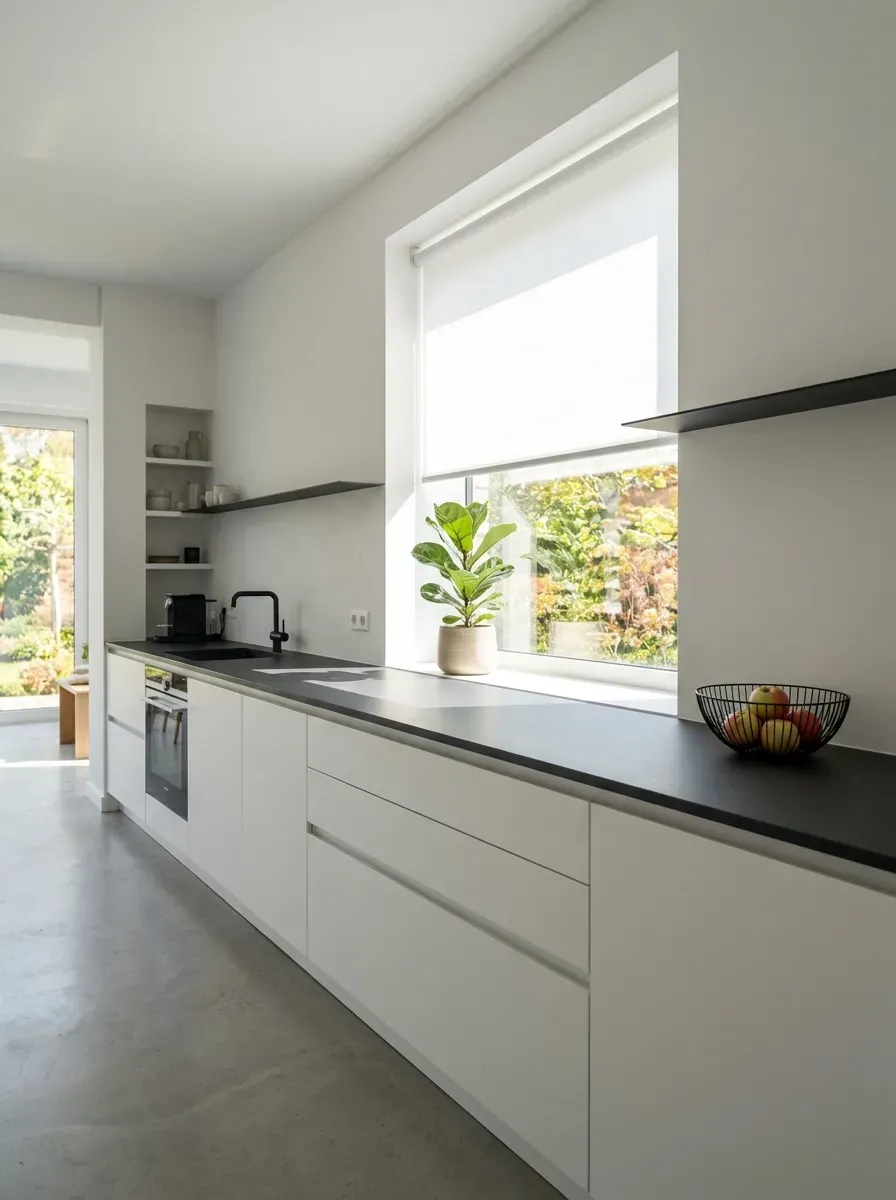
Roller blinds are the single most practical kitchen window option on this list.
They’re flat, minimal, easy to clean, and available at every price point. A single pull cord raises or lowers them in seconds. They take up almost no visual space when raised.
Types of roller blinds:
- Blackout — for blocking all light and heat
- Light-filtering — for softening light while keeping the room bright
- Solar/sunscreen — for reducing glare while still seeing the view
Budget tip: Basic roller blinds from IKEA start at around $10. For a custom look on a budget, buy a plain white blind and use fabric glue or stencils to add a pattern to the fabric.
Where they work best:
- Above kitchen sinks with limited clearance for curtains
- Modern and minimalist kitchens
- Kitchens with wide windows that would need multiple curtain panels
Layering idea: Use a roller blind as your base layer for light control, then add curtain panels on either side for softness and style. This gives you full flexibility — practical on weekday mornings, polished when you have guests.
Roller blinds in white or cream suit nearly any kitchen. For bolder choices, try a deep navy, terracotta, or sage green to make a statement.
10. Stained Glass Window Film for Artistic Color

Stained glass is a stunning window treatment — but the real thing costs thousands.
Stained glass window film is the budget version, and it looks surprisingly convincing. You apply it to the glass just like frosted film, but it adds color, pattern, and light play that transforms an ordinary kitchen window into a focal point.
Why it works:
- Colorful light filters through and dances across kitchen walls and counters.
- It adds personality without permanent changes.
- It’s completely removable — great for renters.
Design options:
- Geometric patterns for a modern or art deco feel
- Floral designs for cottage or vintage kitchens
- Abstract color fields for a bold, artistic statement
- Traditional cathedral style for farmhouse or Victorian homes
Budget tip: High-quality stained glass film on Amazon costs $15–$30 for a standard window. Measure carefully before ordering and cut to fit with scissors or a craft knife.
Application tip: Work on a clean window on a slightly warm day. The film sticks better and bubbles less in mild temperatures. Use a credit card as a squeegee to smooth out any air pockets.
This is one of the highest-impact, lowest-cost kitchen window ideas on the entire list.
11. A Window Seat with Storage Below

If your kitchen has a large window near the floor, building a window seat turns wasted wall space into something genuinely useful.
A window seat gives you extra seating, extra storage, and a cozy spot that makes the kitchen feel like a gathering place rather than just a functional room.
DIY window seat basics:
- Build or buy a low wooden bench frame sized to fit the window width.
- Add hinged storage underneath — great for pots, linens, or seasonal items.
- Top with a cut foam cushion wrapped in durable fabric (outdoor fabric holds up well).
- Add pillows for softness.
Budget estimate: A DIY version using basic lumber runs $100–$300 depending on size. Add a custom cushion from a local upholstery shop for $50–$150.
Style tips:
- Paint the seat base to match your cabinets for a built-in look.
- Choose a cushion fabric that coordinates with your curtains or rug.
- Add small hooks on the sides for kitchen towels or bags.
Window seats look most natural beneath bay windows, bow windows, or wide picture windows. Even a modest bench in front of a standard window adds warmth and intention to the space.
12. Contrast Trim Paint Around the Window Frame
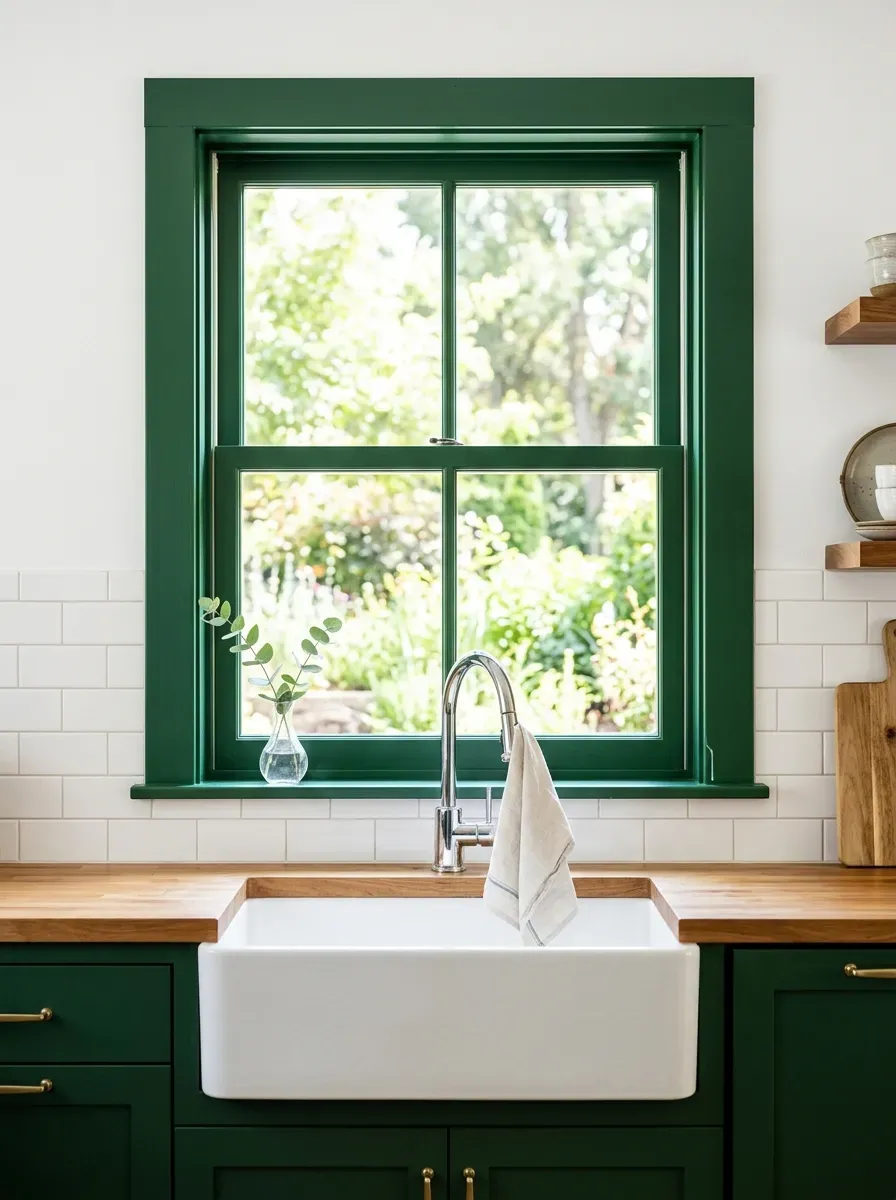
One of the cheapest kitchen window upgrades costs nothing but a can of paint.
Painting your window frame a contrasting color makes the window itself a design feature — like a piece of art framed on the wall. It draws the eye, adds depth, and gives the kitchen a polished, intentional look.
Color ideas:
- Deep forest green on white walls — classic and bold
- Black — modern, dramatic, and surprisingly versatile
- Navy blue — rich and sophisticated
- Terracotta — warm and earthy, great with cream or tan walls
- Dusty sage — calm and natural, pairs with linen and wood
How to do it:
- Tape off the glass with painter’s tape.
- Sand the existing frame lightly with fine-grit sandpaper.
- Apply one coat of primer, then two coats of trim paint in your chosen color.
- Remove tape before the final coat fully dries to get a clean edge.
Total cost: $10–$25 for a small can of trim paint and supplies.
This works on both wood and MDF frames. If your frame is in poor condition, a coat of paint also hides dents, scratches, and wear without replacing anything.
13. Layered Curtains with Tiebacks
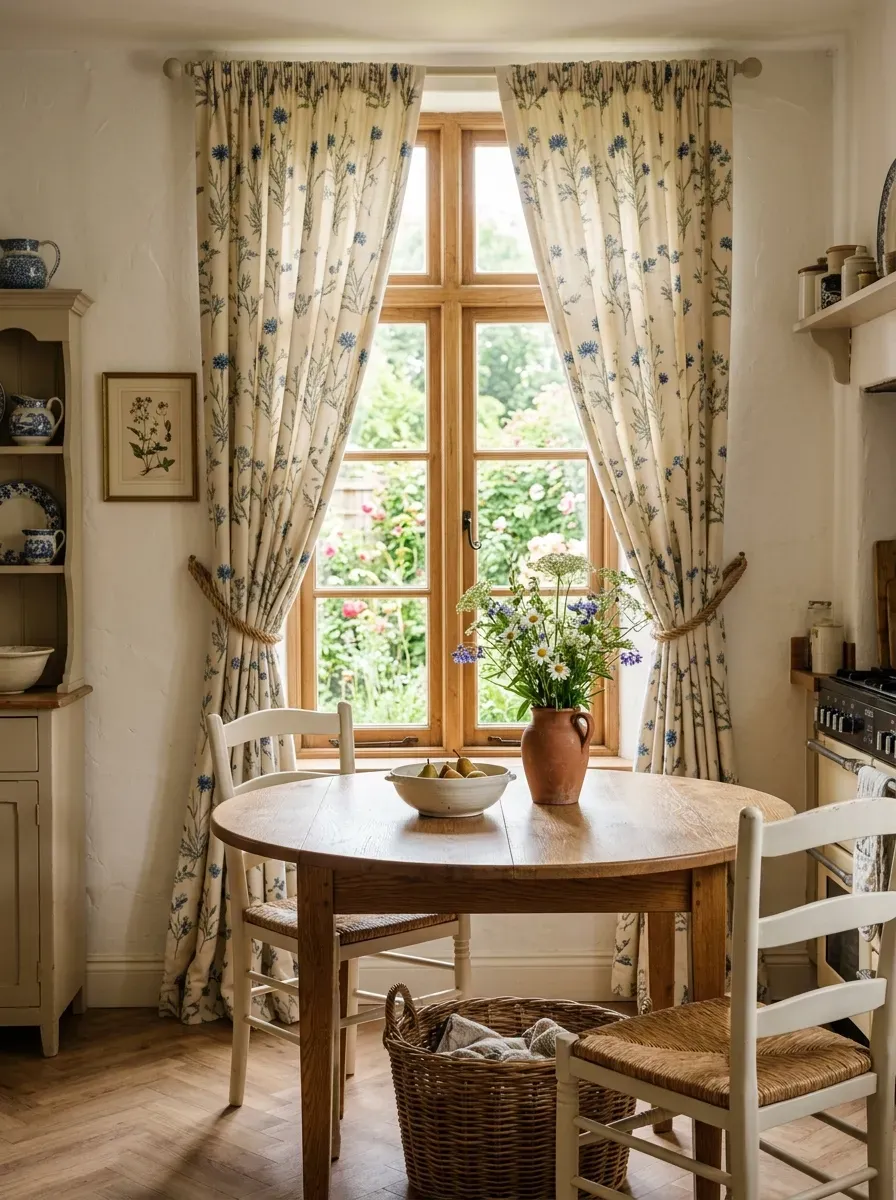
Layered curtains with tiebacks are the most traditional and elegant kitchen window approach.
Two panels hang on either side of the window, held back during the day with tiebacks — decorative rope, fabric ties, or metal hooks — and released at night for privacy.
Why this look works:
- It frames the window like a painting, making it feel larger.
- The tiebacks keep the room looking open and bright during cooking hours.
- It works in formal dining kitchens or eat-in kitchens with style.
Budget tip: Full curtain panels at Target, IKEA, or HomeGoods often cost $20–$40 per panel. For DIY tiebacks, braid three strands of twine, add a small clip at each end, and loop around the curtain — total cost under $5.
Fabric choices:
- Linen — relaxed, natural, works in almost any kitchen
- Cotton print — cottage, farmhouse, or vintage styles
- Velvet — dramatic, best for formal or moody kitchens
Tieback styles:
- Rope or jute — casual and rustic
- Brass ring hooks — classic and polished
- Fabric sashes — soft and romantic
Hang your rod 4–6 inches above the window frame and as wide as possible on each side to maximize the effect.
14. Floating Glass Shelves Across the Window
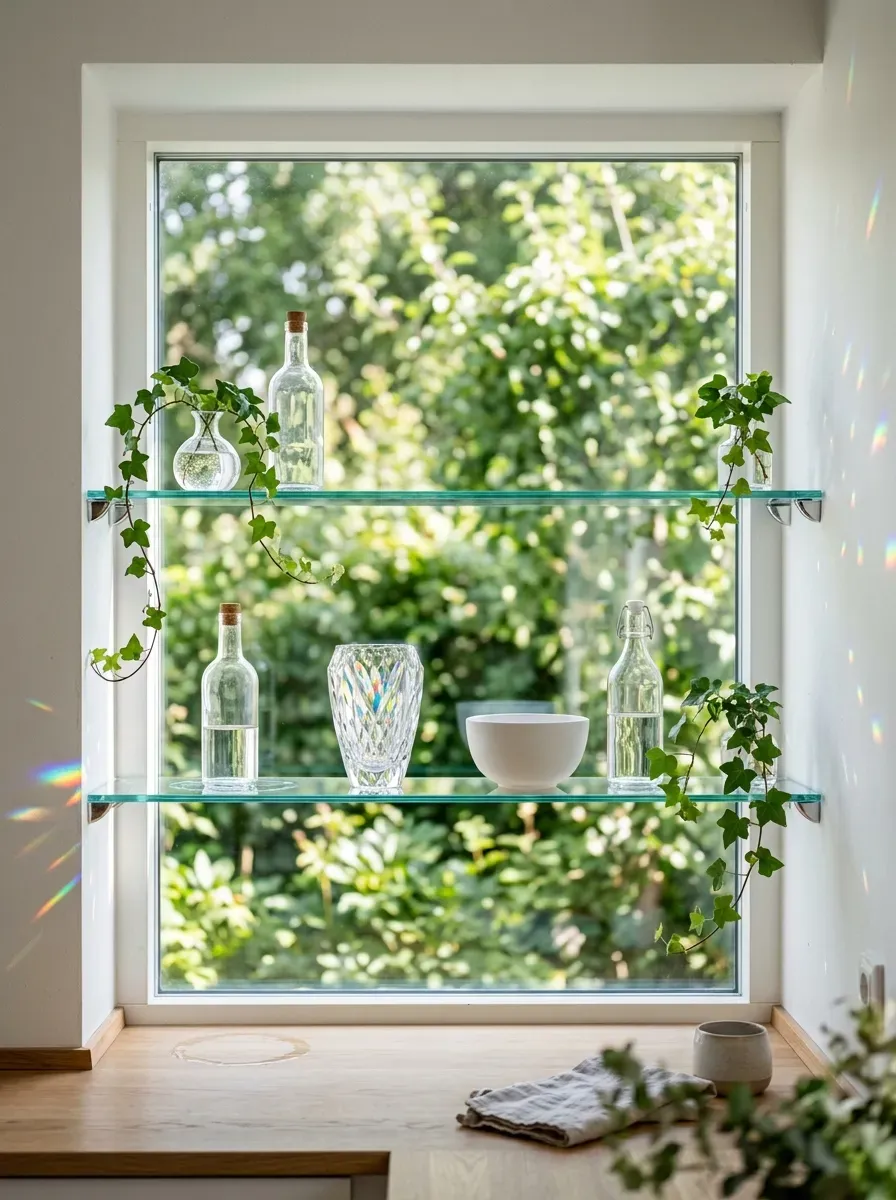
Glass shelves mounted across a window don’t block the light — they play with it.
Sunlight hits the shelves, bounces off glass objects, and scatters light across the kitchen in a way that feels genuinely magical. It’s a functional display space that doubles as a light installation.
What to display on glass window shelves:
- Clear glass bottles and vases
- Crystal or glassware that catches light
- Small trailing plants like pothos or string of pearls
- Sea glass or colored glass objects
- Small ceramic pieces in light colors
How to install them:
- Purchase glass shelves with L-bracket or floating bracket hardware from a hardware store.
- Mark your bracket positions using a level.
- Drill into the window frame or surrounding wall studs.
- Place the glass panels on the brackets — most systems require no glue.
Budget tip: Glass shelf panels from IKEA or a local glass shop run $15–$40 depending on size. Brackets add another $10–$20. Total project under $60 for most windows.
Design note: Keep objects on these shelves minimal. Overcrowding blocks the view and the light. Three to five objects per shelf looks intentional. More than that starts to look cluttered.
15. Bamboo Blinds for an Earthy, Natural Feel
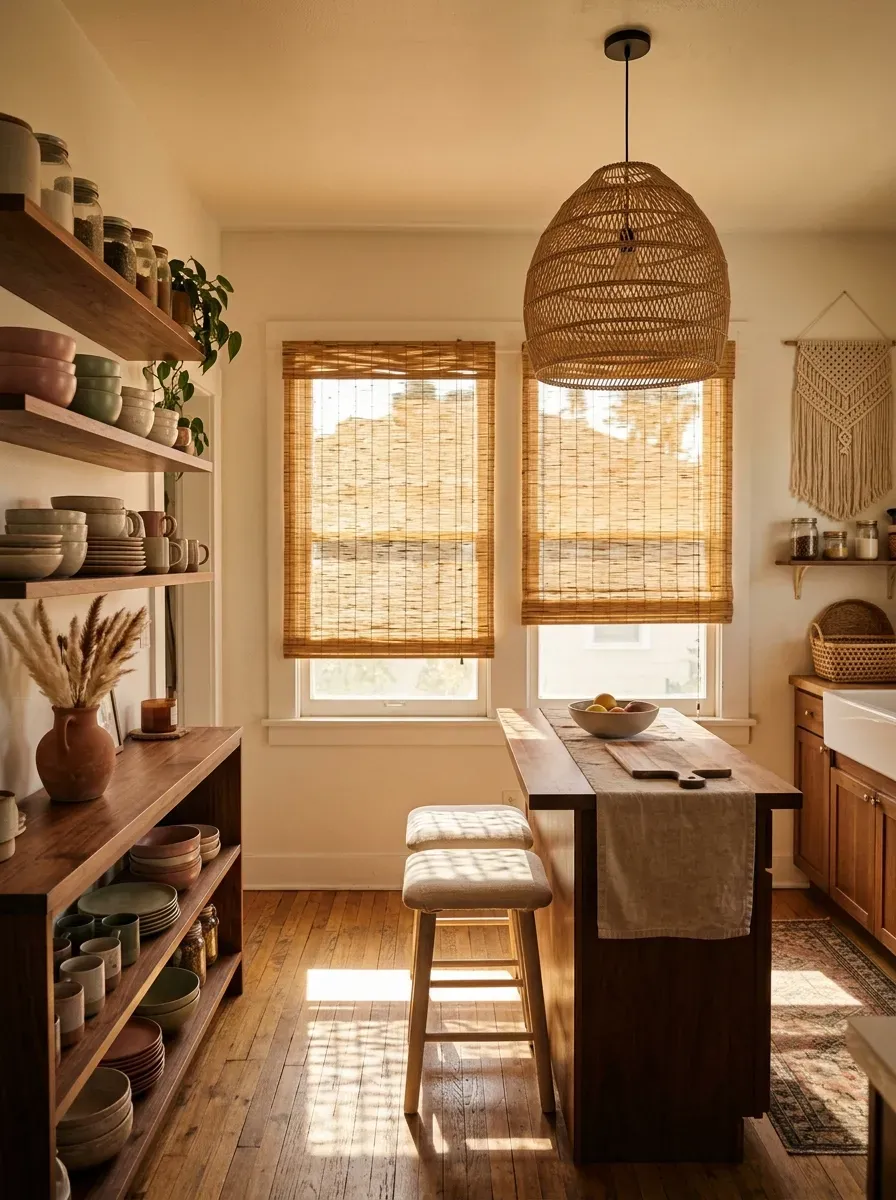
Bamboo blinds are one of the most affordable ways to add natural texture to a kitchen window.
They roll up like a standard blind but bring a completely different visual quality — organic, warm, and layered. Even in a simple kitchen, bamboo blinds read as a considered design choice.
Why bamboo works in kitchens:
- Bamboo is moisture-resistant — more so than fabric.
- It adds warmth to kitchens that lean cold or industrial.
- It pairs naturally with wood, stone, linen, and ceramics.
Budget tip: Bamboo roll-up blinds from Target, World Market, or Amazon start at $15–$30 per blind. They come in natural, dark, and bleached finishes to match your kitchen tones.
Installation: Most bamboo blinds use a simple metal bracket that screws into the top of the window frame — inside or outside mount. Installation takes about 10 minutes per window.
Style note: Bamboo blinds work especially well in boho, coastal, tropical, and earthy-modern kitchens. They look beautiful alongside plants, wooden cutting boards, and hanging dried herbs.
For privacy, choose a tighter weave. For a more casual, filtered light effect, choose a loose or open weave that lets more light through during the day.
16. Copper or Brass Curtain Rods as a Design Feature

Curtain rods are usually an afterthought. They shouldn’t be.
Switching from a basic white or chrome rod to a brass, copper, or matte black rod completely changes the feel of your window — and the whole kitchen.
Why the rod matters:
- It’s the first thing you see when you look at the window.
- It ties into other hardware finishes in the kitchen (faucet, cabinet pulls, light fixtures).
- A decorative finial at the end of the rod adds a polished, intentional detail.
Budget tip: Decorative curtain rods at HomeGoods, IKEA, and Amazon run $15–$50. Look for brass-finish options — they read as high-end even at lower price points.
Best hardware pairings:
- Brass rod with white linen curtains — warm, classic, timeless
- Matte black rod with off-white or cream panels — modern farmhouse
- Copper rod with terracotta or burnt orange fabric — earthy and rich
- Nickel rod with gray or blue curtains — cool, contemporary
Finial shapes to look for:
- Ball (classic, works everywhere)
- Cylinder or square (modern)
- Spear (traditional or formal)
- Acorn (cottage or rustic)
Swap out a builder-grade rod in one afternoon — no special tools required. The visual difference is bigger than you’d expect.
17. A Pegboard or Grid Panel Beside the Window
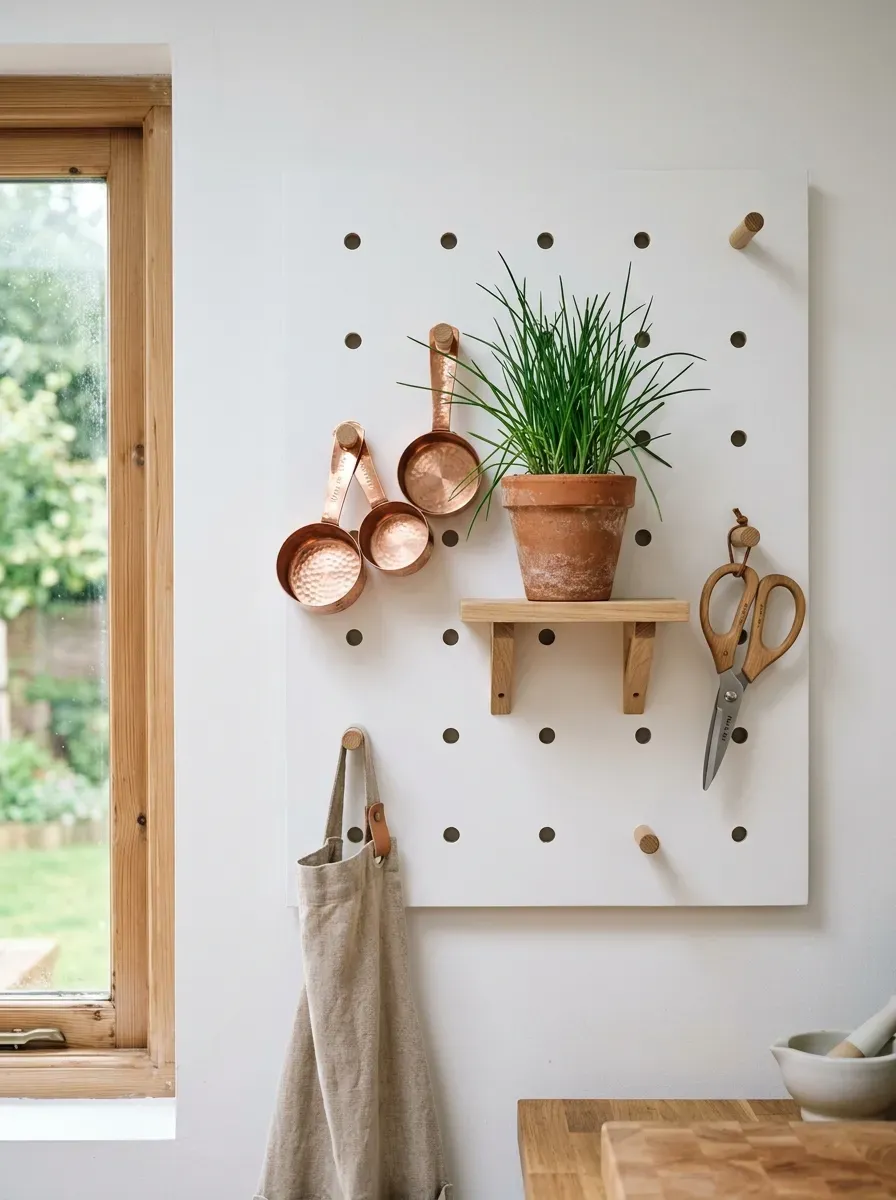
This isn’t a window treatment — it’s window-adjacent decor that makes the whole wall work harder.
A pegboard or wall grid panel mounted right next to the kitchen window creates a functional display area that connects visually to the window space. Hang tools, plants, small shelves, and containers on it. It pulls the eye across the window wall and makes the whole zone feel designed.
What to hang on it:
- Small potted herbs in clip-on holders
- Utensils and tools you use daily
- A small chalkboard or notepad
- Measuring cups, spoons, or scissors
- A small shelf for oils or spices
DIY options:
- Pegboard: Cut to size at a hardware store ($15–$25), sand, paint, mount with standoffs.
- Grid panel: Buy a metal wire grid from IKEA (SKÅDIS) or Target for $15–$25.
- Wood slat panel: Mount horizontal wood strips with gaps between them, add hooks.
Budget tip: A single IKEA SKÅDIS pegboard panel is $15. Add a few accessories and you have a completely custom kitchen organization wall for under $40.
Paint the pegboard the same color as your walls for a subtle, integrated look. Paint it a contrasting color to make it a bold statement.
18. Scalloped or Shaped Valance for Vintage Charm

A valance is a short curtain treatment that only covers the top portion of the window.
It adds a decorative touch without blocking any light — perfect if you love the look of curtains but don’t want to lose visibility or light from the lower portion of your window.
Why a valance works:
- Hides curtain rods and hardware.
- Adds color, pattern, and texture at eye level.
- Works great above kitchen sinks where floor-length curtains would hang over the basin.
Scalloped valances are shaped along the bottom edge in rounded arches — it’s a classic kitchen look that reads vintage, warm, and personal.
Budget tip: You can make a valance from a single yard of fabric. Cut to size, hem the edges and top pocket, and hang on a tension rod. Total cost: $8–$15 in fabric, zero in hardware if you use a tension rod.
Pattern ideas:
- Classic red gingham for a farmhouse feel
- Blue toile for a French country kitchen
- Solid sage green for a calm, modern-traditional look
- White eyelet lace for a vintage or cottage kitchen
Pair a valance with plain roller blinds underneath for a look that’s both decorative and functional.
19. Black-Framed Window for a Modern Industrial Edge
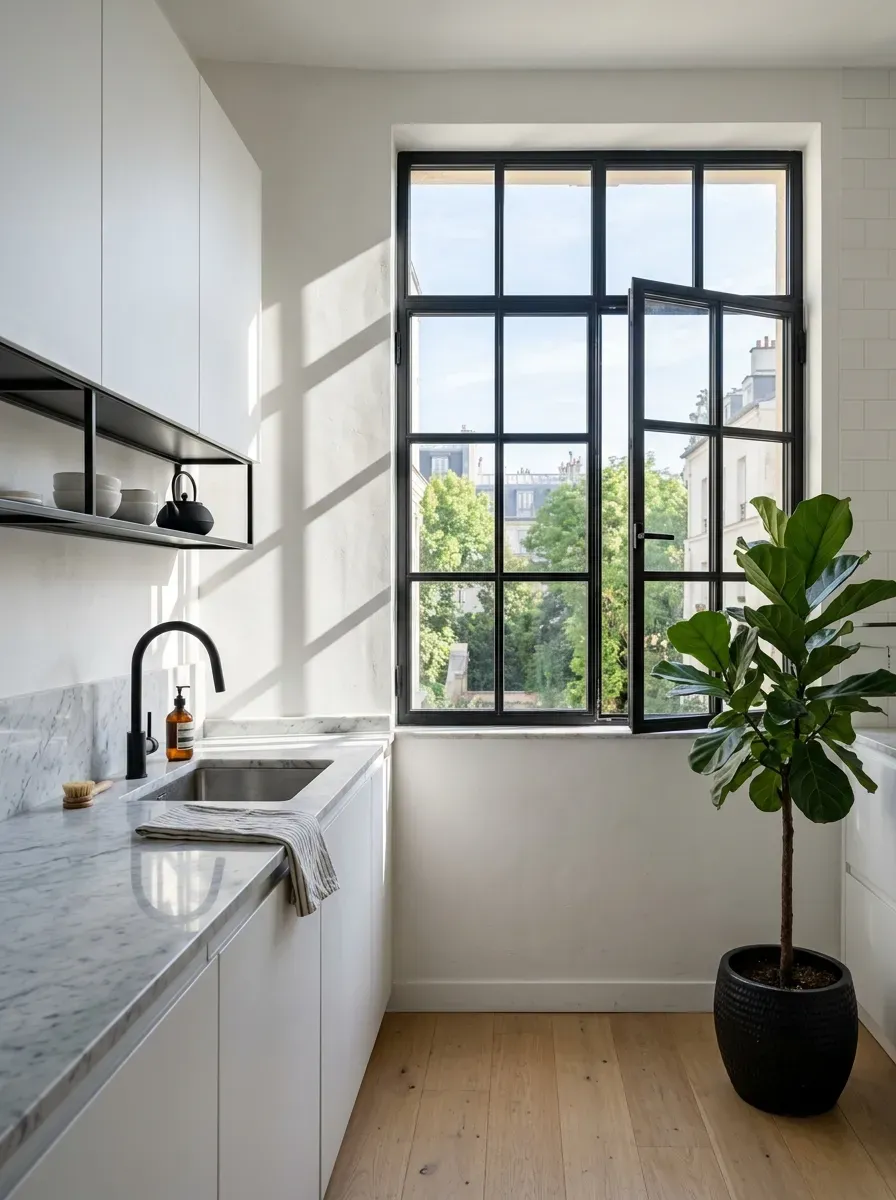
Black-framed windows are one of the defining details of the modern industrial and modern farmhouse kitchen.
If you’re building or renovating, choosing black window frames instead of white adds immediate depth and drama. But even if your windows are already installed, you can paint your existing frames black to get a similar effect.
How to paint window frames black:
- Clean the frames thoroughly.
- Remove any hardware or tape off glass carefully.
- Apply a coat of bonding primer.
- Use a small foam roller for flat sections and a brush for detail areas.
- Two coats of black semi-gloss or satin trim paint.
Budget tip: A small quart of black trim paint costs $15–$25. With careful taping, this is a weekend project anyone can do.
What it pairs well with:
- White or cream walls and cabinets
- Marble or quartz countertops
- Brushed gold or brass hardware
- Open wood shelving
- Statement pendant lights
Style note: Black frames work best with windows that have real visual presence — large panes, casement style, or grid patterns. A skinny builder-grade window may not have enough surface area for the effect to read well.
20. Window Boxes with Flowers or Herbs Outside
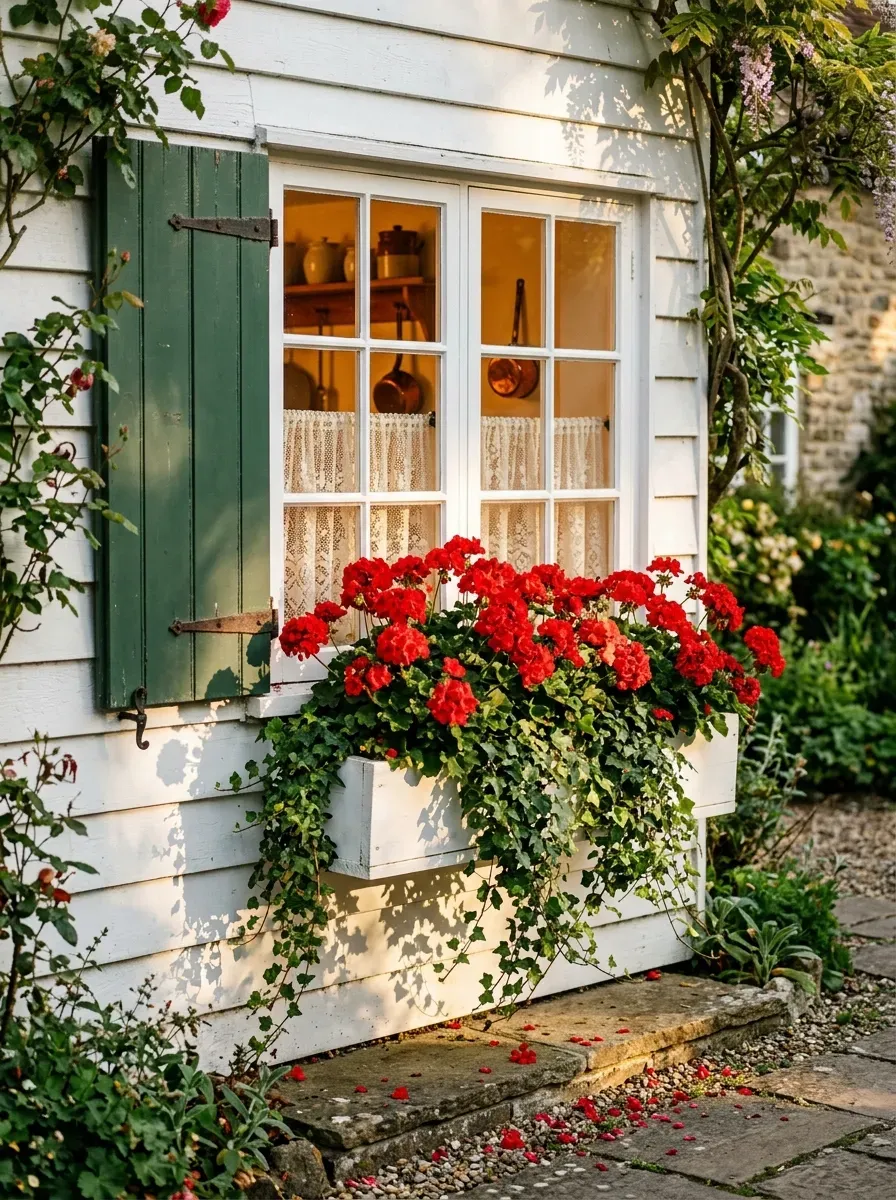
Window boxes turn your kitchen window into something people admire from the street.
Mounted just below the exterior sill, they hold flowers, herbs, or trailing plants that make the whole exterior of your home look more welcoming — and when you’re inside, you look out at a living, colorful frame around your view.
What to plant in kitchen window boxes:
- Herbs (basil, thyme, rosemary) — useful and beautiful
- Trailing flowers (petunias, verbena, lobelia) — colorful, low-maintenance
- Edible flowers (nasturtiums, pansies) — beautiful and garnish-ready
- Ornamental grasses — structural, interesting texture
DIY window box: Buy a basic cedar or pine box from a hardware store ($15–$40) or build one from 1×6 lumber scraps. Drill drainage holes in the bottom. Mount with heavy-duty L-brackets or special window box hardware that wraps around the sill.
Budget tip: Paint your window box the same color as your window trim for a polished, cohesive look. Cedar is naturally rot-resistant and holds up well outdoors without sealing.
Water daily in summer — window boxes dry out fast. Add a slow-release fertilizer at planting and refresh it monthly.
21. Macramé Window Hanging for Boho Warmth
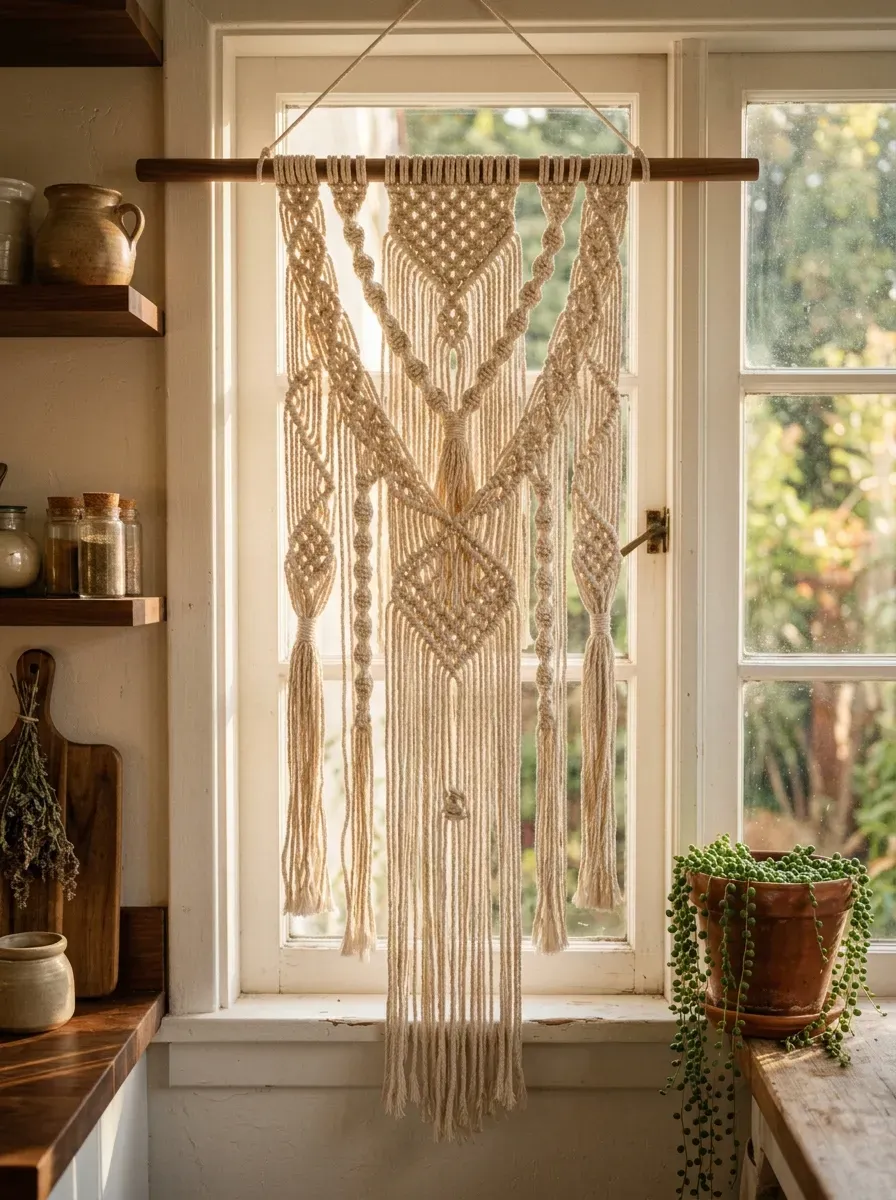
Macramé brings texture, handmade warmth, and a completely unique look to a kitchen window.
Instead of a curtain or blind, you hang a hand-knotted macramé piece across the window — partially filtering light while adding art and personality to the space.
Why it works:
- Light still comes through the knots, just softened and patterned.
- It adds a bohemian, artisan quality that’s hard to achieve with store-bought treatments.
- Every piece is one-of-a-kind.
Budget tip: Macramé pieces on Etsy range from $30–$150 depending on size. But you can make your own for under $15 in supplies.
Basic DIY macramé hanging:
- Buy a roll of 3mm natural cotton macramé cord ($10–$15 online or at craft stores).
- Cut 20–30 strands, double their desired finished length.
- Fold in half and lark’s head knot them onto a wooden dowel.
- Practice basic square knots — there are dozens of free YouTube tutorials for beginners.
A simple macramé panel can be finished in a single afternoon. Start small (a 12-inch square) and work up to a full window-width piece as you get comfortable with the knots.
22. Roman Arch or Arched Window Treatment
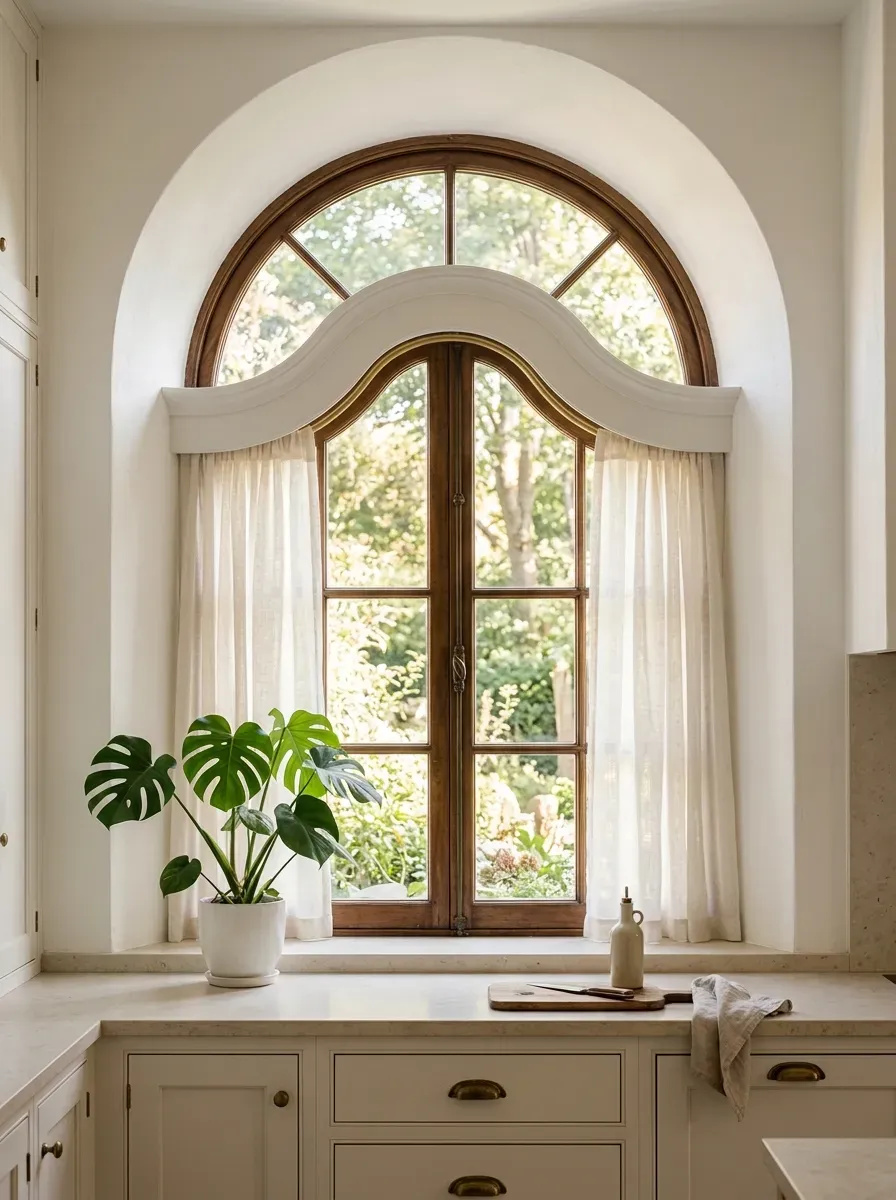
Arched windows are a beautiful architectural detail — but they can be awkward to dress.
The key is to work with the arch, not against it. Leave the arch itself uncovered to showcase its shape, and treat only the lower, straight portion of the window.
Options for arched windows:
- Straight rod with curtain panels hung below the arch, leaving the arch bare
- A custom curved valance that follows the shape of the arch exactly
- Frosted film on the arch only, leaving the lower window clear
- A fan-style shade that radiates from the center of the arch
Budget tip: For a custom curved valance, buy a flexible foam board or thin wood strip and bend it to match the arch curve. Cover with fabric using a staple gun. Mount with small L-brackets inside the frame. Total cost: $20–$40.
If your arch is a round or half-moon window above a regular window, treat the two separately. Use a circle of frosted film or stained glass film in the arch, and hang a standard curtain or blind below.
The worst thing you can do with an arched window is force a square treatment onto it. Let the shape do the work.
23. Vintage or Repurposed Window Frame as Wall Art

Old window frames — even ones with no glass — make extraordinary kitchen wall art.
This is a decor idea that costs almost nothing if you find the right frame. Antique stores, salvage yards, estate sales, and Facebook Marketplace often have old window frames for $5–$30.
Ways to use an old window frame:
- Mount it flat on the wall as a frame for a printed piece of art or fabric
- Hang it as an open frame and place objects in the “panes” — small plants, photos, hooks
- Add chicken wire or mesh to the panes and use it as a memo board
- Lean it against a wall for a casual, layered look
- Attach it above a chalkboard for a window-with-view illusion
DIY tip: If you can’t find an old frame, build one from 1×3 lumber. Cut, assemble, sand, and distress with sandpaper and white paint for a convincing vintage look. Total cost: $10–$20.
Where to hang it:
- On a blank wall near or between actual windows
- Above a kitchen island or breakfast bar
- As a focal point on a wall that lacks architectural interest
24. Linen Curtains with a Natural Hem Detail
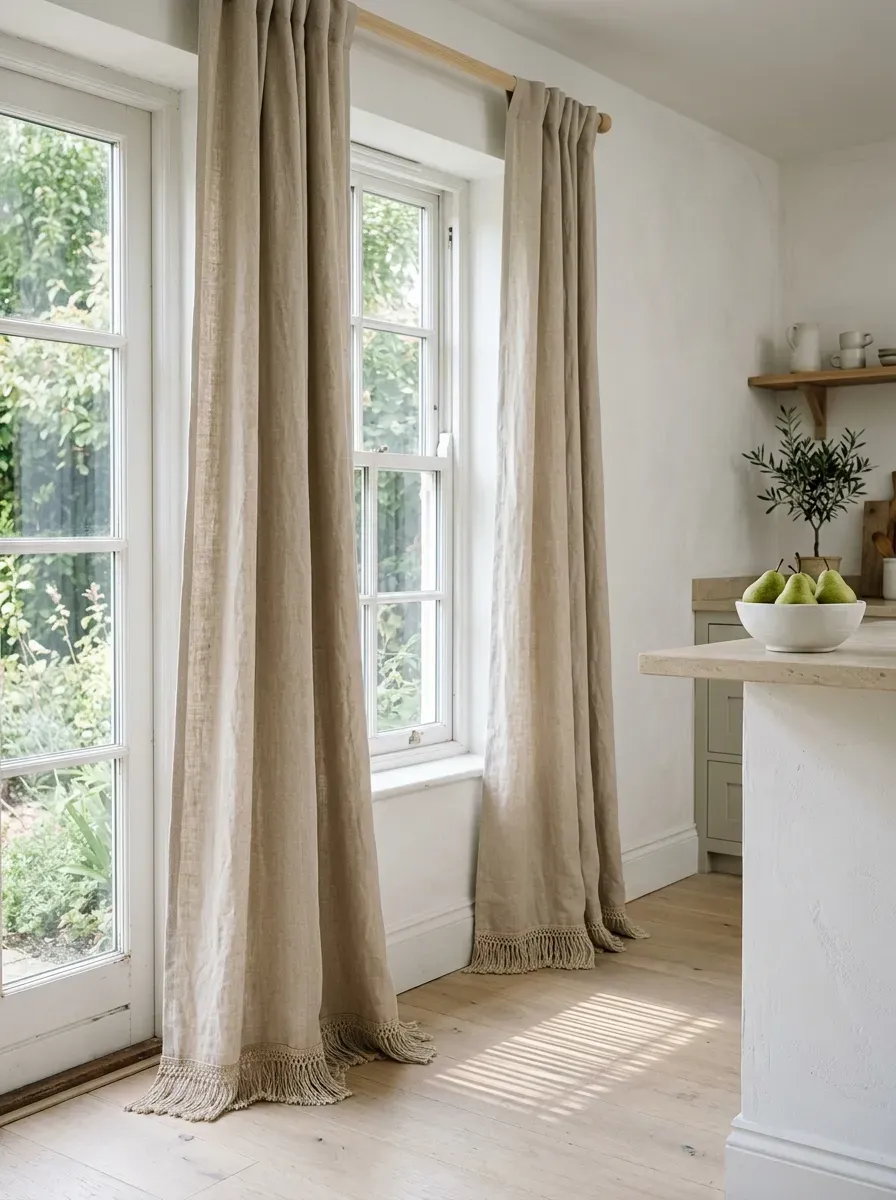
Linen curtains are the ultimate kitchen window classic — and for good reason.
Linen is durable, breathable, washable, and beautiful in natural light. It wrinkles in a charming way that reads relaxed rather than unkempt. It comes in earthy, natural tones that work with almost any kitchen palette.
What makes them special:
- Natural linen changes slightly in color with direct sunlight — getting lighter over time in a beautiful, organic way.
- The texture catches light differently throughout the day.
- They layer well with roller blinds or roman shades for full light control.
The hem detail difference: Adding a simple detail at the hem line takes a basic linen curtain from “fine” to “intentional”:
- Fringe trim — bohemian and tactile
- Contrast color strip — bold and graphic
- Embroidered edge — delicate and artisan
- Raw, unfinished edge — modern and organic
Budget tip: Buy pre-made linen curtain panels and add trim yourself. Iron-on trim tape lets you attach fringe or ribbon without sewing. A yard of fringe from a fabric store runs $4–$8.
Hang linen panels from a wooden or brass rod for maximum texture and warmth in the space.
25. A Pull-Down Projector-Style Shade with Printed Pattern
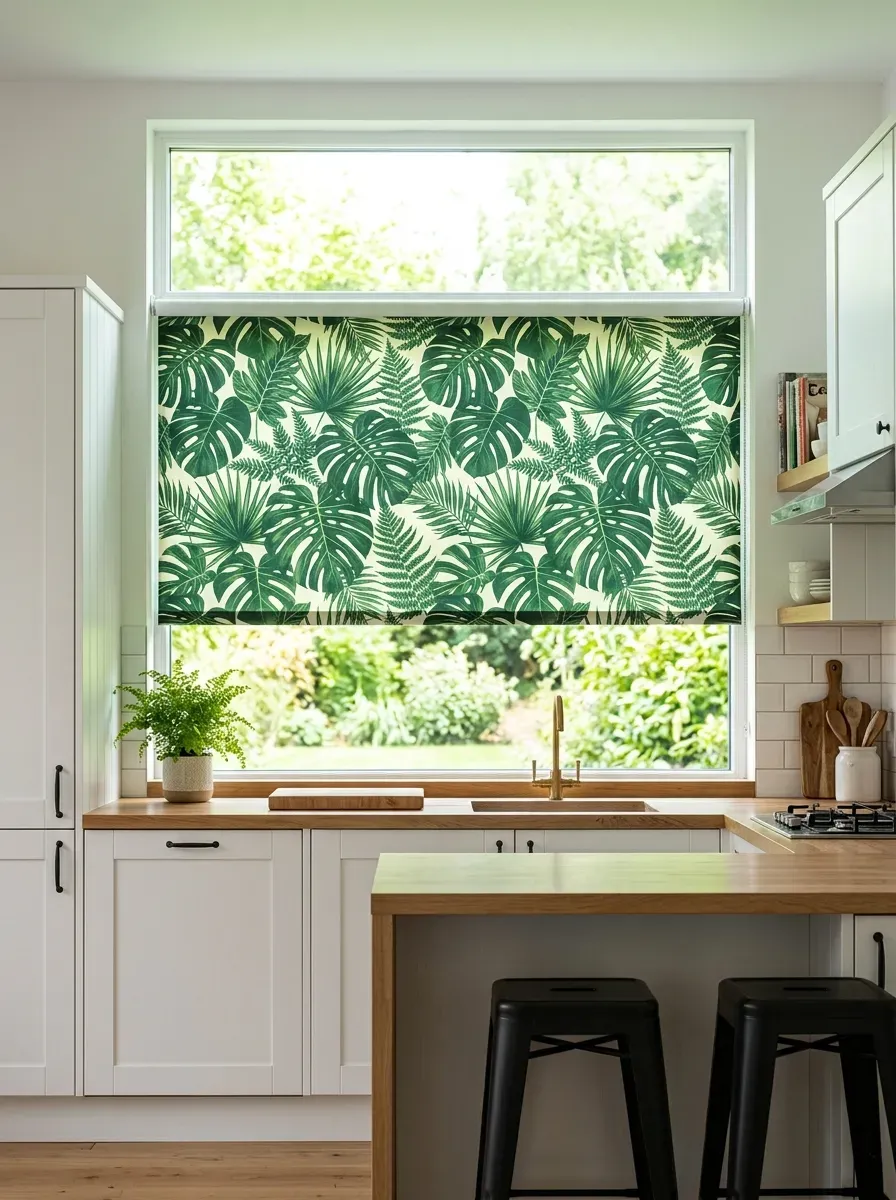
Custom-printed roller shades let you turn your kitchen window into an art piece.
Instead of a plain white or beige blind, you get a large-scale image or pattern printed directly onto the shade fabric. When it’s down, it’s art. When it’s up, it disappears completely.
What you can print:
- Botanical illustrations
- Geometric patterns
- Architectural drawings
- Watercolor landscapes
- Custom typography or maps
Where to order them:
- Blinds.com, Spoonflower, and Roostery all offer custom-printed shade options.
- Prices start around $60–$150 depending on size.
Budget version: You can also buy a plain white roller shade and use fabric paint with stencils to create a custom pattern. Painter’s tape creates clean geometric designs with zero artistic skill required. Total cost: $10–$20 in materials.
Design tip: Go bold. The whole point of a printed shade is to make a statement. A pattern that feels “too big” on a swatch often looks exactly right at full window scale.
This is especially impactful in kitchens where the window is a visual focal point from the table or living space.
26. Tiered Tension Rod Display Inside the Window Frame
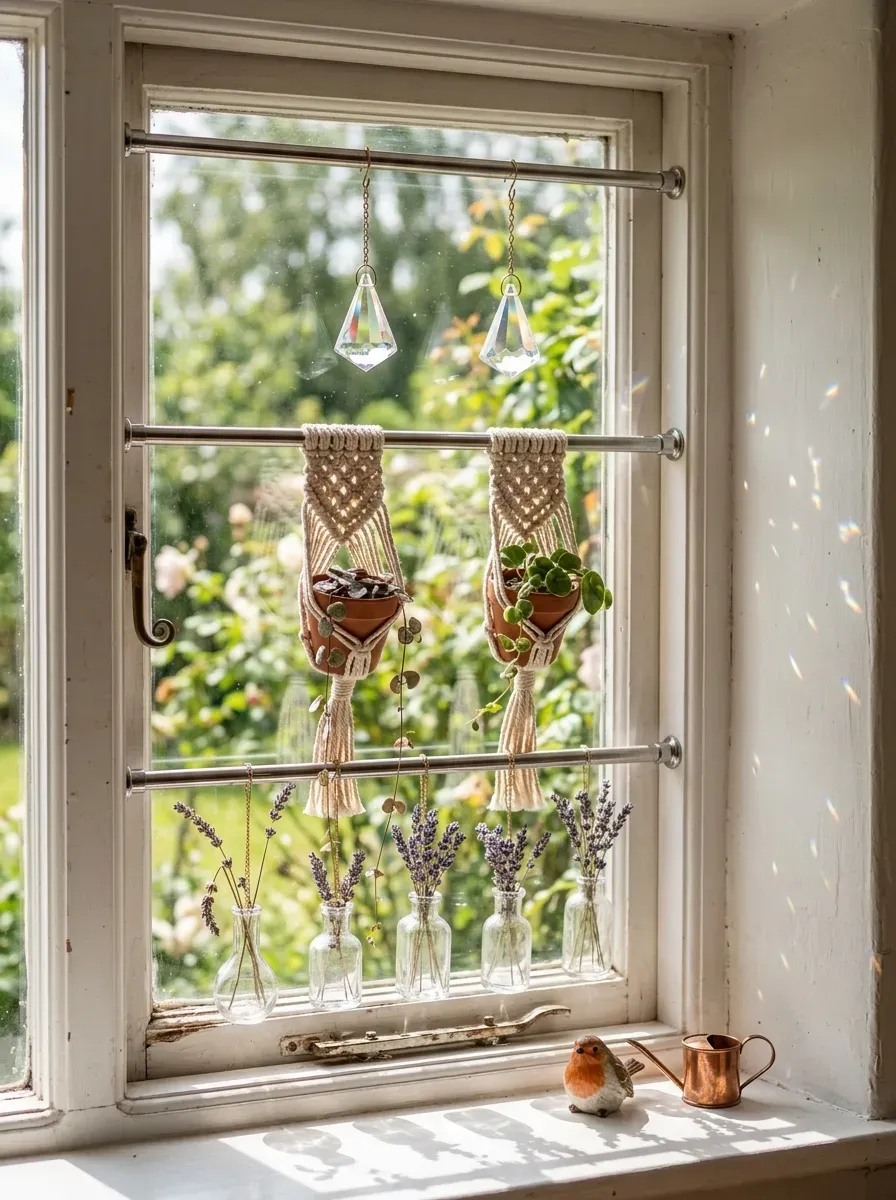
Tension rods aren’t just for curtains.
Stack two or three tension rods inside your window frame at different heights, and suddenly you have a display system — completely free, totally removable, and endlessly customizable.
What to display on tension rod layers:
- Small hanging plants in macramé loops or S-hooks
- Stained glass ornaments or suncatchers
- Vintage glass bottles or small vases
- Crystal prisms or geometric ornaments
- Dried herb bundles tied with twine
Setup instructions:
- Buy tension rods sized to fit inside your window frame (not across the window, but inside the casing — typically 18–28 inches).
- Pop them into the frame at three different heights — they hold by pressure, no drilling required.
- Hang objects from S-hooks or small clips.
Budget tip: Tension rods from a dollar store or Amazon cost $1–$5 each. Three rods and a few plants: under $20 total.
This display works especially well in windows where curtains feel like too much. It fills the window with life and light without blocking either. It’s also perfect for renters who can’t make permanent changes.
27. A Statement Window Seat with a Bold Cushion
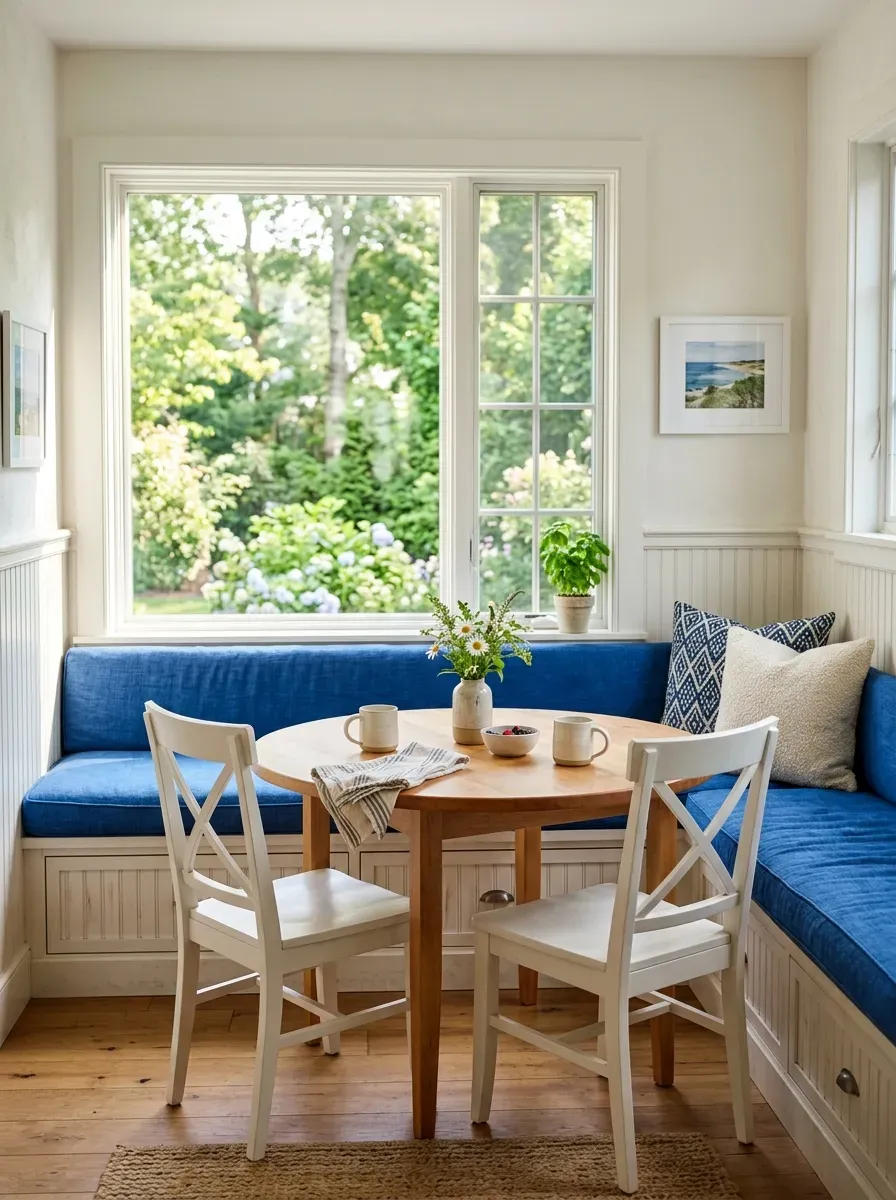
A window bench seat with a bold, standout cushion does more for a kitchen than almost any other single investment.
It turns the window wall into the most inviting spot in the room. People gravitate toward it. It becomes where kids do homework, where guests sit with coffee, where you linger long after the meal is done.
What makes the cushion count: The fabric you choose sets the entire personality of the corner.
- Cobalt blue — striking, classic, works with almost any kitchen color
- Mustard yellow — warm, cheerful, makes the space feel sunny even on gray days
- Terracotta or rust — earthy, grounding, trending and timeless
- Soft sage green — calm, natural, pairs beautifully with wood and white
Budget tip: Buy a foam slab from a fabric or craft store (usually $20–$40 per inch of thickness) and wrap it in your chosen fabric with a staple gun or hand stitching. A 2-inch-thick, 48×16-inch cushion in your own fabric costs $30–$60 total.
Design note: Add one or two throw pillows in a contrasting pattern — a solid cushion with a patterned pillow, or vice versa. This adds depth without complication.
Conclusion
Your kitchen window is never just a window.
It’s where light enters the room in the morning. It’s the view you stare at while the coffee brews. It’s one of the first things guests notice when they walk in. Getting it right doesn’t require a big budget or a professional designer — it just requires knowing what your options are and choosing something that actually fits your kitchen and your life.
Whether you go with a $4 set of sheer panels, a weekend DIY window seat, frosted film for a rental apartment, or a full set of plantation shutters for a forever home — the right kitchen window treatment is the one that makes the room feel like yours.
Start with one idea from this list. Try it. See how the light changes, how the room feels, how you feel in it. That one small change has a way of making the whole kitchen feel transformed.
