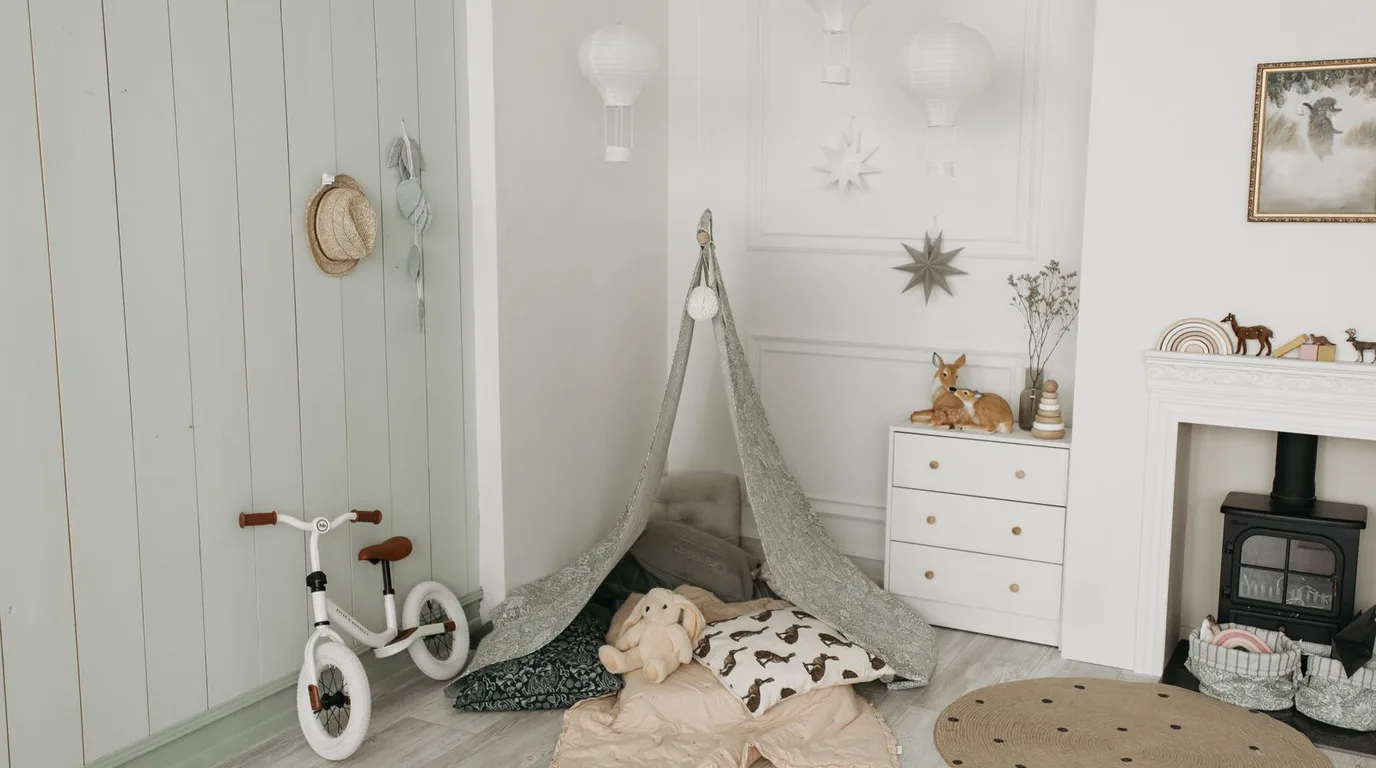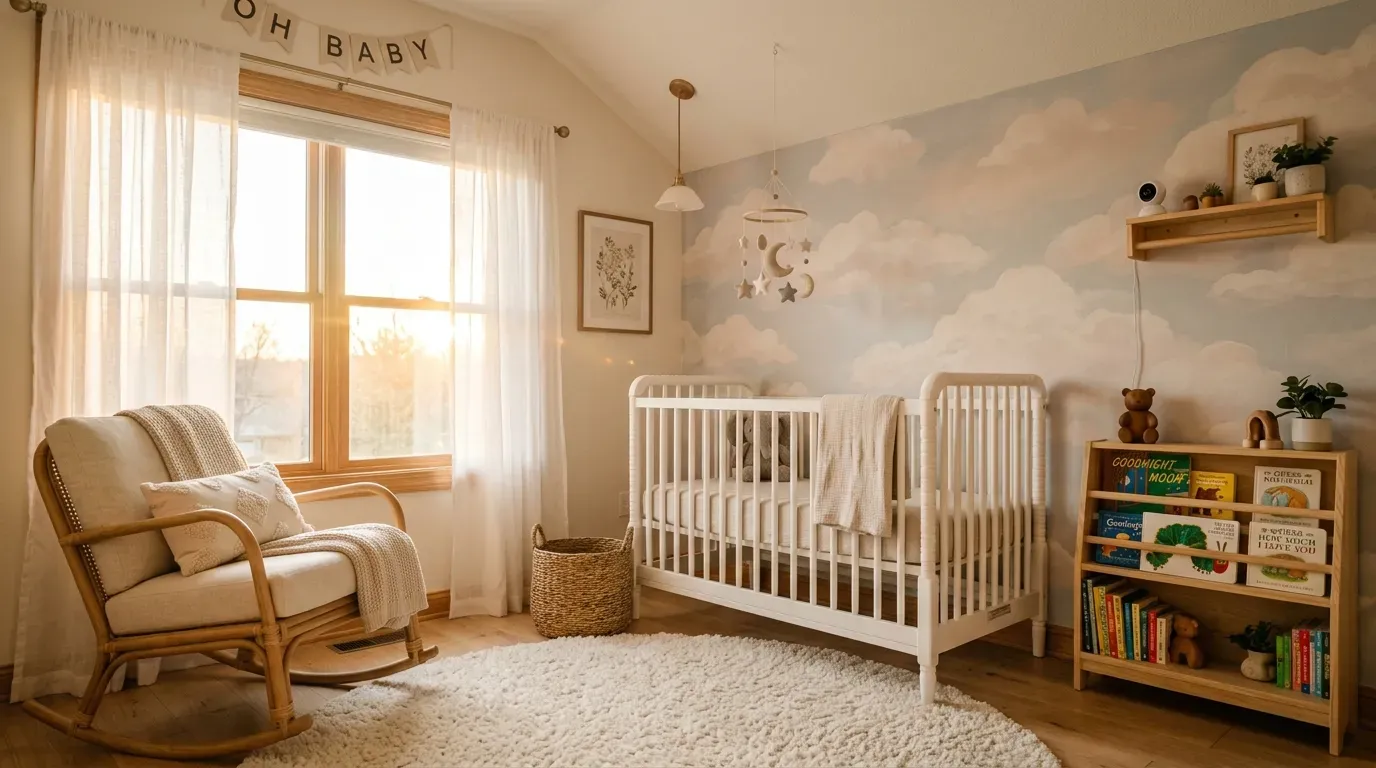
Designing a nursery is one of the most personal, exciting projects a new parent takes on. You want the space to feel warm, safe, and full of personality — without spending a fortune or feeling overwhelmed. The good news? You don’t need a designer budget or a Pinterest-perfect vision to pull it off. Whether you’re working with a tiny spare room, a shared space, or a blank-slate nursery, there are simple, affordable ideas that make a huge difference. This list covers 27 real, doable baby room decor ideas that parents have actually used — ranging from $5 DIY projects to smart furniture choices that grow with your child. Read through, find what fits your space, and start turning that empty room into something your baby will love coming home to.
1. Choose a Soft, Neutral Color Palette
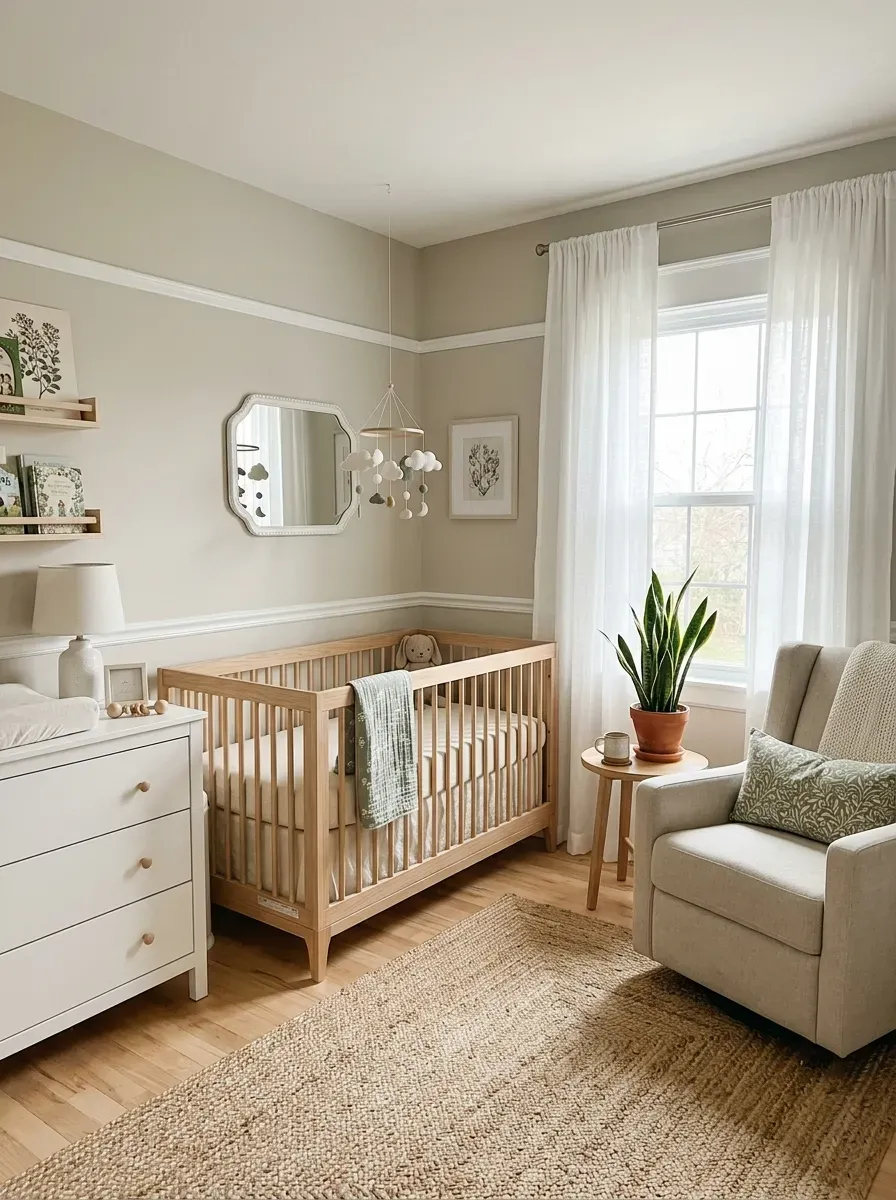
The color you paint the walls sets the entire mood of the room.
Soft, neutral tones — like warm white, greige, sage green, or dusty blush — are popular for good reason. They’re calming, they work with almost any furniture, and they age well as your child grows.
You don’t have to go all white. A single muted accent wall can add character without feeling overwhelming.
Here’s a budget-friendly tip: many hardware stores sell “oops paint” — returned or mis-mixed cans — for $1–$5 per quart. You can often find beautiful soft tones this way.
If you’re renting and can’t paint, removable wallpaper or large fabric wall hangings create a similar effect. Look for peel-and-stick options on Amazon or Etsy — they go up in under an hour and come down without damage.
Avoid bold primary colors for the main wall. They can feel harsh in a sleep space. Save red, yellow, or bright blue for small accents like pillows or storage bins.
Stick to two or three colors total. It keeps the room looking intentional, not chaotic. A grounded, simple palette also makes it easier to swap out decor as your baby’s personality develops.
2. Add a Statement Wall with Removable Wallpaper

One wall. That’s all it takes to completely change a room.
Removable wallpaper is one of the best tools available to nursery decorators right now. It peels off cleanly, doesn’t damage walls, and comes in hundreds of patterns — animals, botanicals, geometric shapes, celestial designs, and more.
Budget option: A single accent wall behind the crib typically uses 2–3 rolls, which can cost $40–$80 total on Amazon or at Target. Compare that to a custom mural, which can run $300+.
Here’s how to do it yourself:
- Measure your wall height and width.
- Order about 10% extra to account for pattern matching.
- Start in the center and work outward.
- Use a credit card or squeegee to smooth out bubbles.
The most popular placement is directly behind the crib, creating a “headboard wall” effect.
Forests, clouds, rainbows, and soft watercolor animals are all timeless choices that won’t feel outdated in two years.
If wallpaper feels like too much commitment, a single large canvas print or a framed fabric piece creates a similar focal point at lower cost. Thrift stores often have large frames you can paint and fill with printed fabric from a fabric store.
3. Layer Soft Rugs for Warmth and Texture

A rug does more than cover the floor — it anchors the whole room.
In a nursery, a soft rug serves a practical purpose too. It cushions falls when your baby starts pulling up, deadens sound, and adds warmth underfoot during those early morning feeds.
What to look for:
- Cotton or wool rugs are easiest to clean
- Low-pile rugs are safer once baby starts crawling
- Round rugs work well in smaller rooms — they open up the space visually
You don’t need to spend hundreds. IKEA’s GASER and Lohals rugs are affordable and machine washable. Target’s Pillowfort line has great options under $60.
DIY layering trick: Place a smaller textured rug (like a sheepskin or braided jute) on top of a larger solid-color rug. It looks intentional and adds depth without spending much.
Avoid thick shag rugs for babies who are learning to crawl or walk — they can be a tripping hazard.
If you’re on a tight budget, a few large interlocking foam tiles in a solid neutral color serve the same function for under $20 and are easy to clean.
A rug with a simple pattern — stripes, dots, or a subtle geometric — hides small stains better than a plain solid.
4. Use a Canopy Over the Crib

A canopy turns an ordinary crib into something magical.
It’s one of the simplest ways to add visual drama to a nursery — and it costs almost nothing. A basic canopy hoop with flowing fabric can run as low as $20–$40.
Safety first: The canopy should hang well above the baby — never inside or touching the crib. It’s purely decorative, attached to the ceiling, not to the crib itself.
You can buy ready-made canopy kits on Amazon or Etsy. Or make your own with a wooden embroidery hoop ($5) and 3–4 yards of lightweight muslin or lace fabric ($10–$15 at a fabric store).
How to hang it:
- Find a ceiling stud or use a toggle bolt.
- Hang the hoop from a single ceiling hook.
- Drape fabric evenly over the hoop, letting it fall in soft folds.
White and cream fabrics are the most popular — they work with any room color. Blush, sage, and soft gray are great alternatives.
The canopy draws the eye upward, which makes the room feel taller. In small nurseries, this is especially useful.
Parents also love that the canopy makes the crib feel like a cozy, intentional space — almost like a little nest just for the baby.
5. Hang a Gallery Wall Above the Changing Table
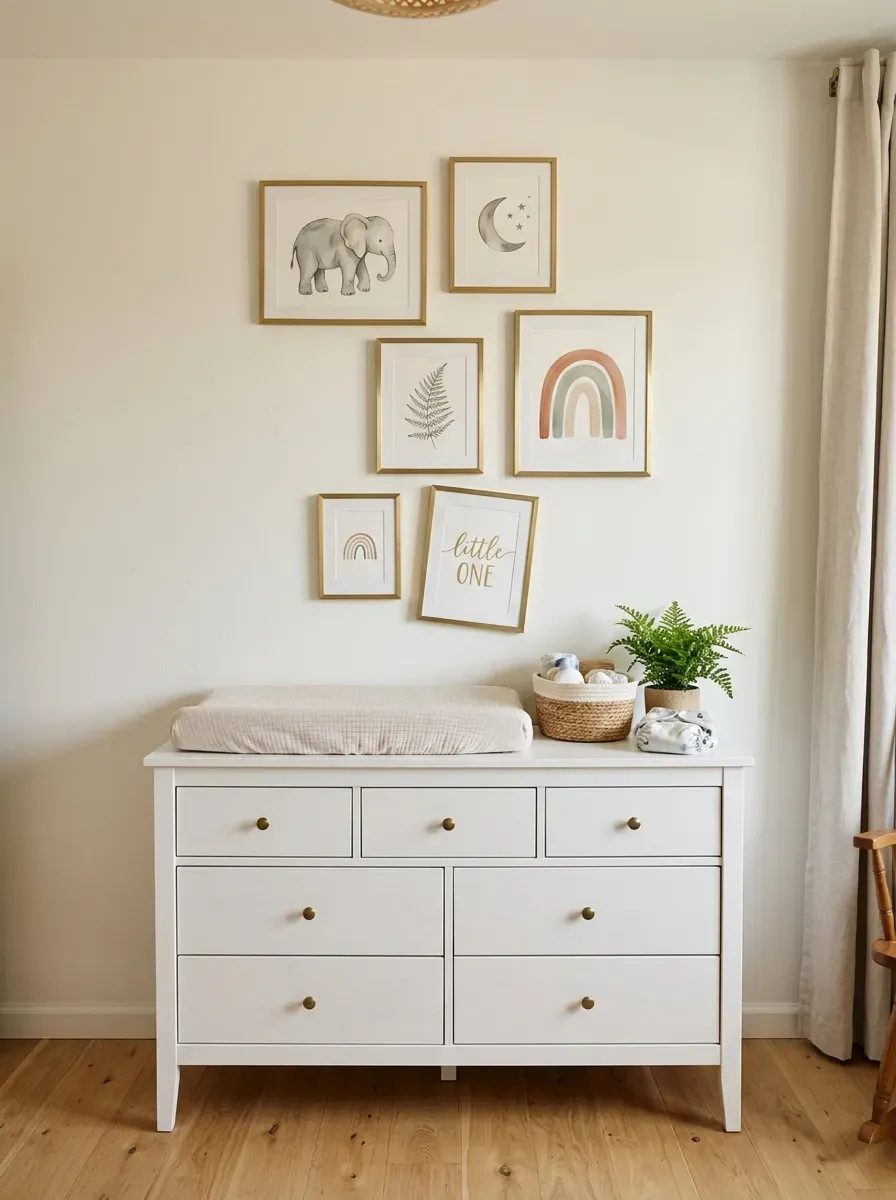
Gallery walls aren’t just for living rooms.
Above the changing table is actually one of the best places in the nursery for art. You spend a surprising amount of time there, and so does your baby — it gives them something interesting to look at.
Keep it simple: 5–7 small frames, all in the same finish, is all you need.
Where to find affordable prints:
- Etsy digital downloads — buy and print for $2–$5 each
- IKEA’s frame sets (the RIBBA line is a classic)
- Print your own photos and illustrations at a local print shop
Themes that work well: animals, botanicals, celestial motifs (stars and moons), alphabet letters, or soft abstract shapes.
DIY tip: Lay out your arrangement on the floor before hanging anything. Once you’re happy with the layout, take a photo so you have a reference when you pick up the hammer.
Use painter’s tape to mark where each nail goes. It makes the process much less stressful.
You can also use adhesive picture-hanging strips instead of nails — great for renters.
Update the gallery as your child grows by swapping out a few prints at a time. The frames stay; only the art changes. It’s an easy way to keep the room feeling fresh without redecorating from scratch.
6. Bring in a Cozy Glider or Rocking Chair

You will spend hours in this chair. Choose wisely.
A glider or rocking chair is often the single most-used piece of furniture in the nursery. Night feeds, nap time, story time, soothing — all of it happens here. So comfort matters more than looks.
That said, you can have both.
What to look for:
- A gentle glide mechanism (not a harsh rock)
- Padded armrests — your arms need support during feeds
- A fabric that’s easy to wipe clean
You don’t need to spend $500 on a designer glider. IKEA’s POÄNG chair with a footstool costs under $200 and is deeply comfortable. Facebook Marketplace and Craigslist regularly have nearly-new gliders for $50–$100.
If you’re buying secondhand, check that the mechanism still moves smoothly and that the frame is solid.
Style tip: A slipcover can completely transform a dated glider. You can find fitted slipcovers on Amazon or make a simple one from a yard and a half of fabric.
Place the glider near the window if possible — natural light during daytime feeds is a bonus.
Add a small side table or a clip-on tray to hold a water bottle, your phone, and anything else you need within arm’s reach at 2am. It makes a real difference.
7. Use Wall Shelves for Both Storage and Style
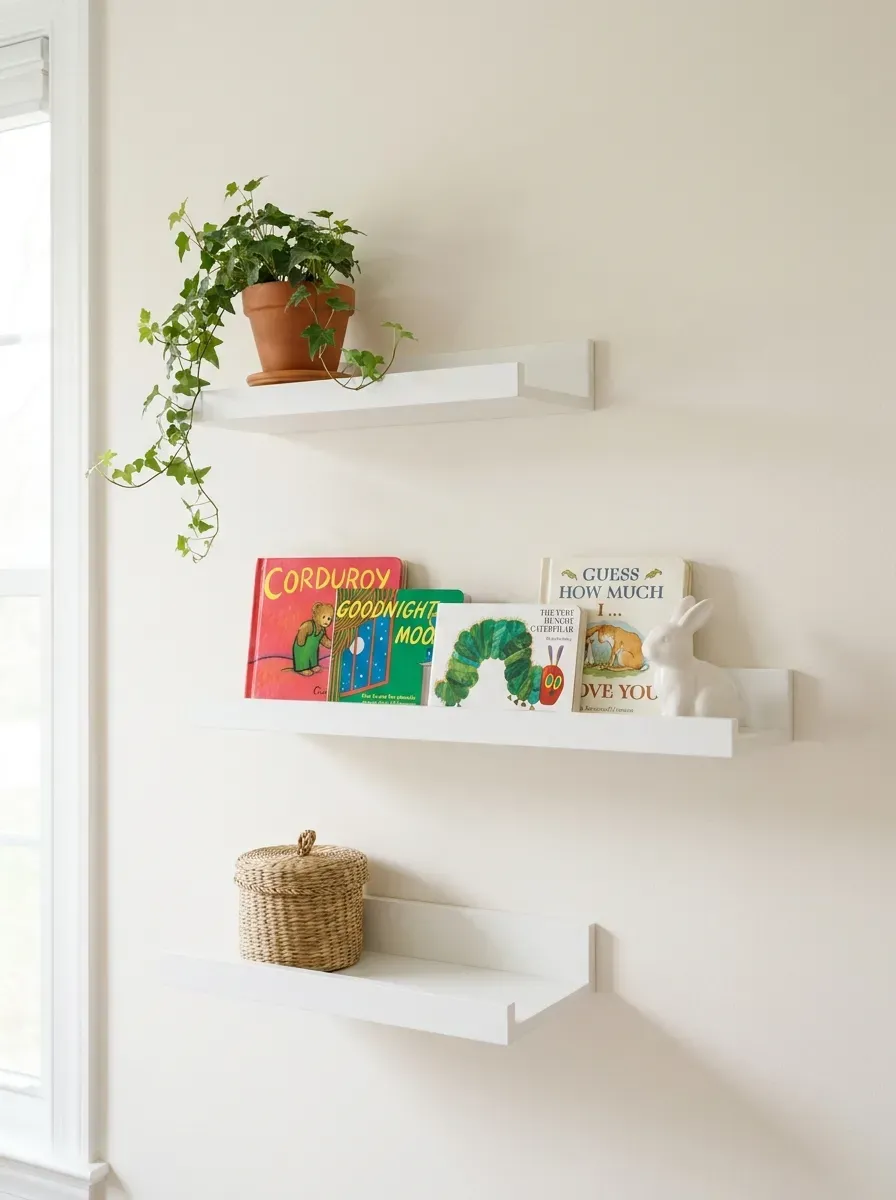
Wall shelves solve two problems at once: storage and decor.
In a nursery, floor space is precious. Wall shelves let you keep books, small toys, plants, and decorative objects off the floor and within reach — without taking up any square footage.
The “picture ledge” style shelf is especially useful. You can face board books outward (spine toward the wall) so babies and toddlers can see the covers and choose what they want to read. It’s a popular Montessori-influenced approach that genuinely encourages reading.
IKEA’s MOSSLANDA picture ledges are $10–$15 each and are one of the most popular choices for this exact purpose.
For a more styled look, mix in a few small decorative items between the books:
- A small potted plant (fake is fine — and safer)
- A tiny framed photo
- A ceramic animal figurine
DIY shelving option: Pre-cut pine boards from a hardware store, sanded and painted, cost about $10–$15 per shelf. Add simple L-brackets and you have custom shelving for a fraction of the retail price.
Space shelves at different heights to create visual interest. A staggered arrangement — one high, one mid, one low — looks intentional and works well in small spaces.
Keep the top shelf for decor only. Things your baby can’t reach should stay out of reach.
8. Install a Ceiling Mobile for Visual Stimulation
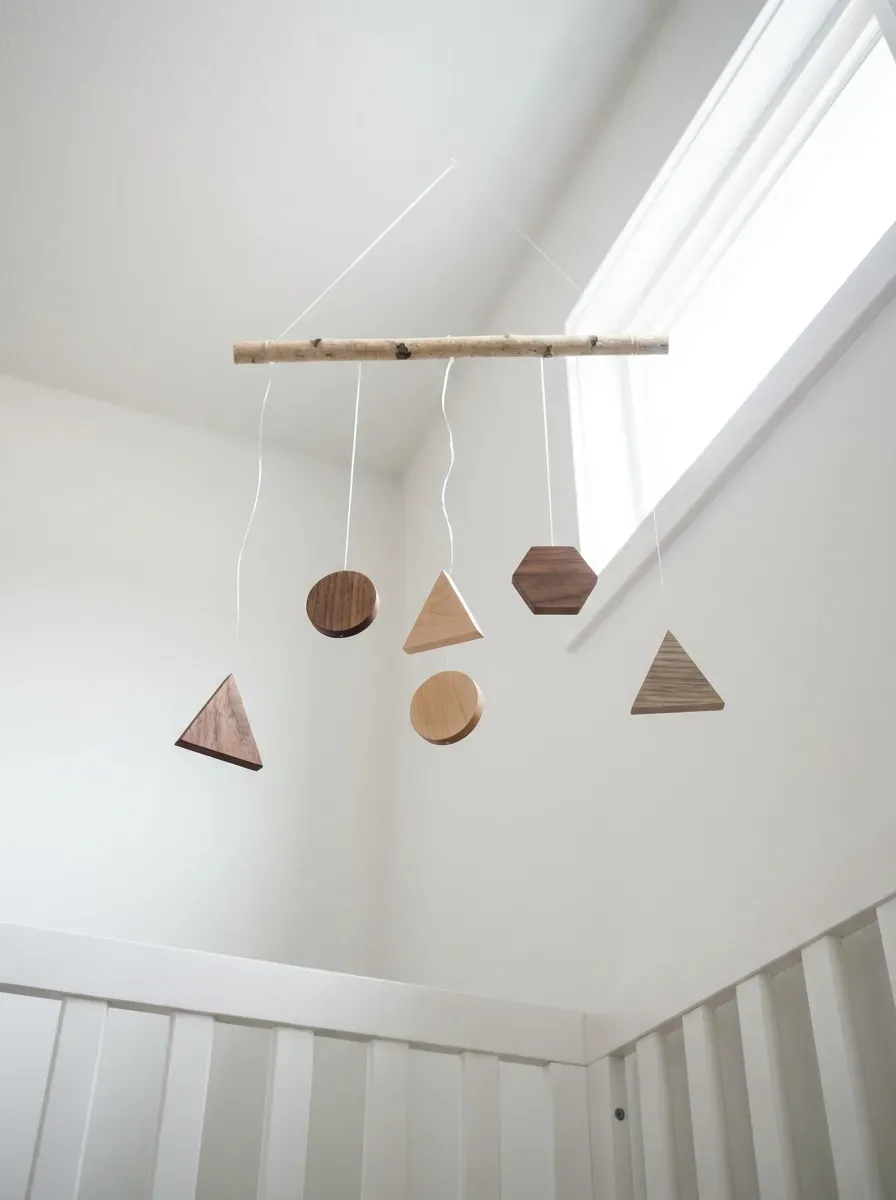
Babies can’t play with toys for weeks after birth. But they can look at things.
A ceiling mobile gives your newborn something to focus on during awake time. It also adds a decorative element that feels special and handmade — even if it cost very little.
Store-bought mobiles range from $15 (basic plastic ones from Amazon) to $150+ for handcrafted wooden versions on Etsy. The mid-range sweet spot is $30–$60 for something that looks beautiful and holds up well.
DIY mobile — it’s easier than you think:
- Buy a 12-inch wooden dowel ($2) from a craft store.
- Cut three or four shorter dowels at different lengths.
- Tie them together with string.
- Hang felt shapes, paper cranes, wooden beads, or cardstock clouds from the bottom.
- Hang the whole thing from a ceiling hook with fishing line.
Total cost: $5–$10.
For newborns, black and white contrast is more stimulating than color — their vision is limited for the first few months. A simple black-and-white geometric mobile can be both stylish and developmentally appropriate.
Once your baby is around 3 months and starts reaching, check that the mobile is high enough that they can’t grab it from the crib.
9. Create a Reading Nook with Floor Cushions

Reading nooks aren’t just for big kids.
Setting up a small reading corner in the nursery — even if it’s just two floor cushions and a small shelf — creates a routine and a habit from day one. Where you read with your child matters. A dedicated, cozy corner makes it feel special.
You don’t need much space. A 4×4 foot corner is enough.
What you need:
- 1–2 large floor cushions or a kids’ bean bag ($20–$40 at IKEA or Target)
- A low bookshelf or a wall-mounted picture ledge for books
- A small basket for stuffed animals or puppets
DIY cushion option: Buy a large pillow insert from IKEA and sew (or iron-on hem tape) a cover from a half yard of fabric. Cost: under $15.
Face board books outward on the shelf so your baby and toddler can see the covers. Research consistently shows that kids read more when they can see book covers rather than spines.
Add a small, dimmable lamp nearby for nighttime reading — warm light keeps the mood calm and signals wind-down time.
Keep this corner tidy. When the reading nook looks inviting, kids (and parents) actually use it. A small basket with a lid keeps stuffed animals from taking over the space.
10. Hang Fabric Wall Art for Softness and Warmth
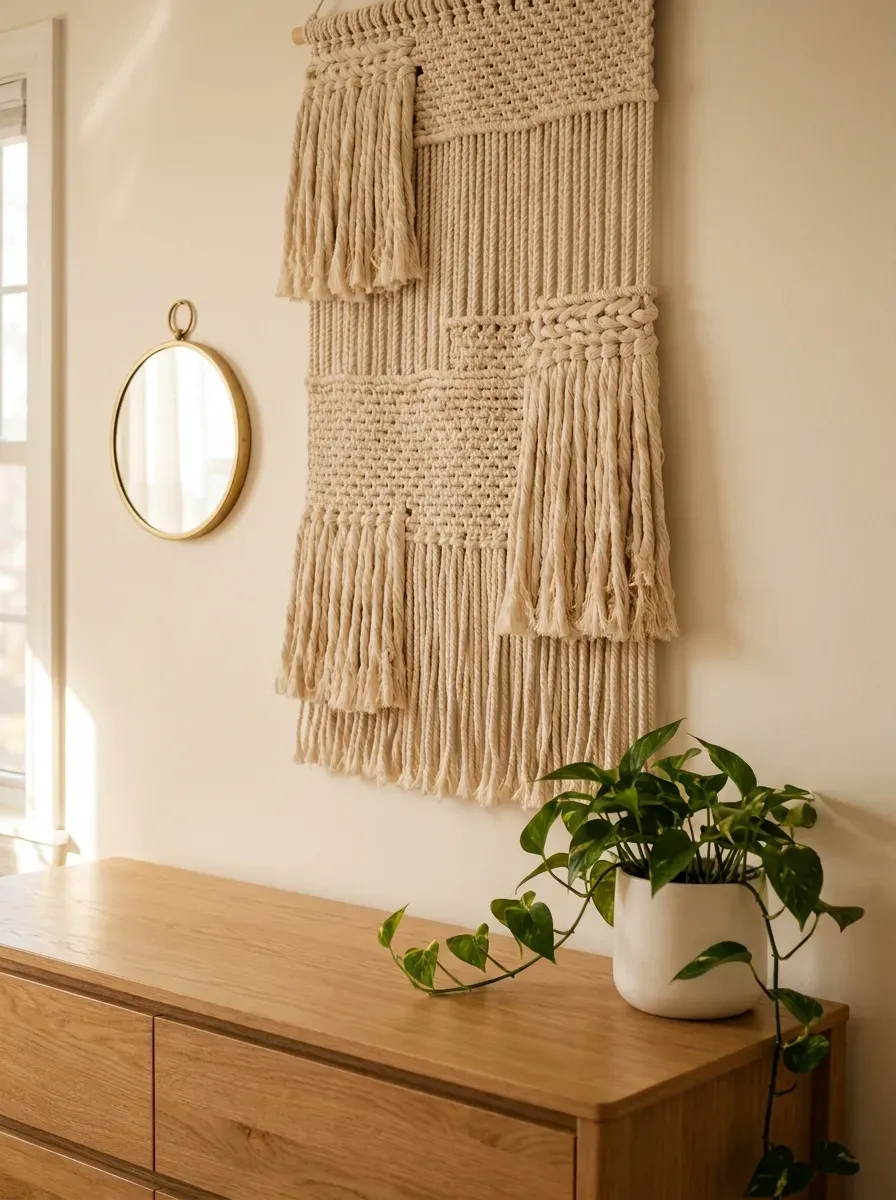
Fabric brings warmth that paint and wood simply can’t.
Fabric wall art — macramé, woven tapestries, quilted panels, or embroidered hoops — adds texture and softness to a nursery wall. It also absorbs sound, which can help with acoustics in a room where a baby is sleeping.
Macramé is the most popular choice right now. You can find beautiful handmade pieces on Etsy for $30–$80. For a large statement piece, expect to spend $60–$120.
DIY embroidery hoop art: This is a beginner-friendly project that takes about two hours.
- Stretch a piece of fabric (linen, muslin, or felt) over a 10-inch embroidery hoop.
- Use fabric markers or embroidery thread to add a simple design — a moon, an animal outline, your baby’s initial.
- Trim excess fabric and hang with a ribbon.
Total cost: $5–$10 per hoop.
You can group three or four embroidery hoops in different sizes into a small gallery arrangement — it looks intentional and charming.
Alternative: Frame a piece of fabric with a beautiful print. African mudcloth, Liberty floral cotton, or a vintage handkerchief can all become stunning wall art in a standard frame.
Fabric art is also easy to swap out as your child grows — no holes in the wall, no repainting required.
11. Use a Dresser as a Changing Table

The dedicated changing table is one of the most overhyped pieces of baby furniture.
Here’s the reality: a standard changing table is useful for about 18 months. After that, it takes up space and does nothing.
A dresser with a changing topper is a far smarter choice. You get all the functionality of a changing table, plus a piece of furniture that stays useful for years.
What you need:
- A sturdy dresser with a flat top (IKEA’s HEMNES or TARVA lines work perfectly)
- A contoured changing pad ($20–$35)
- A waterproof changing pad cover ($8–$15)
The HEMNES dresser is a popular choice because it’s the right height for standing diaper changes without back strain.
Use the top two drawers for diaper supplies: diapers, wipes, diaper cream, and a change of clothes. Keep everything within arm’s reach — you can never take both hands off a baby on a changing table.
Wicker or fabric bins fit nicely in dresser drawers and keep things organized. Label them with a label maker if multiple caregivers are involved.
This setup costs the same or less than a purpose-built changing table, and when your baby is done with diapers, you still have a beautiful dresser.
12. Add a Star or Cloud Projector for Ambiance
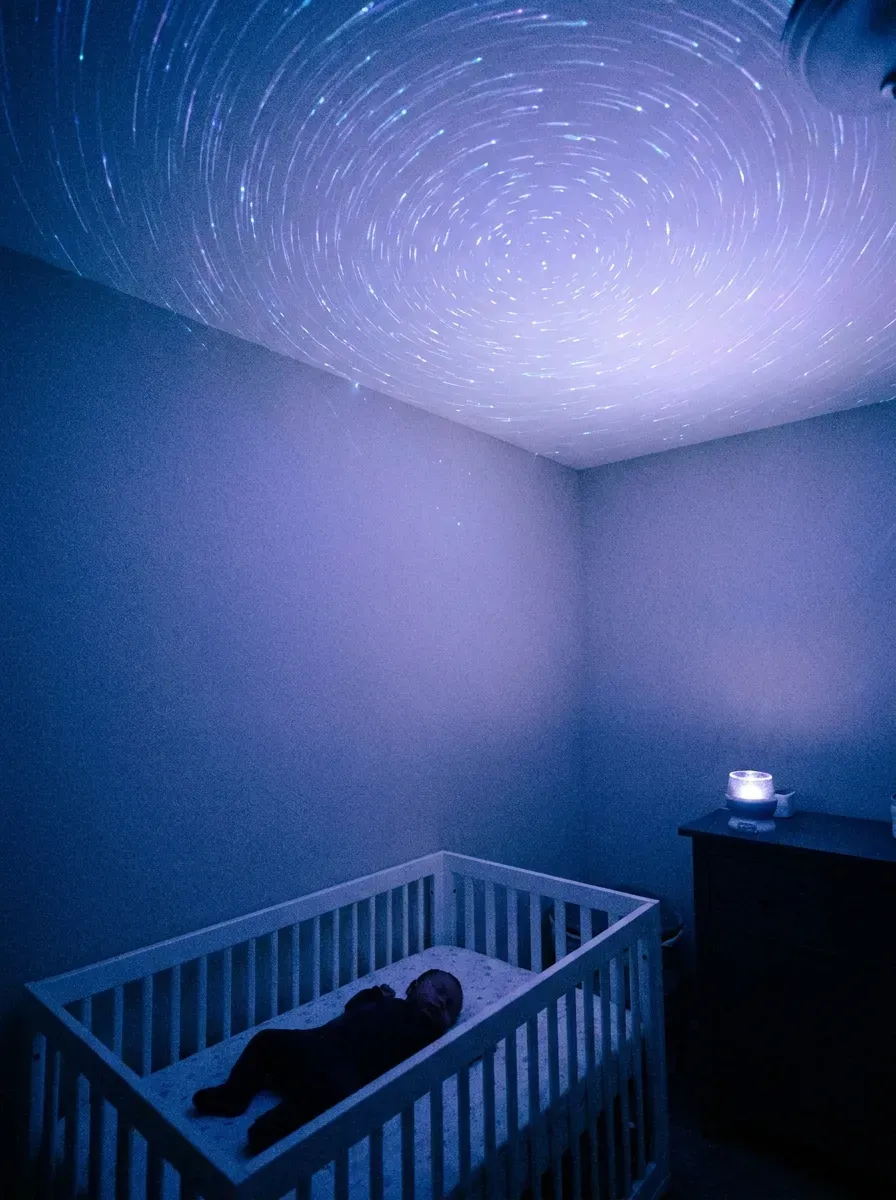
Star projectors feel like magic. And they genuinely help some babies sleep.
A ceiling star projector casts moving lights — stars, clouds, moons — across the ceiling and walls. Many babies find the slow movement mesmerizing and calming at sleep time.
They’re also just beautiful. When the light show comes on, even tired parents pause to look up.
Budget options start at $15–$25 on Amazon. The most popular entry-level model is the Homestarlab or similar budget versions. They work well.
Mid-range projectors ($40–$70) often include:
- Color-changing options
- Rotating movement
- Built-in white noise or lullabies
- Timer functions
What to look for:
- Auto-shutoff (so you’re not getting up to turn it off after baby falls asleep)
- Remote control or app compatibility
- Volume control if it has a sound function
Place the projector on a high shelf, dresser, or nightstand pointed at the ceiling. Most have a wide beam angle that fills the whole room.
White noise and soft light together create a powerful sleep association. Many parents report that just turning on the projector is enough to signal to the baby that it’s time to sleep.
13. Use Peel-and-Stick Wall Decals for Easy Decoration

Wall decals are the fastest way to add personality to a nursery wall.
They go up in minutes, come off cleanly, and cost a fraction of what wallpaper does. They’re perfect for renters, for people who change their minds a lot, or anyone who wants a quick nursery update.
What to buy:
- Check Etsy for custom, illustrated decals — many sellers offer beautiful hand-drawn animals, botanicals, and name-letter decals
- Amazon has large sets for $10–$20 that include 30–50 individual pieces
- Pottery Barn Kids and Minted have higher-end options with more refined illustration styles
Application tips:
- Clean the wall with a dry cloth first — dust causes decals to peel.
- Start from the top of the arrangement and work down.
- Use a credit card to smooth out air bubbles as you apply.
- Step back every few decals to check the overall layout.
Mix and match: You don’t have to use the whole set at once. Use half the set now and add more as the room develops.
Popular themes: woodland animals, jungle animals, clouds and stars, hot air balloons, rainbows.
For a cohesive look, stick to one theme and one color family rather than mixing too many styles on the same wall.
14. Layer Lighting for Function and Mood

One overhead light is rarely enough in a nursery. Layered lighting changes everything.
Think about the different moments in the nursery: bright light for playtime and diaper changes; dim, warm light for feeds and wind-down; very low nightlight glow for nighttime checks.
Three lighting layers to plan for:
- Overhead light — your main light source. A ceiling fan with a light fixture is practical in warmer climates.
- Task lighting — a lamp near the glider for reading and feeding.
- Nightlight — a very dim, warm-toned light for overnight checks without fully waking the baby.
Budget tips:
- Plug-in dimmer switches ($10–$15) can turn any standard lamp into a dimmable light source.
- Amber or red-toned nightlights are best for babies — they interfere the least with melatonin production and don’t fully wake a sleeping baby during checks.
- IKEA’s SPOKA and SOLBO nightlights are popular, affordable choices.
String lights create a soft, warm glow when draped along a shelf or behind a canopy. LED string lights use minimal electricity and stay cool.
Smart bulbs (Philips Hue, IKEA TRÅDFRI) let you control brightness and color temperature from your phone — genuinely useful at 3am when you’re trying not to wake anyone.
15. Personalize with the Baby’s Name in Wall Letters

A baby’s name on the wall is one of the most personal touches a nursery can have.
It’s also one of the most affordable. Wooden letters from a craft store cost $1–$3 per letter. You paint them yourself in whatever color works with your room, and they look custom.
DIY options:
- Unpainted wood letters from Hobby Lobby, Michaels, or Amazon
- Paint with leftover wall paint for a monochromatic look
- Or use chalk paint for a matte, textured finish
- Add gold leaf paint for a luxe effect — a small jar costs $4–$6
Other letter styles:
- Neon acrylic name signs (available on Etsy for $30–$80)
- Fabric-stuffed letters you sew yourself
- Framed name prints (just buy a digital file on Etsy and print it locally)
- Woven macramé name hangings
Placement ideas:
- Centered above the crib
- Along a shelf at varying heights
- As part of a gallery wall
If you’re not sure about committing to wall letters, command strips and adhesive putty can hold lightweight letters without permanent installation.
Keep the style consistent with the rest of the room. If the room is minimalist and neutral, go with plain white letters. If it’s more playful and colorful, go bold.
16. Add Greenery with Safe, Non-Toxic Plants

Plants make a nursery feel alive without any extra decoration.
The right plant brings color, texture, and a sense of calm to the space. Just choose carefully — some common houseplants are toxic to children.
Safe plants for a nursery:
- Spider plants
- Boston ferns
- Parlor palms
- Prayer plants
- Calatheas
- Peperomia
Avoid: Pothos, ZZ plants, and philodendrons are popular but mildly toxic if chewed on.
Placement matters: Keep plants on high shelves or in hanging planters out of reach of curious hands. Once your baby starts pulling up, floor-level plants are a hazard.
If you don’t have a green thumb: High-quality faux plants have gotten extremely convincing in recent years. Amazon and IKEA both carry realistic-looking artificial plants that require zero maintenance — ideal for a sleep-deprived new parent.
A single large plant in a beautiful pot can be as effective as five smaller ones. A fiddle leaf fig or a large calathea in a white or terracotta pot creates a real statement corner.
For a budget start, spider plants are nearly impossible to kill, available at most garden centers for $5–$10, and they actually clean the air.
17. Use Baskets and Bins for Stylish Storage

Clutter is the enemy of a calm nursery. Baskets are the solution.
When baby items have a home, the room stays manageable — even when you’re running on three hours of sleep. Wicker, seagrass, and fabric bins look good AND do a job.
What to store in baskets:
- Rolled blankets and swaddles
- Extra diapers and wipes
- Burp cloths and bibs
- Stuffed animals
- Board books
Where to find them affordably:
- IKEA (NOJIG and STORSTABBE lines)
- Target’s Threshold collection
- Dollar Tree — small baskets for $1.25 each
- Thrift stores (strip old lids, bleach if needed, they clean up beautifully)
Pro organizing tip: Don’t over-sort. You don’t need 15 separate bins. Three to five clearly defined categories (feeding supplies, diaper supplies, toys, clothes) is plenty for a nursery.
Label baskets with a label maker, handwritten tags, or simple chalk labels. It helps other caregivers find things without asking.
Stackable fabric bins work well in closets and on shelves. IKEA’s SKUBB boxes are a popular, inexpensive option.
Choose a consistent color or material for your baskets — all wicker, or all white fabric, or all seagrass. Mixing too many styles creates visual noise in an already-busy room.
18. Hang a Dreamy Macramé Mobile or Wall Hanging
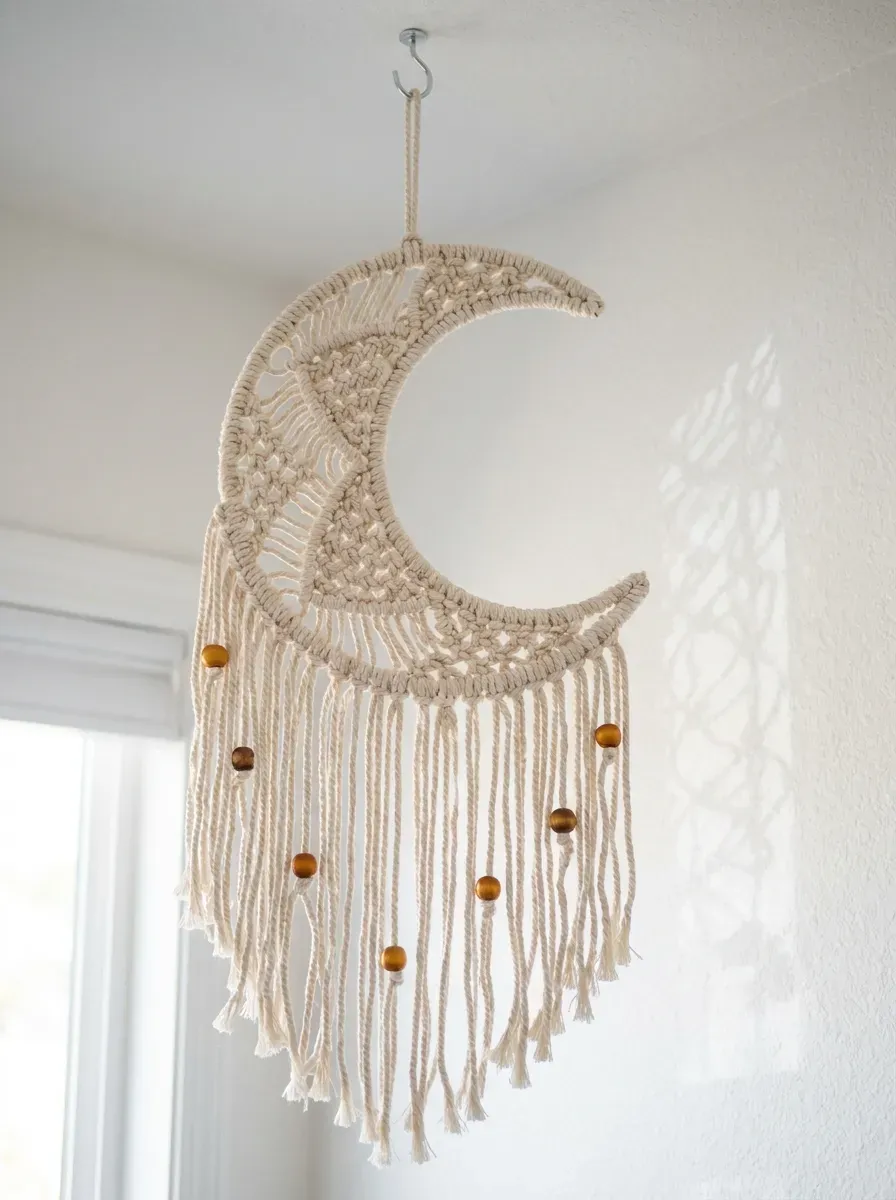
Macramé has made a full comeback — and the nursery is one of the best places for it.
A macramé mobile or wall hanging adds texture, warmth, and a handmade quality that you simply can’t get from printed art or plastic decor. It also photographs beautifully, which matters when you’re taking a thousand pictures of your newborn.
Where to buy:
- Etsy is the best source for handmade macramé — look for sellers with clear photos and good reviews
- Prices range from $25 for small pieces to $120+ for large, elaborate wall hangings
- IKEA sometimes carries simple woven wall art in the $20–$30 range
DIY macramé is very learnable. A basic wall hanging requires only:
- A wooden dowel ($2–$3)
- 3mm natural cotton rope ($8–$12 for a 100-foot spool)
- A YouTube tutorial (there are hundreds of beginner-level ones)
You can make a simple fringe wall hanging in an afternoon, even with no prior experience.
Placement: A large piece behind the crib works well as a backdrop. A smaller piece on a side wall adds balance without competing with the main art.
Earth tones — natural white, warm beige, soft terracotta — work with almost any nursery palette and feel timeless rather than trendy.
19. Invest in Blackout Curtains for Better Sleep

Dark room. Better naps. Every parent learns this fast.
Blackout curtains are one of the highest-impact, most practical purchases you can make for a nursery. A baby who sleeps in a dark room naps longer and wakes less during the night — and that matters more than almost any other nursery decision.
What to look for:
- “True blackout” or “100% blackout” rating — not just “room darkening”
- Grommet-top curtains are the easiest to hang
- Floor-to-ceiling panels block more light than café-length panels
- Lined or layered curtains work better than single-layer
Brands that work well:
- IKEA’s MAJGULL ($30/pair) — one of the best-reviewed budget blackout options
- Amazon Basics blackout curtains ($20–$35/pair)
- Eclipse brand (widely available at Target and Walmart)
Gap-sealing trick: Most curtain rods leave a gap at the sides and top where light sneaks in. Use a tension rod inside the window frame plus a regular rod outside the frame to double up and close those gaps.
Alternatively, Blackout EZ window covers are adhesive panels that stick directly to the glass — no rods, no curtains, completely portable. They’re perfect for travel or rental situations.
Good sleep hygiene starts in the first weeks, and a dark room is one of the easiest tools to use.
20. Create a Soft, Inviting Tummy Time Spot

Tummy time is a daily part of life with a newborn. Make the space work for it.
Babies spend a lot of time on the floor in those early months — building neck strength, developing their senses, and exploring their environment. A dedicated, inviting tummy time spot makes the routine easier and more enjoyable for both of you.
What you need:
- A firm but cushioned play mat — foam or quilted cotton works well
- A baby gym with hanging toys (many come as a set with the mat)
- Black-and-white contrast cards propped nearby — newborns respond strongly to high contrast
Budget options:
- IKEA’s BJUDNING activity mat is under $30
- Amazon has a wide range of foam mats with baby gyms starting around $35–$50
- You can DIY contrast cards by printing high-contrast patterns from free websites and laminating them at an office store for about $5
Place the tummy time area near a window for natural light — babies love looking at the light and shadows.
Keep it at floor level. A dedicated spot that’s always ready makes it easier to do a few minutes of tummy time consistently rather than setting up and breaking down every time.
As your baby grows, the same mat becomes their play area. Good quality play mats get used for a year or more.
21. Add a Personalized Night Light
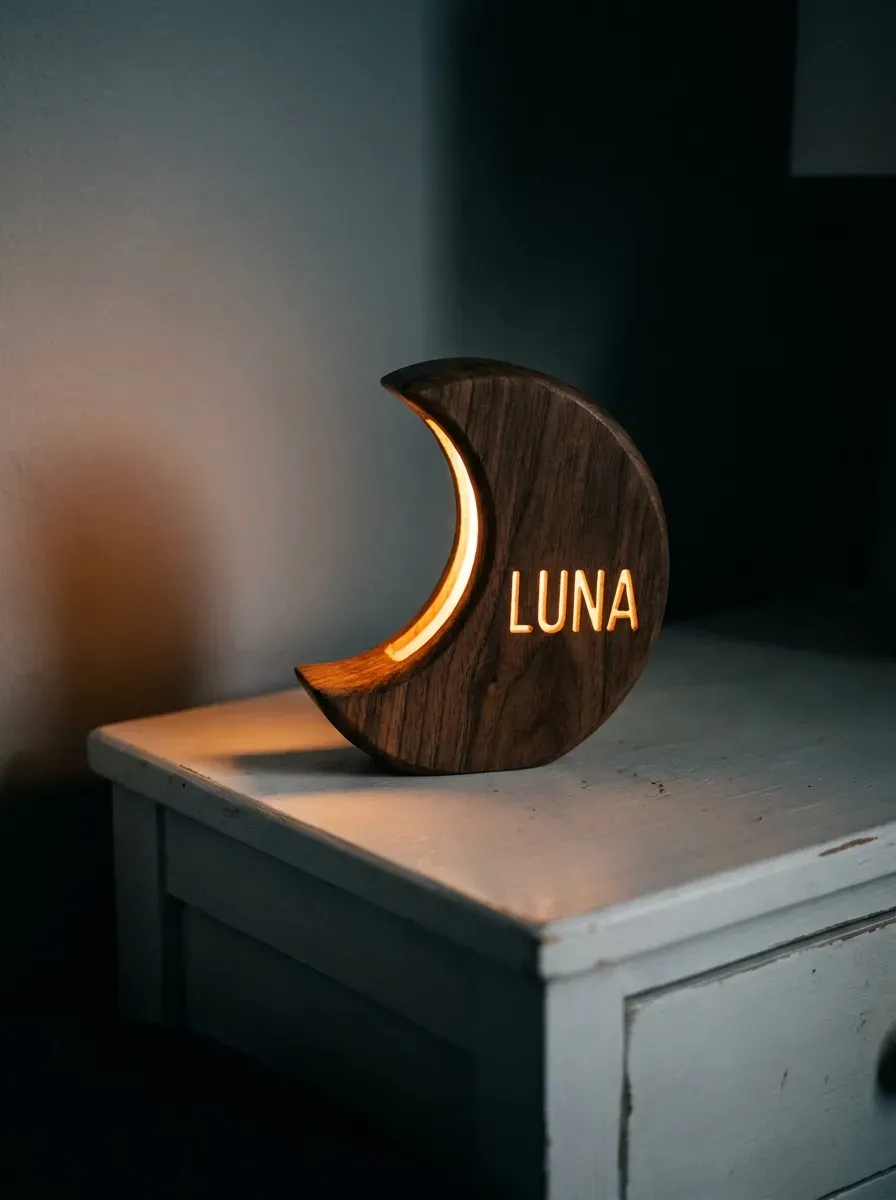
A nightlight does more than keep the dark away. It becomes part of the bedtime ritual.
The right nightlight emits warm amber or red-toned light — not blue or white. Blue-spectrum light suppresses melatonin and makes it harder for babies (and adults) to fall asleep. Amber light doesn’t.
Personalized nightlights are a popular nursery touch. You can find wooden name lights and custom shape lights on Etsy for $20–$50. They’re also a wonderful gift idea if someone asks what to buy.
Budget alternatives:
- IKEA’s SPOKA nightlight ($10) — it’s soft, simple, and rechargeable
- Amazon’s plug-in amber nightlights ($5–$10 for a 2-pack)
- Battery-powered push lights that click on easily during nighttime feeds
Placement: On the nightstand, changing table, or plugged into a low outlet. You want enough light to see what you’re doing during a diaper change, but not so much that it fully wakes the baby.
Some parents put a small nightlight in the closet — it makes finding the right size onesie at 3am much easier.
A dimmer switch or a smart bulb controlled by your phone is another route — you can set it to the exact brightness level you want without fumbling for switches in the dark.
22. Style a Small Book Corner for Early Reading

The earlier you surround a baby with books, the better. And the setup matters.
A book corner — even just a single ledge at floor level with five or six books facing forward — creates an invitation to read. When kids (and babies) can see book covers, they’re more likely to reach for them.
What works:
- Low wall-mounted picture ledges (IKEA MOSSLANDA, $10–$15)
- Small floor-standing book displays
- A simple crate or tray on the floor with books propped cover-out
Start small. Six to ten board books at a time is enough. Rotate them every few weeks to keep things interesting — babies respond to novelty just like older kids.
Where to get affordable board books:
- Thrift stores — board books hold up beautifully and can be wiped clean
- Library sales
- Buy Nothing groups on Facebook
- Mama Bear app and ThriftBooks online
Display height matters. Position books at your baby’s eye level when they’re sitting or crawling. That means mounting ledges very low — about 18 inches from the floor for a crawling baby.
As your child grows, raise the ledge slightly. A reading corner that adapts as your baby develops is one of the most lasting additions to a nursery.
23. Use a Dresser Mirror to Open Up the Space
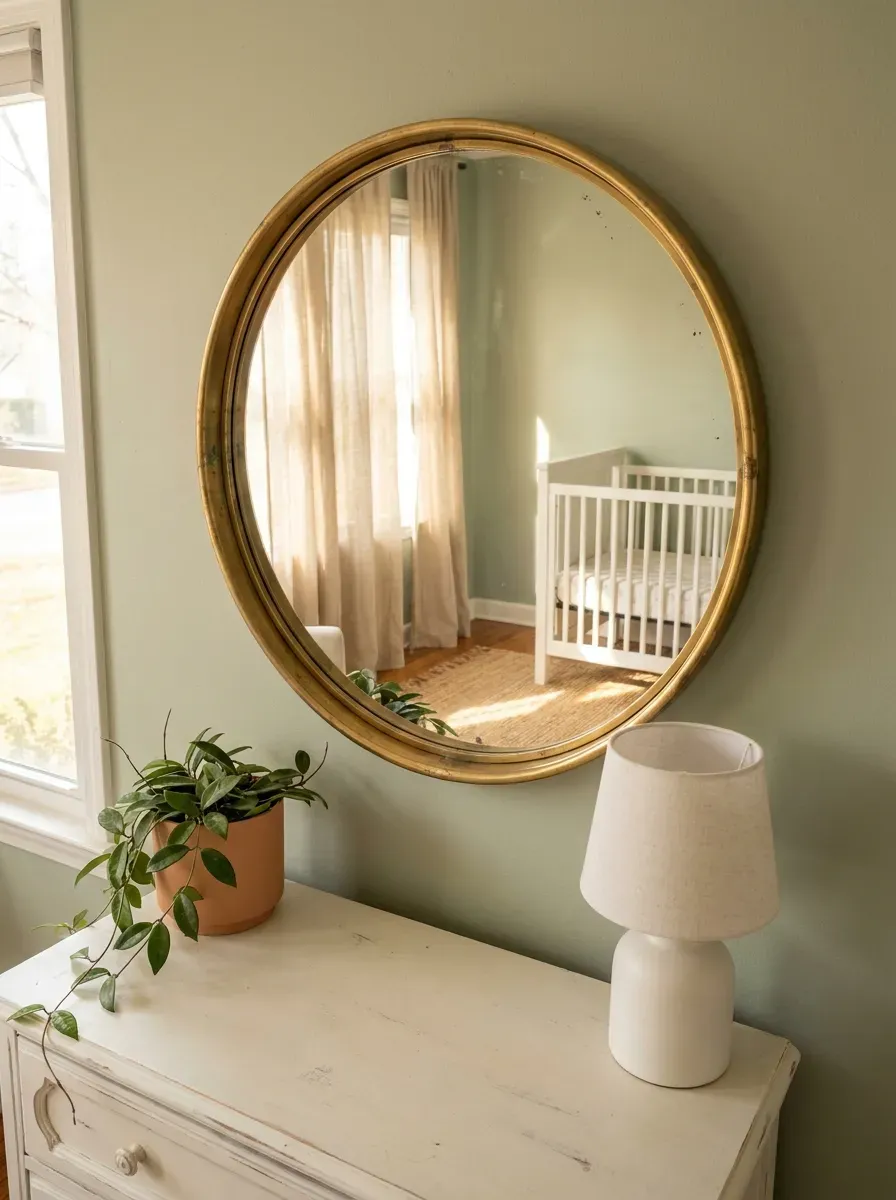
Mirrors are a decorator’s trick for making small rooms feel larger.
In a nursery, a mirror on the wall reflects light and creates the visual impression of more space. It also gives your baby something fascinating to look at during floor time — babies are captivated by their own reflection, and it’s a genuinely good developmental activity.
Style options:
- A round brass or gold-framed mirror ($30–$80 at Target, H&M Home, or Amazon)
- An arched mirror leaning against the wall (not hung — keep it secured safely)
- A sunburst mirror for a more decorative statement
Safety note: Any mirror in a nursery should be mounted securely on the wall using proper wall anchors — not leaned on furniture a baby could pull over. Anti-tip furniture straps are a good additional measure.
Budget option: Thrift stores and Facebook Marketplace regularly have mirrors for $10–$30. You can repaint the frame with spray paint ($4–$6) to match your room.
For a mirror at baby’s eye level (great for crawlers and floor time), use a full-length mirror secured flat against the lower half of a wall — it’s a classic Montessori setup and babies genuinely love it.
Avoid positioning mirrors where direct sunlight will reflect glare into the baby’s eyes during nap time.
24. Make a Custom Cloud Mobile with Cotton Batting
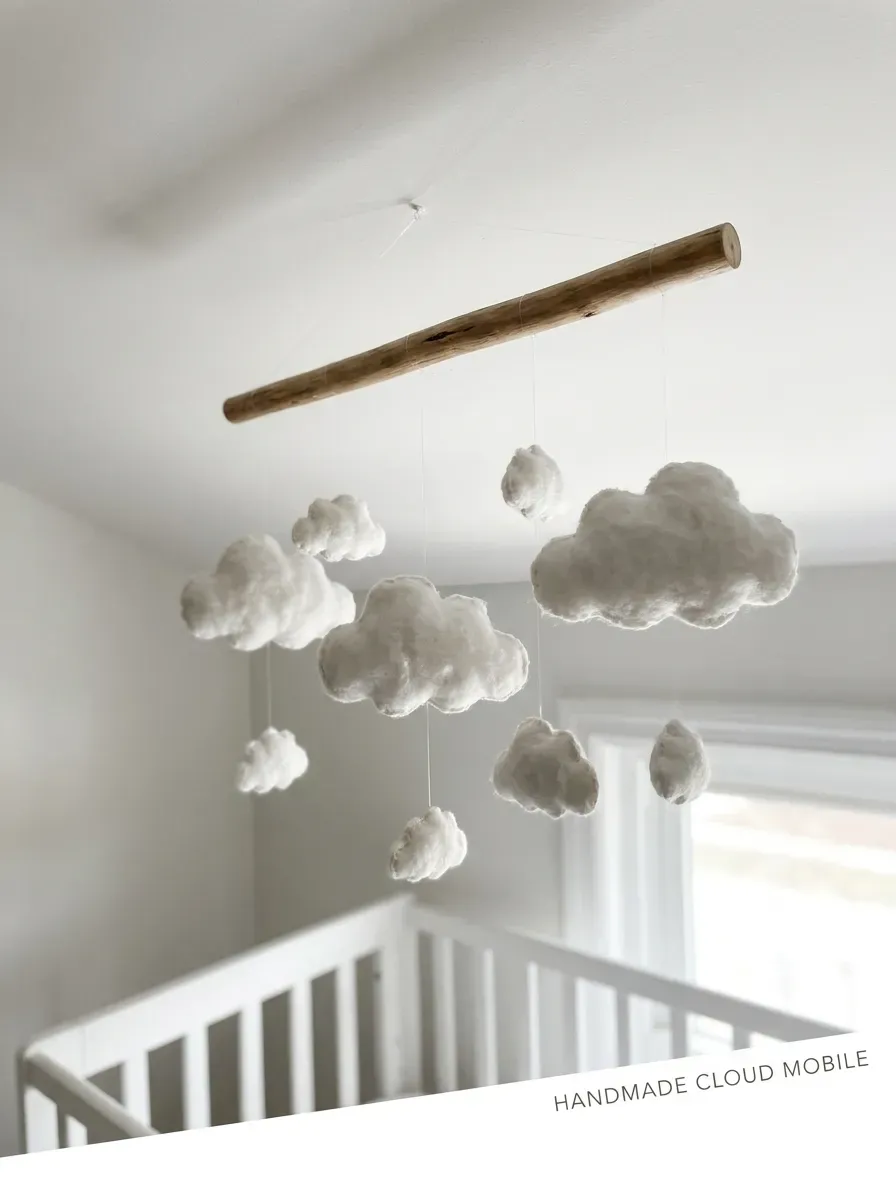
This might be the most beginner-friendly DIY in the nursery world.
A cloud mobile made from cotton batting (the fluffy filling used in quilts) is soft, lightweight, and takes about 30 minutes to make. It looks expensive and handmade — because it is.
What you need:
- A bag of polyester fiberfill or cotton batting ($5–$8 at a craft store)
- Fishing line or clear thread
- A small embroidery hoop or wooden dowel to hang from
- Hot glue gun or needle and thread
How to make it:
- Pull apart chunks of batting and loosely shape them into cloud puffs.
- Pinch the base and wrap a few times with thread to create a more defined shape.
- Attach a length of clear fishing line to each cloud.
- Tie the clouds to the hoop or dowel at varying heights.
- Hang from a ceiling hook.
Total cost: under $10.
Make 5–8 clouds of varying sizes for a full mobile. You can also add small felt stars or paper cranes between the clouds.
Color options: Pure white is the most popular, but you can tint batting with diluted watercolor paint for soft pastel clouds.
This mobile photographs beautifully and is often mistaken for something that cost $80 on Etsy.
25. Layer Textures with a Woven or Knit Throw Blanket
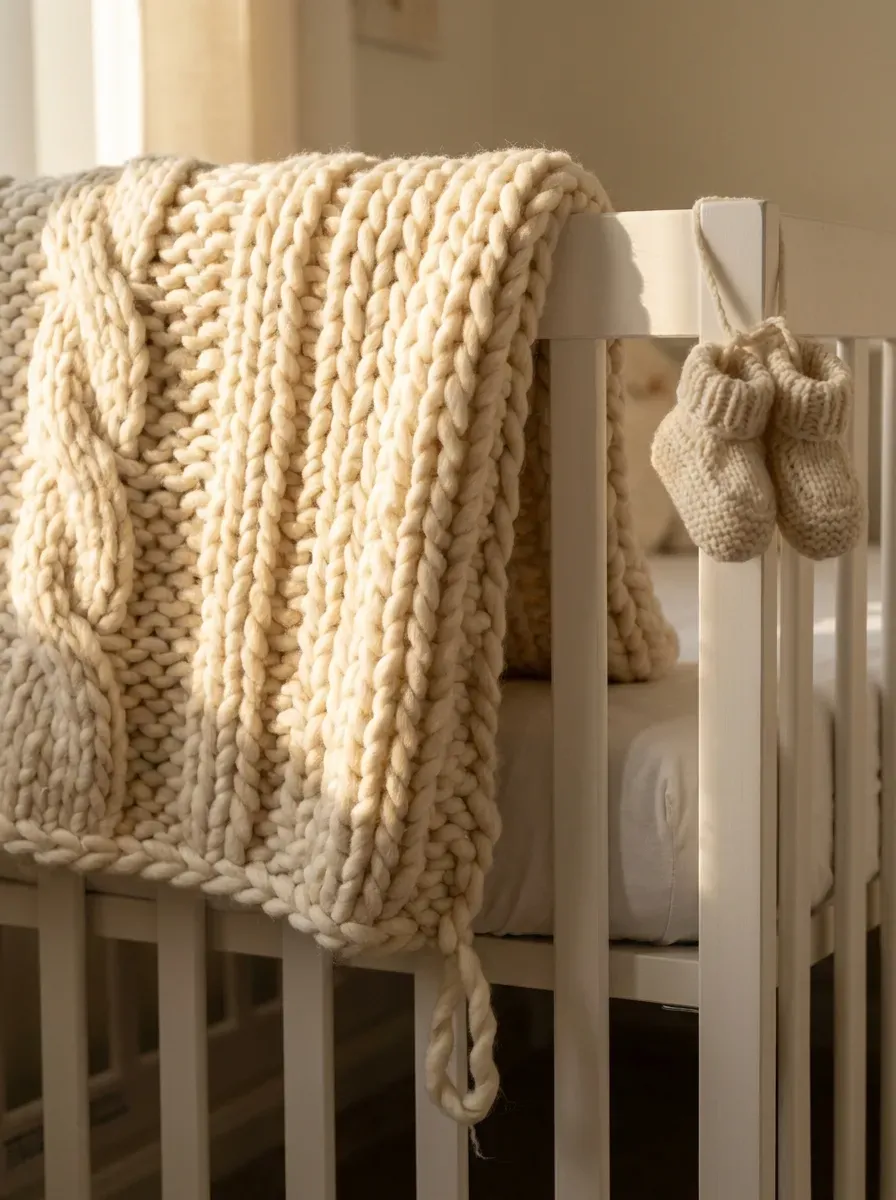
Texture is what makes a room feel designed rather than decorated.
A beautiful throw blanket draped over the crib rail, the glider arm, or the edge of a shelf adds softness and warmth to a nursery without being permanent or expensive.
Textures that work well:
- Chunky knit blankets (extremely popular and cozy-looking)
- Waffle-weave cotton throws
- Muslin quilts in neutral tones
- Velvet or boucle fabric throws
Where to find affordable ones:
- IKEA’s SÖTRÖNN and INGABRITTA throws ($8–$20)
- Target’s Threshold line
- TJ Maxx and HomeGoods are excellent for under-$30 throws that look expensive
- Etsy sellers who make handmade chunky knit blankets ($30–$60)
Practical note: The throw on the crib rail is for decor only — it should never be inside the crib with a sleeping baby. Safe sleep guidelines call for a completely bare crib mattress.
Draping a beautiful blanket on the glider or rocking chair is both decorative and functional — you’ll reach for it during those cold-night feeds.
DIY option: Chunky arm-knitting is genuinely beginner-level. You can make a basic knit throw blanket in 2–3 hours using your arms as needles. YouTube tutorials walk you through it step by step. Yarn for one blanket costs about $25–$40.
26. Set Up a Simple, Functional Diaper Station
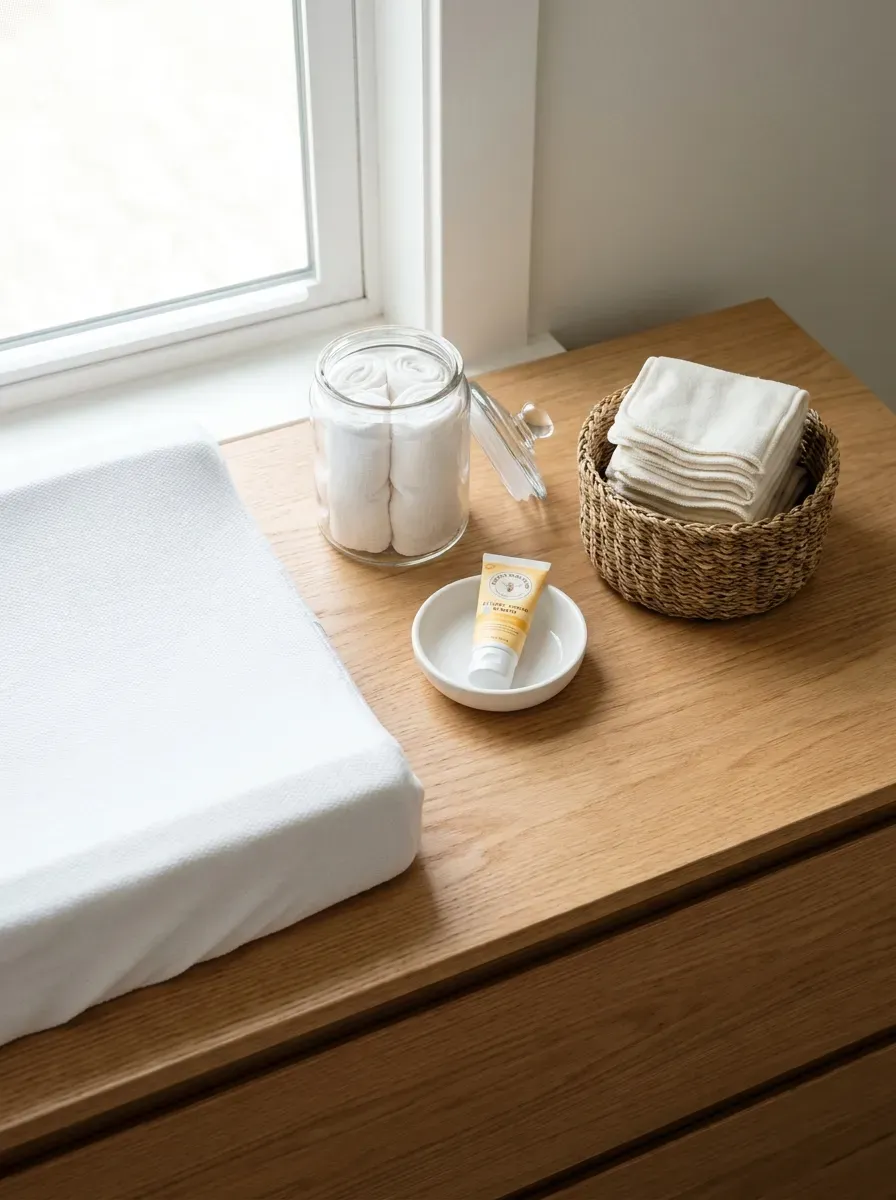
Function over form — but you can have both.
A diaper station that’s organized and within arm’s reach makes diaper changes faster, cleaner, and less stressful. It also just looks better when everything has a dedicated spot.
The essentials to keep at the station:
- Diapers stacked within reach (not in a closed drawer)
- Wipes in a dedicated wipes warmer or small basket
- Diaper rash cream or ointment
- A few extra onesies for blowout changes
- A small trash can with a lid nearby
Stylish storage that works:
- A small lazy Susan keeps supplies organized and easy to rotate
- Apothecary jars or glass containers for cotton balls and gauze pads
- A small labeled tray for creams and ointments
Budget setup idea: A clear acrylic lazy Susan from Amazon ($12–$18) on top of the dresser organizes everything at a spin. No extra furniture required.
Cloth diaper families: Use a small wet bag hanging from the dresser handle for used diapers. A large wicker hamper with a liner nearby handles the overflow.
The more streamlined the station, the more likely everyone (partners, grandparents, babysitters) will be able to use it independently without asking questions.
Label everything clearly if multiple people are caring for the baby. It reduces stress for everyone.
27. Create a Cozy Nesting Spot with Floor Pillows

Some of the best moments in the first year happen on the floor.
Tummy time, first giggles, rolling over, sitting up, learning to crawl — all of it happens at floor level. A cozy cluster of oversized floor pillows gives parents a comfortable spot to be down there too.
Why this works: Large floor cushions are versatile, moveable, and inexpensive. They make the floor feel intentional and inviting rather than just an afterthought.
Where to find them:
- IKEA’s DJUNGELSKOG and DIHULT lines
- Target’s Opalhouse collection has beautiful boho-style floor cushions
- Amazon for affordable large foam-filled options
- Thrift stores — cushions are easy to recover with a basic sewing machine or even iron-on hem tape
DIY recovering tip: Buy an inexpensive pillow insert and make a cover from a half yard of linen or cotton canvas. A simple envelope-style cover requires no zipper and can be sewn by a beginner in under an hour.
Choose fabrics that are machine washable — floor pillows in a nursery will need cleaning.
Arrangement tip: Three cushions in a loose triangle or curved arc looks natural and welcoming. Two can feel too symmetrical and rigid.
This setup doubles as an adult reading spot, a breastfeeding area, and — as your baby grows — the softest crash-landing zone in the house.
Conclusion
Building a nursery doesn’t have to be overwhelming or expensive. The ideas in this list cover a wide range — from a $5 DIY cloud mobile to a thoughtfully chosen glider that will last for years. What matters most is creating a space that feels calm, personal, and functional for your family’s real life. Start with the basics: a safe sleep setup, good lighting, and simple storage. Then layer in personality with art, texture, and small touches that reflect who you are. Pick three or four ideas that excite you and actually fit your budget, and start there. A nursery built slowly and intentionally — rather than all at once in a panic — often turns out to be the most beautiful one. Your baby won’t remember the decor. But you will, and the effort you put in now creates a warm, welcoming space you’ll both love spending time in.