
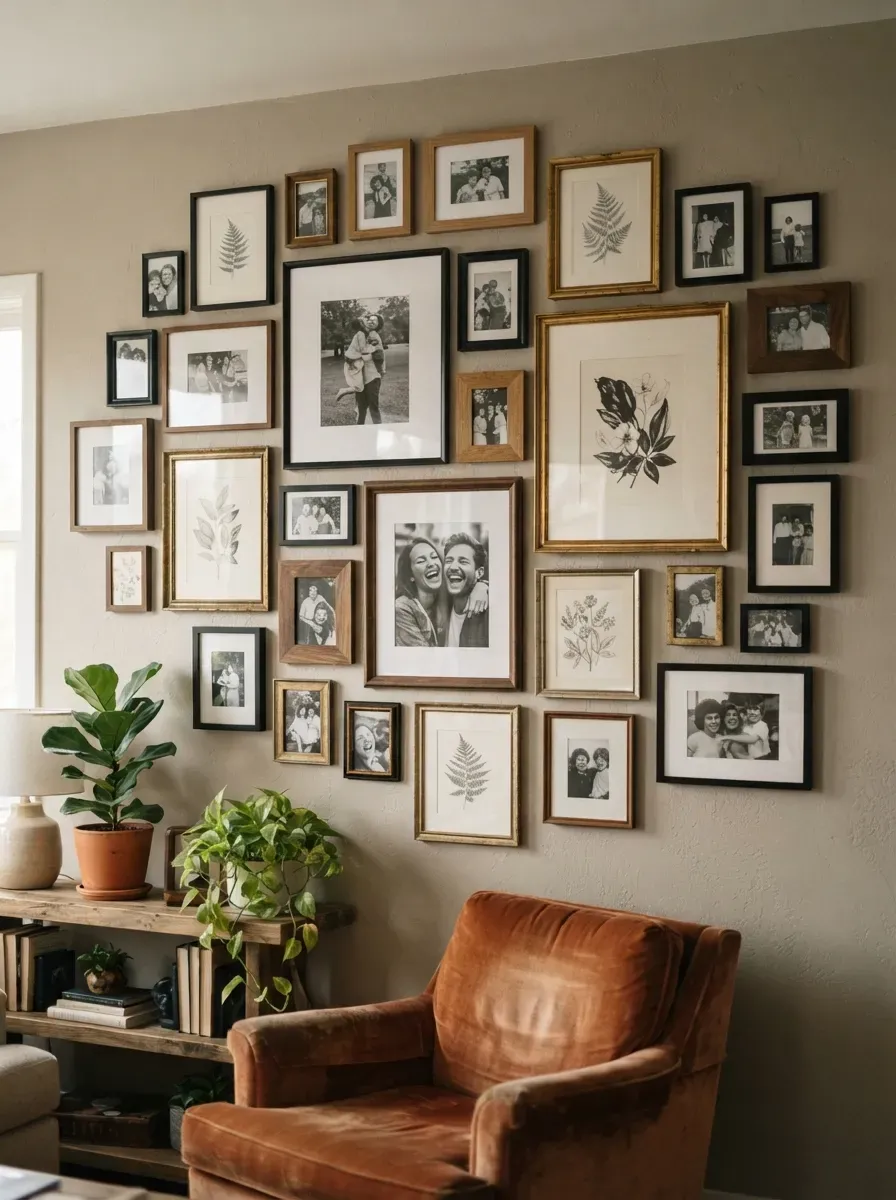
Your living room walls are the largest canvas you own — and most people leave them completely blank. Whether you are renting a small apartment or settling into your forever home, the right wall treatment can make the whole room feel pulled together, personal, and worth showing off. You don’t need a designer budget or weeks of renovation time. From peel-and-stick wallpaper to thrifted gallery frames, there are dozens of ways to turn a flat, forgettable wall into something that actually makes guests stop and stare. Below are 25 ideas that range from weekend DIYs to simple styling swaps — all chosen because they work in real homes, for real budgets.
- Create a Gallery Wall with Mismatched Frames
Gallery walls work because they fill space without feeling heavy. The trick is mixing frame sizes and finishes — don’t match everything perfectly. Pull frames from thrift stores, dollar stores, and IKEA. Paint some black, some white, some gold. Before you hammer a single nail, lay the frames on the floor. Arrange them until the overall shape feels balanced. Take a photo of the layout on your phone. Use that as your guide when hanging. Budget tip: Frames from Goodwill often cost $1–$3 each. A gallery wall of 15 frames can be done for under $30. What goes inside? You have options. Print family photos at Walgreens for under $1 each. Download free art prints from sites like Unsplash or the Art Institute of Chicago’s digital collection. Cut pages from old calendars, maps, or coffee table books. The wall doesn’t have to be symmetrical. Some of the best gallery walls are loose, organic arrangements that grow over time. Start with three or four pieces and add as you find things you love. Pro tip: Use painter’s tape to mock up the layout on the wall before committing. Move the tape pieces around until the spacing feels right — then hang.
- Try Peel-and-Stick Wallpaper on One Accent Wall
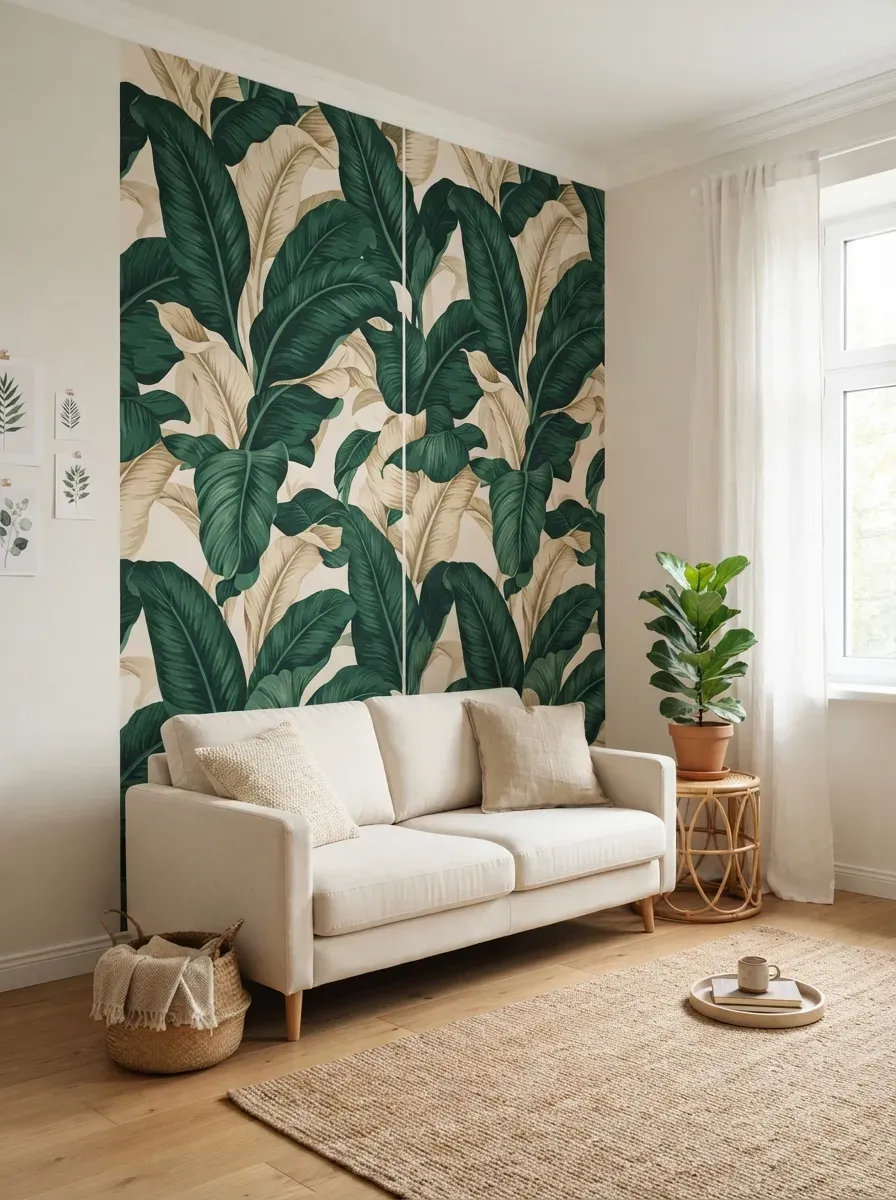
Renters, this one is for you. Peel-and-stick wallpaper has come a long way. The patterns look real, it goes up without tools, and it comes down without damaging the wall. Most brands work on smooth, painted drywall without leaving residue. Start with one wall. The wall behind your sofa or your TV works perfectly. A single bold pattern on one wall reads as intentional — not overwhelming. Popular patterns right now: large-scale botanicals, geometric arches, textured grasscloth looks, and vintage-inspired florals. How to apply it without bubbles: • Cut each panel about 2 inches longer than you need. • Start at the ceiling, peel a few inches of backing, and press it flat. • Use a credit card or squeegee to smooth as you go. • Work slowly, section by section. Budget pick: Peel-and-stick wallpaper runs $25–$50 for a pack that covers one standard accent wall. Brands like RoomMates, NuWallpaper, and Chasing Paper all offer good options. The removal process is just as easy. Peel slowly from a corner, pulling at a low angle to keep the wall paint intact. This is one of the highest-impact, lowest-commitment wall upgrades you can make.
- Mount a Large Statement Mirror
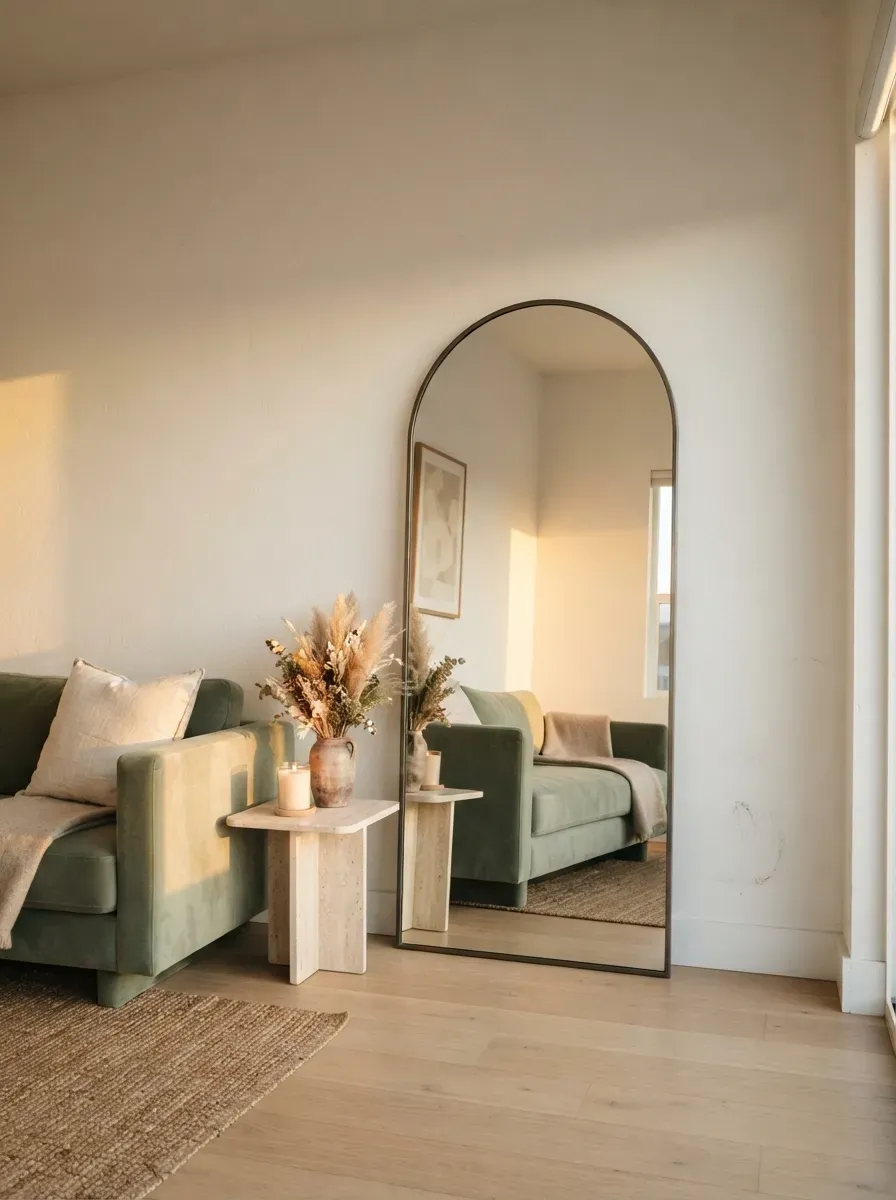
A large mirror doesn’t just decorate — it changes the room. Mirrors bounce light around and make a space feel twice as big. If your living room is small or dark, a big mirror is one of the fastest fixes available. You don’t need to hang it. Leaning a tall mirror against the wall is a popular styling choice right now. It looks relaxed and intentional, and you skip the hardware entirely. Where to put it: • Behind the sofa to expand the visual depth of the room • Across from a window to reflect natural light • Next to a lamp to spread warmth in a dim corner Budget options: • IKEA NISSEDAL or HEMNES mirrors: $30–$80 • HomeGoods and TJ Maxx usually carry large mirrors at 50–70% below retail • Facebook Marketplace often has floor mirrors for under $20 For a DIY upgrade, paint the existing frame. A plain wood frame sprayed in matte black or brushed gold looks completely different — and professional. Shape matters. Round mirrors soften rooms that feel boxy. Arched mirrors add a modern, architectural feel. Rectangular mirrors work well in traditional or transitional spaces. Don’t overthink the placement. Put it where you’d naturally look — and watch the room open up.
- Install Floating Shelves for a Styled Display
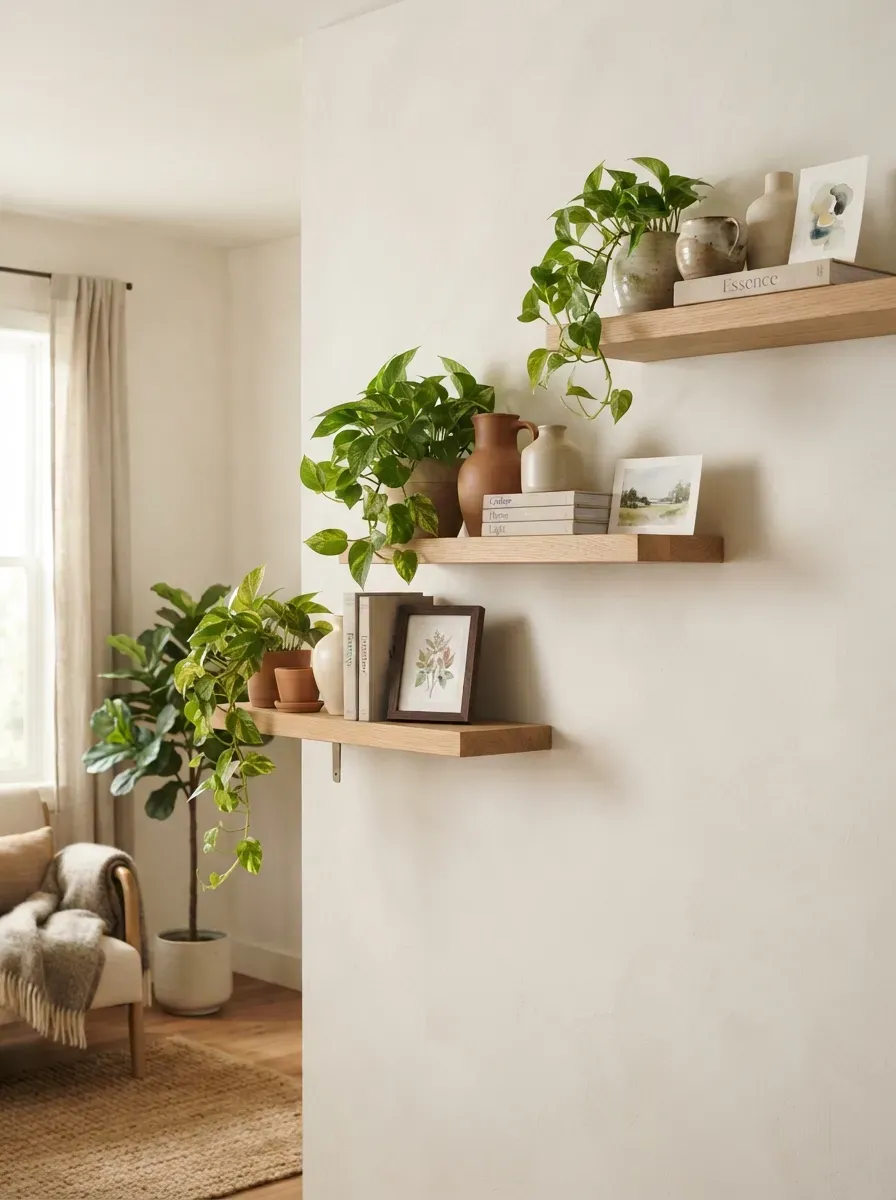
Floating shelves do two things at once — they add storage and wall interest. The key is how you style them. Empty shelves look unfinished. Overcrowded shelves look cluttered. The goal is somewhere in between. A simple shelf-styling formula: • One plant (real or high-quality faux) • One tall item (a vase, a candle stick, a small sculpture) • One stack of books • One small framed photo or print • One empty space (breathing room matters) Repeat this loosely across each shelf, varying heights and textures. Budget installation: • IKEA LACK shelves: $10–$15 each • Amazon basics floating shelves: $20–$35 for a set • For a warmer look, cut a pine board from Home Depot and use L-brackets to mount — total cost around $25 per shelf Staggering works better than symmetry. Instead of three shelves in a straight vertical column, offset them slightly. It looks more intentional and architectural. Weight limits matter. Check the bracket rating before loading heavy ceramics or books. Most standard shelf kits hold 10–20 lbs per shelf safely. Shelves give walls a purpose — and give you a place to show off the things you actually love.
- Paint an Accent Wall in a Deep, Rich Color

One wall. One bold color. Completely different room. Painting an accent wall is one of the most affordable ways to change how a space feels. A gallon of paint costs $30–$50, and most accent walls take less than a gallon. Colors that work especially well: • Deep forest green • Warm terracotta • Dusty navy • Charcoal black • Moody burgundy These tones add depth without making the whole room feel closed in — because only one wall carries the weight. Which wall to paint? The wall your eye naturally lands on when you walk in. That’s usually the one directly opposite the main entrance, or the wall behind the main seating. How to get a clean finish: • Use a 2-inch angled brush for edges (called “cutting in”) • Roll the main section after the edges are done • Apply two coats — always • Let each coat dry fully before the next Matte and eggshell finishes tend to look more sophisticated on accent walls than gloss. Gloss can highlight imperfections in the drywall. If you are renting, ask your landlord. Many are fine with it as long as you repaint before you leave — and a $30 gallon of white paint on the way out is worth the transformation.
- Add Texture with a Shiplap or Board-and-Batten Wall
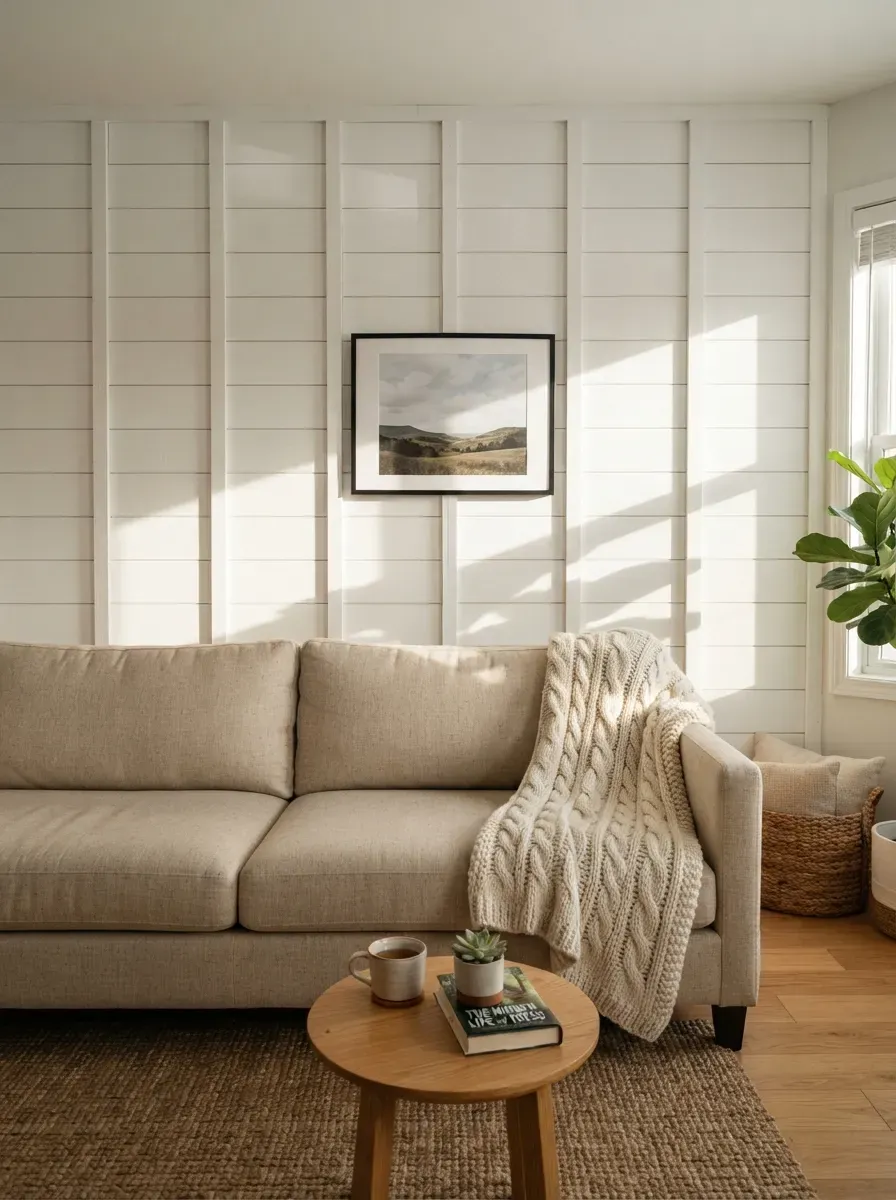
Texture changes how a wall feels — even before you touch it. Board-and-batten is one of the most popular DIY wall treatments right now. It sounds complicated, but it is really just thin strips of wood glued and nailed to the wall in a grid pattern, then painted. Basic materials: • 1×3 or 1×4 pine boards (cut to size at Home Depot for free) • Liquid Nails adhesive • A brad nailer or finishing nails • Caulk and paint Total cost for one wall: $80–$200, depending on wall size. The process: install a horizontal rail at the height you want (usually 32–36 inches from the floor), then add vertical boards at even intervals. Fill nail holes and seams with caulk. Sand lightly. Paint. The paint matters. White or off-white is the classic choice and makes the texture pop through shadow lines. A darker color like navy or sage can look dramatic and modern. Shiplap is similar — horizontal boards with a slight gap between them. It reads as farmhouse or coastal, depending on the room. Both styles add architectural detail that makes a home feel more finished and custom — without actually doing major renovation work.
- Hang a Large-Scale Tapestry or Textile
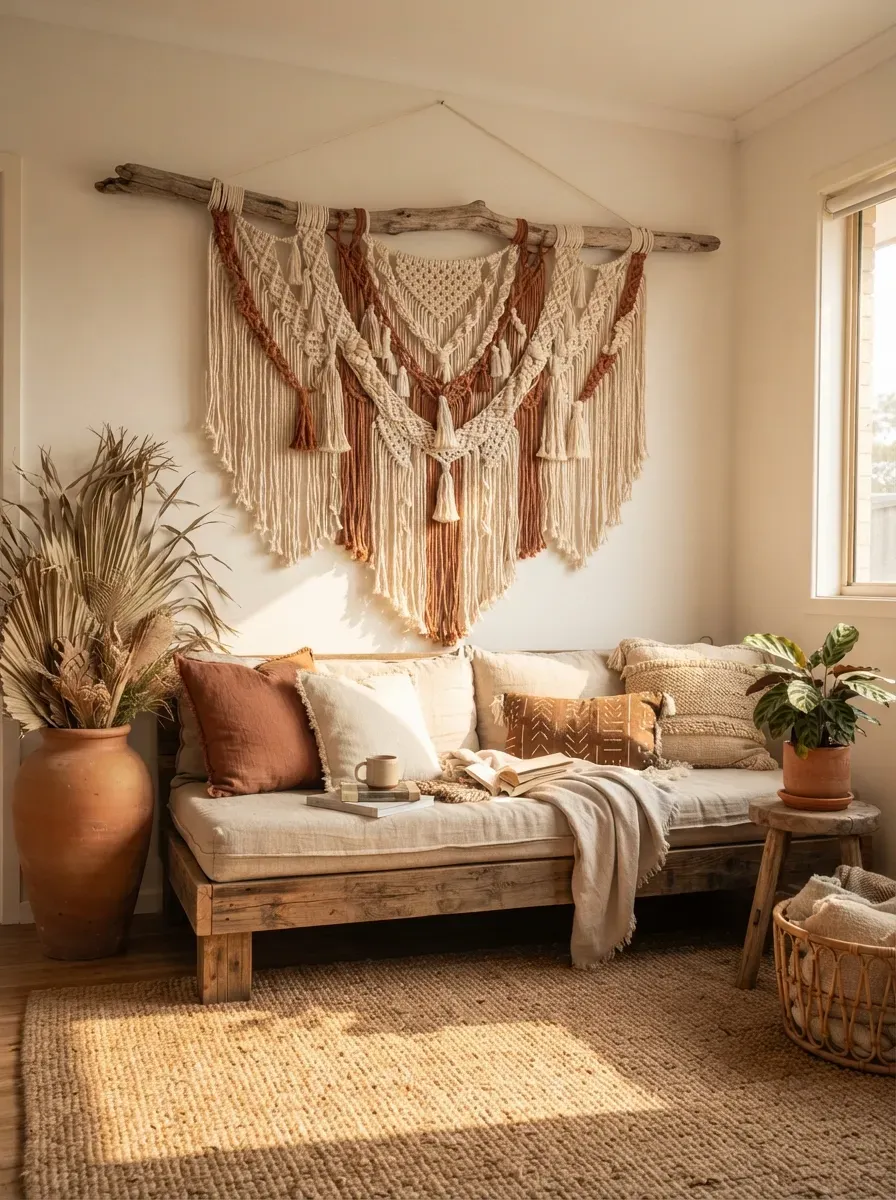
A textile on the wall adds warmth that paint and art can’t match. Tapestries, woven wall hangings, macramé panels, and even vintage rugs can fill a large wall beautifully. They absorb sound, soften hard edges, and bring in texture and color all at once. Where to find affordable options: • World Market and Urban Outfitters carry large tapestries for $40–$80 • Etsy has handmade woven wall hangings from independent makers — range is wide • Antique stores and estate sales sometimes yield vintage rugs or textiles for very little • Amazon carries basic macramé hangings starting around $25 Hanging without damage: • A simple wooden dowel with twine is the classic method — easy to DIY • Command strips work for lighter pieces (under 5 lbs) • For heavier textiles, use a curtain rod mounted with two brackets Scale is everything. A small tapestry on a large wall looks like an afterthought. Go bigger than feels comfortable. A piece that fills at least half the wall’s width reads as intentional. Textiles work especially well in rooms that feel cold or echo-y — they bring warmth and acoustic softness that hard-surface art can’t provide.
- Build a DIY Pegboard Display Wall
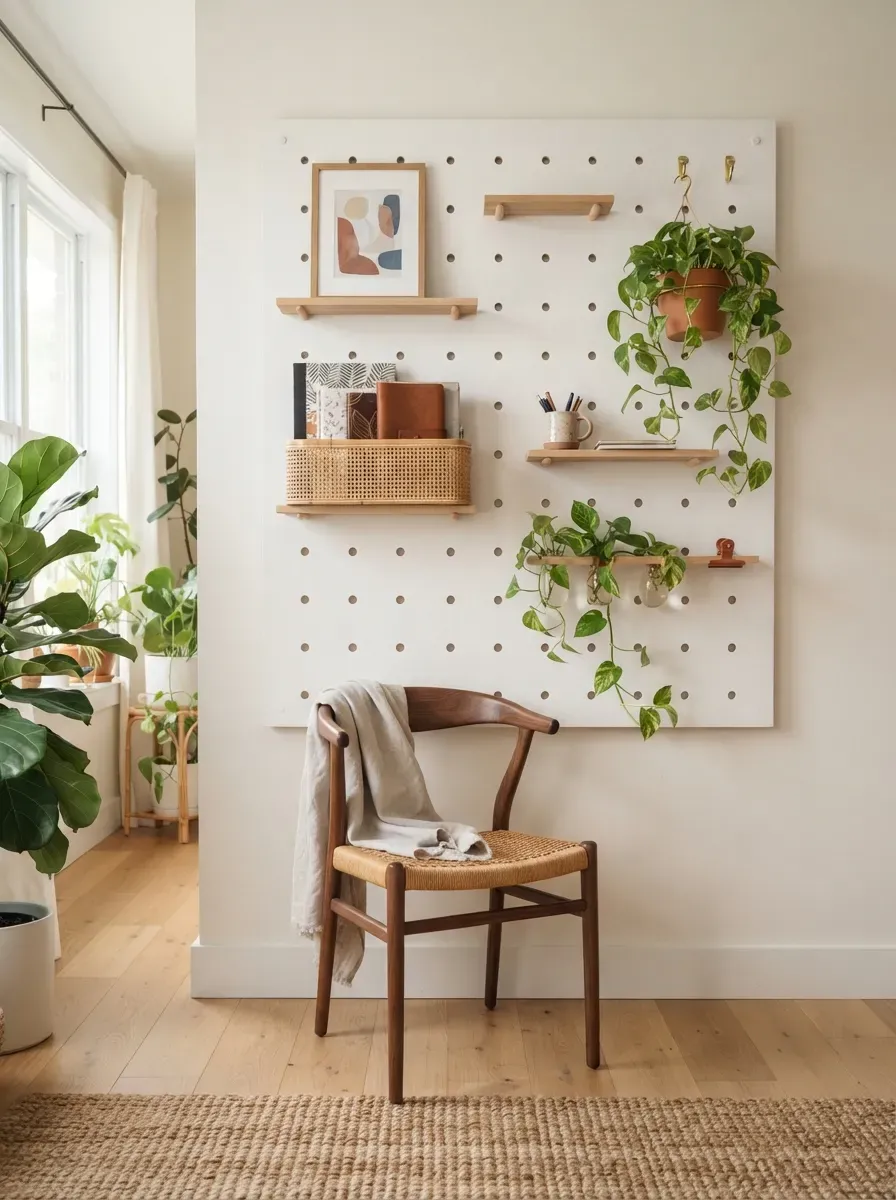
Pegboard is not just for garages anymore. A painted pegboard panel on a living room wall is functional, customizable, and genuinely stylish when done right. You can rearrange it any time. Add shelves, hooks, ledges, and baskets. Swap things out seasonally without touching the wall. Materials: • A sheet of pegboard ($10–$20 at Home Depot, usually sold in 2×4 or 4×4 ft sheets) • Spacers (to create a gap between the board and wall — required for hooks to fit) • Pegboard accessories: dowels, shelves, hooks, bins • Paint to match or contrast your wall How to mount it:
- Screw wooden spacer blocks into the wall studs
- Screw the pegboard into the spacers
- Paint the whole thing your chosen color
- Add accessories White is clean and gallery-like. Black looks editorial and modern. A muted sage or warm terracotta works for boho-style rooms. What to display: • Small plants in clips or hooks • Art prints on mini ledges • Books, journals, baskets • Favorite objects and keepsakes The whole project runs $30–$75 depending on size and accessories. It takes one afternoon. And it gives you a wall that actually does something.
- Frame Fabric or Wrapping Paper as Art
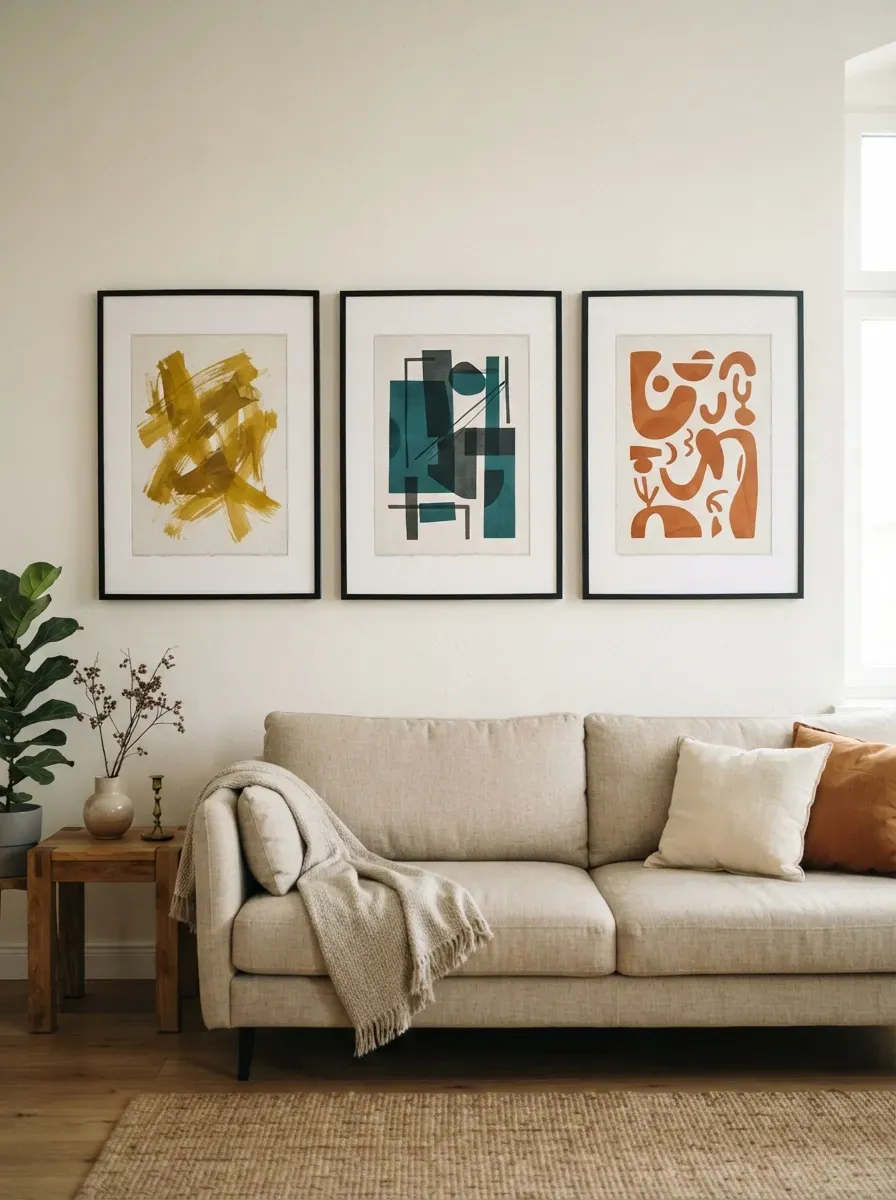
Original art is expensive. This hack is not. Fabric and decorative wrapping paper can look like real artwork when properly framed. This is especially useful if you want large-format art — the kind that would cost hundreds of dollars at a home goods store. What works well: • Bold-patterned fabric in abstract or geometric prints • High-quality gift wrap with botanical, marbled, or modern patterns • Scrapbook paper in coordinating colors for a multi-frame display • Pages from oversized coffee table books (architecture, fashion, nature photography) The frame matters more than the art. A cheap print in a great frame looks expensive. A great print in a cheap frame looks forgettable. Look for frames with a wide white mat — it adds visual breathing room and makes even simple patterns look gallery-worthy. Budget math: • Fabric: $2–$5 per yard at a local fabric shop • Wrapping paper: $3–$8 a sheet (one sheet fills a 16×20 frame) • Frames: $10–$25 at IKEA or Target For a cohesive display, stick to two or three colors across all pieces. It will look curated, not random — and no one will guess you spent under $50.
- Install a Picture Rail or Ledge for Easy Swapping

Picture ledges are one of the most flexible wall solutions you can install. A ledge is a shallow shelf — usually just 3–4 inches deep — designed to hold frames and art leaned against the wall. You can rearrange everything without making new holes. Swap out art seasonally. Mix frames and canvas. Layer pieces in front of each other. Where to get them: • IKEA MOSSLANDA picture ledge: $15 for 55 inches — the most popular option by far • Can be stained or painted to match your room • DIY with a 1×4 board and a small front lip made from a 1×1 How to style a picture ledge: • Lean pieces of different heights — tall in back, short in front • Mix frames (black, wood, white) with unframed canvases • Add a small plant, ceramic piece, or candle for dimension • Keep it slightly asymmetrical A single long ledge above the sofa can hold 6–10 pieces comfortably. Run two or three ledges vertically up the wall for a more dramatic floor-to-ceiling look. Best part: when you find a new print you love, you just swap it in. No patching, no repainting, no measuring. The ledge does all the work.
- Create a Mural with Paint or Wall Decals

You don’t have to be an artist to paint a mural. You just need a plan. The most beginner-friendly murals are abstract — loose shapes, organic curves, color blocks. No fine lines or portraits required. Simple mural ideas anyone can try: • Large watercolor-style blobs in two or three colors • A single oversized arch or half-circle in a contrasting tone • Soft horizontal color-wash bands from floor to ceiling • A tree branch starting at one corner and extending across the wall How to prep:
- Choose your colors (two to three max for a first mural)
- Sketch the design loosely in pencil first
- Use painter’s tape for any straight edges
- Commit — brush in large, confident strokes For those not ready to paint, vinyl wall decals are the alternative. Peel-and-stick tree branches, leaf patterns, geometric designs, and abstract shapes all exist in removable form. A large decal set runs $15–$40 on Amazon or Etsy. The biggest beginner mistake is making the design too small. Whatever size you think the mural should be — go bigger. A small mural on a big wall looks like an accident. A design that fills the wall looks like a choice.
- Use Wainscoting or Beadboard on the Lower Half

Wainscoting adds architectural character that makes a room feel older and more established in the best way. It is the formal name for paneling applied to the lower portion of a wall — typically from the floor to about 36 inches high. The upper portion of the wall is then painted a different color, creating a two-tone effect. Types to consider: • Beadboard — vertical grooved panels with a cottage or farmhouse feel • Raised panel — classic box molding with a traditional look • Board-and-batten on the lower half with paint above — a modern hybrid Budget installation: • Beadboard sheets: $20–$30 per 4×8 panel at home improvement stores • Pre-primed MDF beadboard is easiest to paint and work with • Chair rail molding (the cap strip): $0.80–$2 per linear foot • Total material cost for one wall: $80–$150 Paint the wainscoting white and the upper wall a contrasting color. Sage green, slate blue, warm cream, and soft terracotta all work beautifully above white paneling. This treatment photographs extremely well and adds genuine perceived value to a home. Buyers and guests alike notice it — because it is the kind of detail that usually only exists in older, well-built homes.
- Display a Collection of Vintage Clocks or Plates
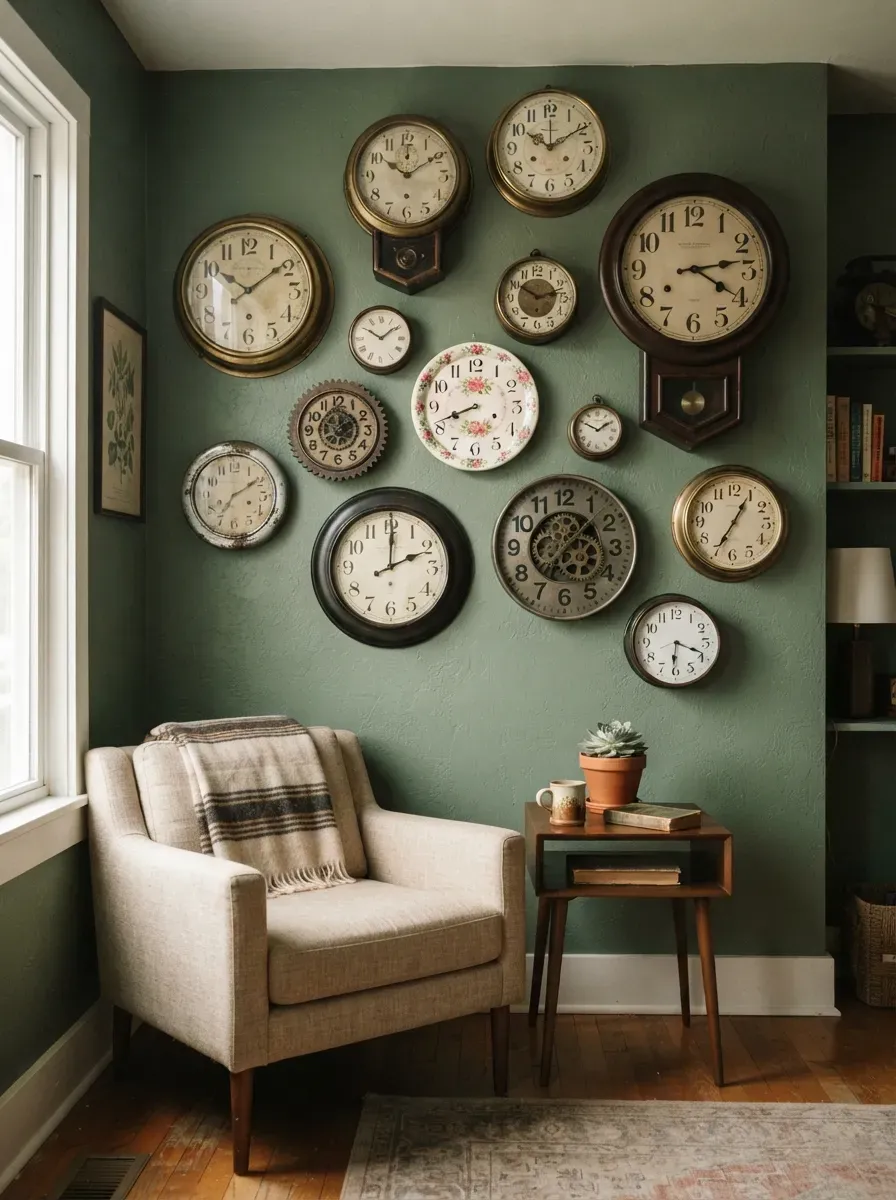
Groupings of one type of object make a wall feel collected, not decorated. The most compelling wall displays are built around a single category — clocks, plates, mirrors, hats, baskets, botanical specimens. The variety within that category creates visual interest, while the theme holds it all together. Easiest collections to start: • Vintage wall clocks from thrift stores ($2–$8 each) • Decorative ceramic plates in varying patterns (very common at Goodwill) • Woven baskets or rattan mirrors hung at different heights • Framed botanical or insect prints in matching frames The display rules are the same as gallery walls: • Arrange on the floor first • Photograph your arrangement • Use the photo as your hanging guide • Keep the overall shape of the group roughly rectangular or circular Thrift store tip: Vintage plates, clocks, and small mirrors are among the most abundant and underpriced items in any secondhand store. A full wall arrangement of 12 clocks could cost less than $50 if you shop secondhand. The personal nature of a collection is also its strength. A wall of clocks or plates tells people something about you — which is exactly what a well-decorated home should do.
- Add Architectural Interest with Molding and Trim
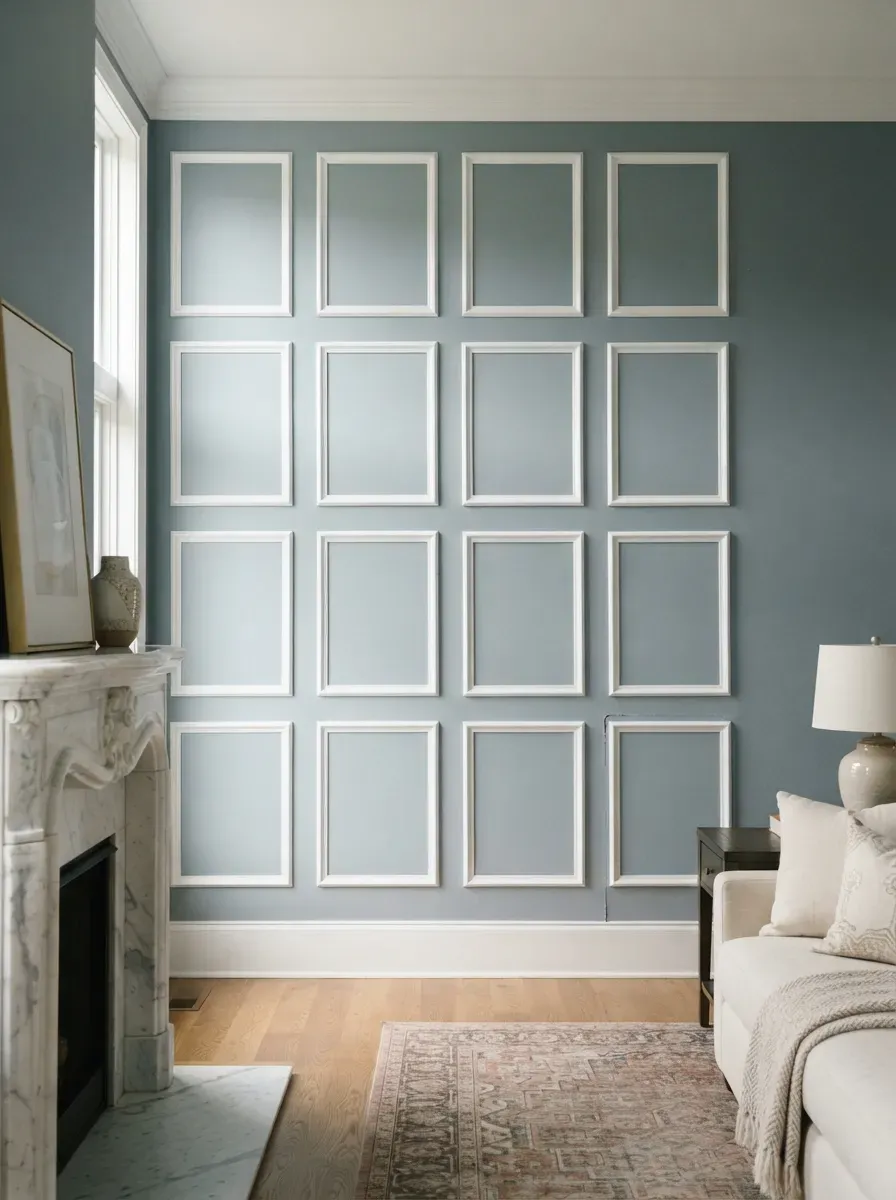
Crown molding, picture frame molding, and decorative trim can transform a flat wall into something that looks custom-built. Picture frame molding is the easiest entry point. You apply simple rectangular frames of molding directly to the wall surface, creating the look of raised panels. Paint everything — wall and molding — the same color and the effect looks extremely high-end. Materials: • Primed MDF molding strips: $0.70–$2 per linear foot • Liquid Nails adhesive • A miter saw (or have Home Depot make the 45-degree angle cuts) • Caulk, sandpaper, paint Total cost for one wall: $60–$120 depending on size. The install process:
- Mark your panel placement on the wall with pencil
- Cut molding to size with 45-degree corner cuts
- Glue to the wall and pin with a brad nailer
- Fill nail holes and seams with caulk
- Sand smooth and paint The result looks like expensive architectural detail — the kind you see in Victorian homes and upscale renovations. But it is applied to the surface of a regular drywall. Paint the whole wall (molding included) in one unified color for the most polished, modern look.
- Hang a Macramé or Woven Wall Hanging
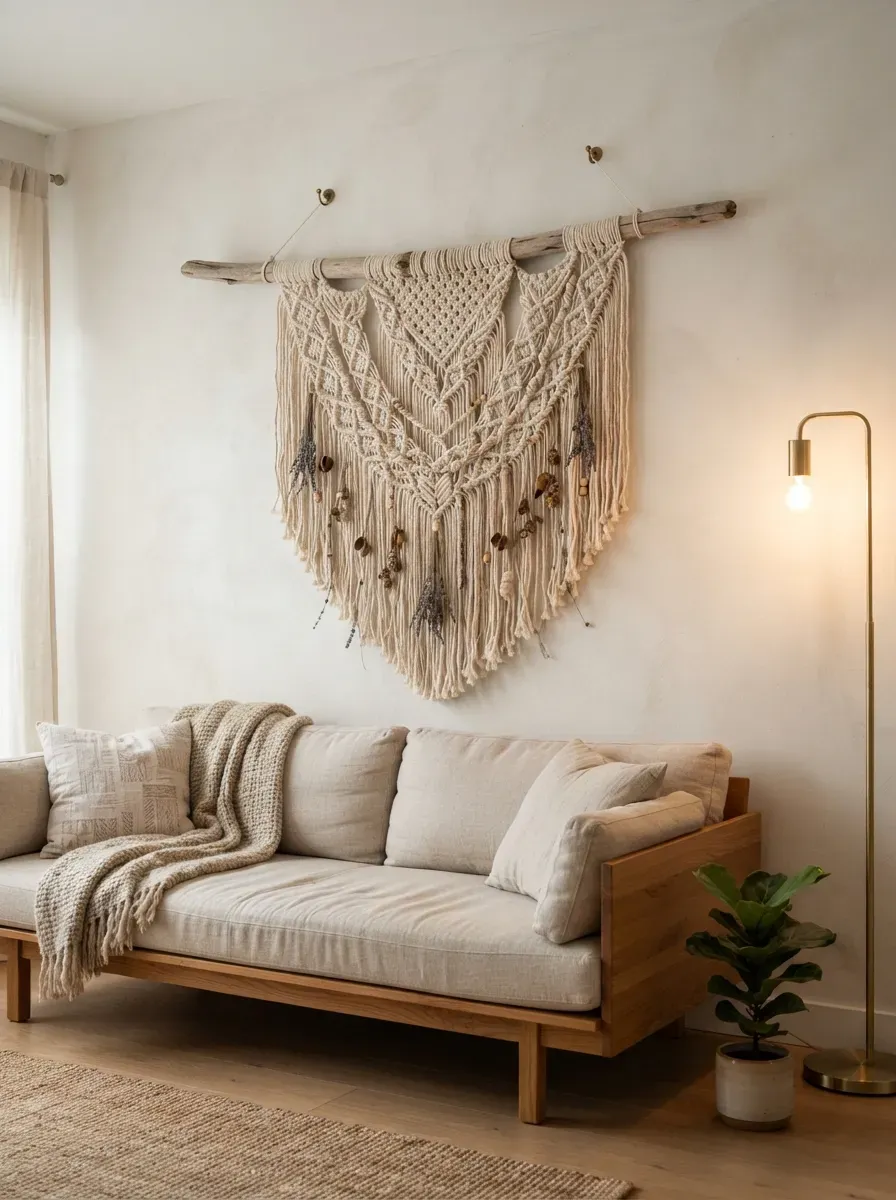
Macramé has made a full comeback — and for good reason. It fills a wall with texture and warmth that nothing else quite replicates. A large macramé wall hanging can anchor a whole room. It works in bohemian spaces, minimalist rooms, and even more modern interiors when done in a simple knot pattern. Where to buy: • Etsy has the best selection from independent makers: $40–$200+ depending on size • World Market and Target carry simpler options: $30–$60 • Urban Outfitters, West Elm, and Anthropologie all carry versions, often on sale To make your own: Macramé is genuinely beginner-friendly. A basic square knot is the only knot most designs use. Starter materials: • 3mm or 5mm single-strand cotton cord ($12–$20 for a spool) • A wooden dowel or branch • A YouTube tutorial (search “beginner macramé wall hanging”) A simple homemade piece 24 inches wide and 36 inches long can be made in an afternoon with no experience. The right size matters. For above a sofa, aim for a piece that is at least 30–40 inches wide. Anything smaller will look lost against the wall.
- Build a DIY Wood Plank Accent Wall
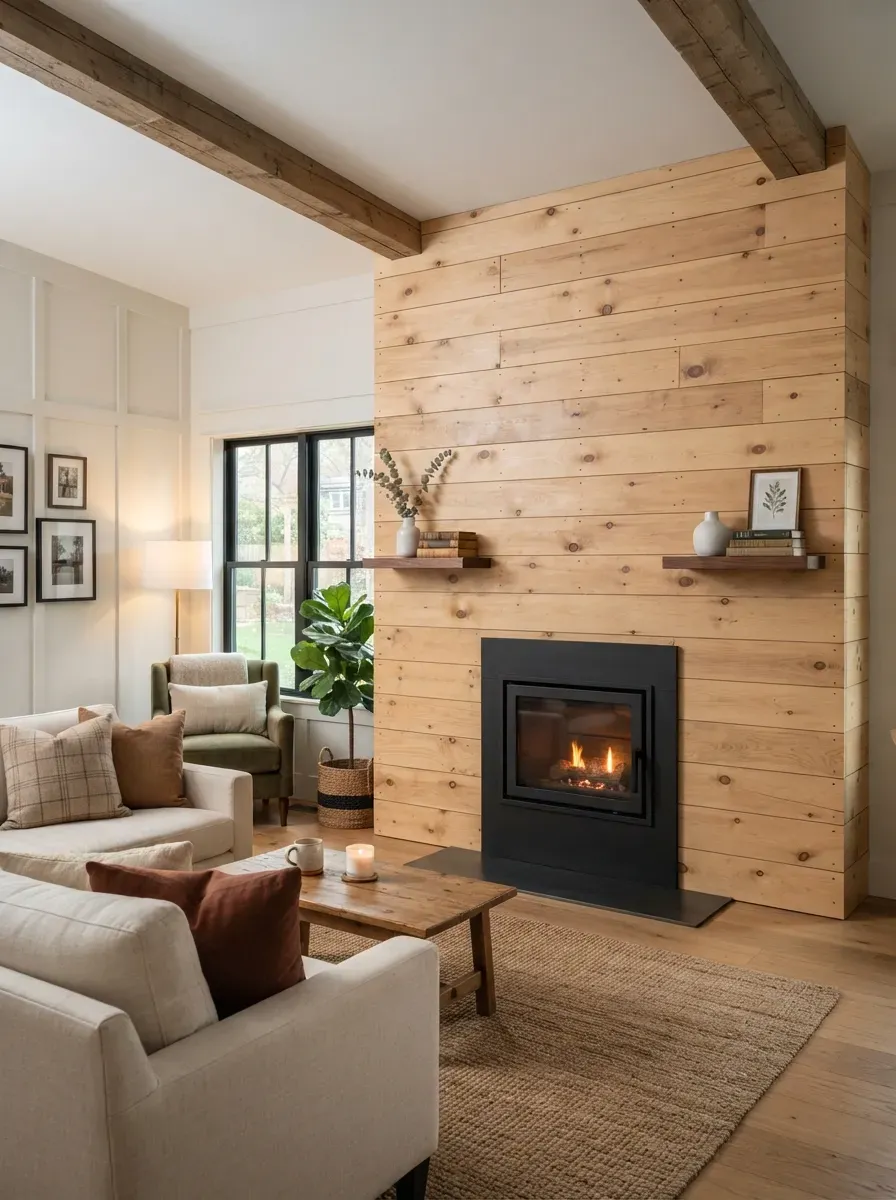
A wood plank wall adds warmth and texture that no paint color can fully replicate. The most popular version uses thin, horizontal boards installed edge-to-edge across one full wall. It reads as modern farmhouse, Scandinavian, or mid-century depending on your stain color and the rest of your room. Materials: • 1×4 pine boards are the easiest and most affordable option • Buy pre-cut or have the lumber yard cut to your wall width • Stain or leave raw, or paint for a different effect Finish options: • Natural/light stain: warm, Scandinavian feel • Dark walnut stain: rich and dramatic • White-washed: beachy, casual, coastal • Painted white: reads like shiplap Install process:
- Find and mark your wall studs
- Nail or screw each board directly into studs
- Leave a small gap between boards (use a coin as a spacer) or butt them tight
- Fill nail holes and apply finish Cost estimate: $1–$2 per linear foot for pine boards. A 10-foot wide wall costs $80–$150 in materials. This is a full day of work but requires no special skills — just a level, a drill, and patience.
- Use a Map or World Map as Statement Art
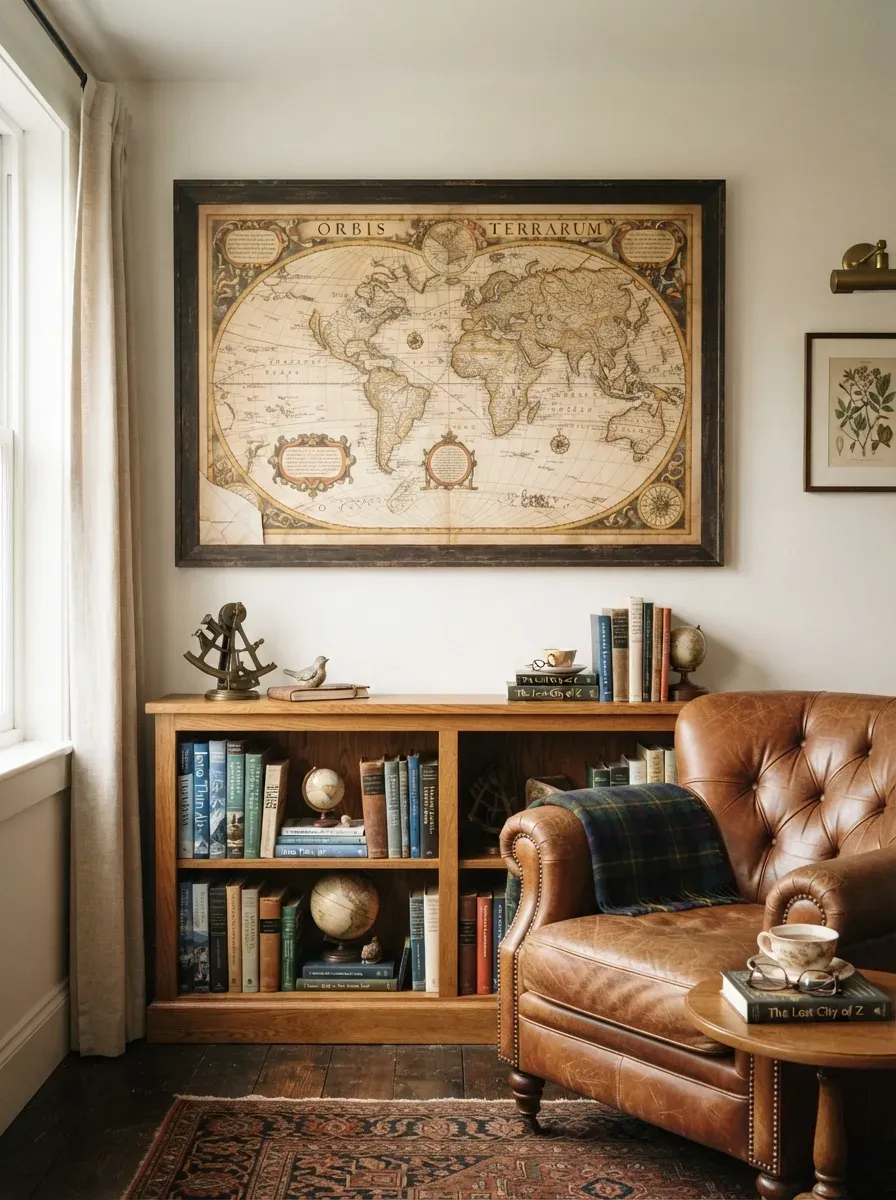
A large map on the wall is a classic — and it still works. A map as art is personal (it’s a place you love), interesting (guests always engage with it), and scalable (maps look better the bigger they are). Popular options: • World map in a vintage or contemporary style • A specific country or region you’ve traveled to or dream of • A topographic map of a mountain, national park, or coastline • Your hometown or city, especially in an antique or illustrated style Where to get them: • AllModern, Society6, Minted, and Etsy all sell large format map prints • For ultimate scale, order a custom large-format print from a local print shop (ask for a “wide format” print on matte paper) • A 24×36 inch print typically costs $15–$40 to print Framing a big map: Frame it properly for maximum impact. A simple black or walnut wood frame with no mat at this scale looks clean and modern. Or skip the frame entirely and mount it directly to a backing board using spray adhesive for an intentional, studio-art look. Push pin personalization: many people add push pins to mark places they’ve been or want to go — turning the map into an evolving piece of living art.
- Layer Lighting on the Wall with Sconces

Wall lighting changes the entire mood of a room. Most living rooms rely entirely on one overhead light. That single source creates flat, even light that makes a room look like an office. Wall sconces add layers — pools of warm light that make a space feel cozy, curated, and dimensional. The plug-in sconce is the renter’s best friend. No electrician needed. No wiring required. Plug it into any outlet, run the cord behind furniture or along the baseboard, and you get real sconce lighting without the renovation. Where they work best: • Flanking a sofa on either side (symmetry looks intentional) • On either side of a large mirror or artwork • In a reading corner with a single sconce angled toward the seat • As ambient light along a TV wall Brands to look at: • IKEA has plug-in sconces starting around $20 • West Elm, CB2, and Rejuvenation carry better-designed options ($60–$150) • Amazon has a huge range of plug-in options from $25–$80 Choose a bulb temperature of 2700K–3000K (warm white, not daylight) for the coziest effect. The difference between a room with layered lighting and a room with only overhead light is significant. One feels lived-in. The other just feels lit.
- Create a Chalkboard or Whiteboard Feature Wall

This is especially good if you have kids, love to sketch, or want a wall that can constantly change. Chalkboard paint turns any flat surface into a writable, erasable canvas. You can cover a full wall, paint a single panel, or even create a chalkboard shape (a large rectangle or arch) on one part of the wall. What you need: • Chalkboard paint in black, grey, or green ($15–$25 per quart) • Two coats, applied like regular paint • After curing (24–48 hours), “prime” the surface by rubbing a piece of chalk flat across the whole surface, then erasing Uses beyond kid drawings: • A weekly meal plan or grocery list in the kitchen-adjacent living space • Hand-lettered seasonal quotes or affirmations • Botanical illustrations that you update by season • A map of a city you love, drawn freehand For a more polished version, frame the chalkboard area with simple wood trim to make it look intentional rather than industrial. Whiteboard paint is a newer alternative — it creates a dry-erase surface. Better for those who want a cleaner, modern look and prefer markers over chalk. Both options give you a wall that is always slightly different. Never static, never boring.
- Display Oversized or Large-Format Photography
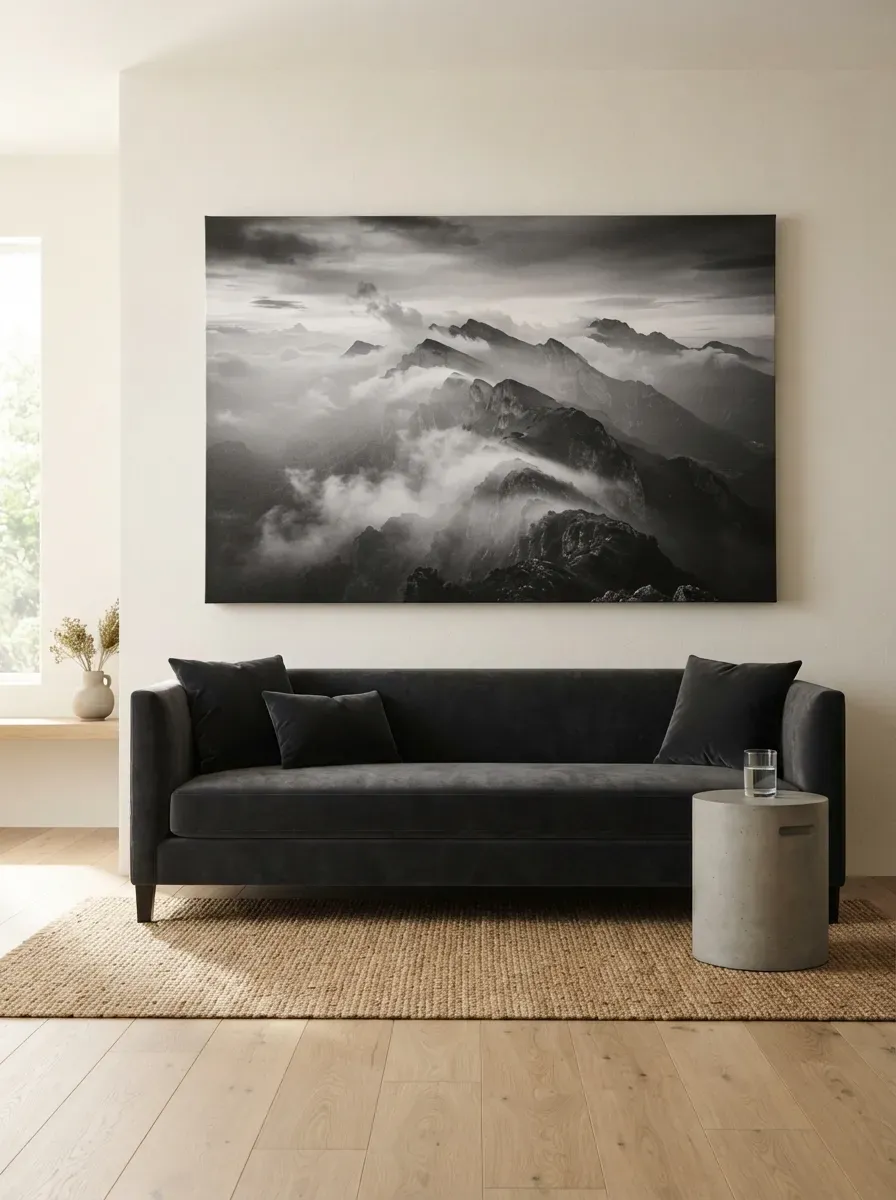
One big, bold photograph can do what a gallery wall of twelve small prints cannot. Scale creates impact. A single photo printed large and hung in the right place becomes the whole room’s visual anchor. Everything else in the space begins to feel like it belongs to that image. What to print large: • A landscape you photographed on a trip you love • A family photo that captures a genuine moment (not staged) • Black-and-white street photography • Abstract macro photography (extreme close-ups of textures, water, light) Where to print large format: • Costco Photo Center — excellent quality at very low cost (a 20×30 print is around $8–$15) • Walgreens and CVS offer large-format printing • CanvasDiscount.com, Printique, and Bay Photo Lab for canvas wraps and fine art papers Mounting options: • Traditional frame (can be custom-ordered for any size) • Canvas wrap (the image wraps around a wooden stretcher frame, no frame needed) • Flush mount (printed image adhered to a rigid backing board — very clean, modern look) File quality matters. For prints over 16×20 inches, your image needs to be at least 2400×3000 pixels. iPhone photos taken in the last five years are usually fine.
- Use Decorative Hooks as a Functional Display

Hooks are typically utilitarian — but styled right, they become a wall display. The concept is simple: mount a row of decorative hooks, then hang objects that are both useful and beautiful. The result is a wall that is functional, personal, and always slightly changing. What to hang: • Wide-brim hats (a collection of four or five hats looks intentional) • Woven bags, baskets, or tote bags you actually use • A vintage mirror or small framed print • Dried botanicals — eucalyptus, pampas grass, dried florals in a tied bundle • Scarves, throws, or linen fabric in colors you love Hook style options: • Matte black metal: modern, industrial • Brass: warm, vintage-adjacent • Ceramic knobs: cottage, eclectic • Sculptural brass hooks in leaf or abstract shapes: artful, conversation-starting Mounting options: • Individual hooks screwed directly into studs or with wall anchors • A mounting board (a stained or painted plank with hooks already attached, then the whole board mounts as one piece) The board approach is the cleanest look and easiest install. You can even buy them pre-made — Etsy has great handmade versions — or build one with a 1×6 board and hardware store hooks.
- Try Color Blocking with Paint

Color blocking is painting different sections of a wall in distinct, contrasting colors — creating a bold, geometric effect without any additional materials. It sounds dramatic. It looks incredible. And it is genuinely one of the cheapest ways to completely change the feeling of a room. Common color block approaches: • Horizontal split: paint the lower third one color, the upper two-thirds another • Vertical split: divide the wall into two or three vertical bands • Corner block: paint one corner section (both the side wall and part of the back wall) in a contrasting color • Organic shape: use a curved or arched dividing line instead of straight Color pairing tips: • Warm terracotta + soft cream • Deep navy + warm white • Forest green + charcoal • Dusty rose + warm grey The line between colors is where most people get nervous. Use painter’s tape for a straight line. Let the first color dry fully before taping. Press the tape firmly to prevent bleeding. Peel the tape while the second coat is still slightly wet for the cleanest edge. Two colors of paint — maybe $60 total — can make a living room look like it was designed by someone with a real point of view.
- Install a Cane or Rattan Panel as a Feature Wall

Cane webbing is having a major moment in interior design — and applying it to a wall is one of the most striking uses. Cane panels (the same woven material used in mid-century furniture and cabinet doors) bring an immediate warmth, texture, and organic quality to any space. How to create a cane accent wall:
- Buy a roll of cane webbing online ($15–$30 per yard, available on Amazon or Etsy)
- Cut it to size
- Stretch it slightly (dampen it with warm water — it becomes more pliable)
- Staple or adhere it to a flat backing panel (plywood or MDF)
- Frame the panel with wood trim or thin molding strips
- Mount the finished panel on the wall For a simpler version, some retailers now sell pre-made cane panels or cane-front cabinet inserts that can be mounted directly. Where it looks best: • Behind a sofa as a full accent wall • Framed as a single large panel centered on a wall (almost like a textile artwork) • As lower wainscoting, cane panels in place of traditional painted wood The material pairs naturally with warm neutrals, terracotta, sage, and walnut tones — adding a rich, handmade quality that feels both timeless and current.
- Make a DIY Concrete or Plaster Effect Wall

A textured plaster or concrete-effect wall adds a depth and sophistication that flat paint simply cannot achieve. The good news: you don’t need to hire anyone. Venetian plaster, limewash paint, and concrete overlay products are all DIY-friendly and widely available. Option 1 – Limewash paint: Brands like Portola Paints and ROMABIO make limewash that you apply with a brush in random, overlapping strokes. It creates a soft, faded, Old World texture. No mixing, no plastering skills required. Cost: $50–$80 per gallon (covers about 250 sq ft with one coat). Option 2 – Venetian plaster: This is a smoother, more polished technique. Apply with a trowel in thin layers and burnish with a damp cloth between coats. More skill involved, but tutorials are widely available and the material is forgiving. Option 3 – Concrete overlay: Products like Ardex Feather Finish create a genuine concrete-like surface applied with a trowel over drywall. Very thin, very durable, and looks extraordinary when sealed. Cost comparison: All three options run $40–$100 for materials on a standard accent wall. The result looks like a $500+ professional finish. The imperfect texture is part of the appeal. Variation in application is what makes these treatments look authentic rather than clinical.
- Create a Reading Nook Accent Wall

Turn a wall into a destination, not just a backdrop. A reading nook accent wall combines a bold paint color (usually dark — navy, forest green, charcoal) with built-in or IKEA shelving and a built-in seat or bench to create an immersive, wrapped-in feeling. How to build a simple version:
- Choose a corner or alcove in your living room
- Paint the back wall (and optionally the two side walls) in a rich, dark color
- Add BILLY bookcases (IKEA) on either side of the space, painted to match the wall
- Add a bench seat or floor cushion below
- String lights along the top shelf edge for warm ambient light Total cost with IKEA shelving: $200–$400 depending on how many bookcases you add. Without built-ins, a simpler version works just as well: • Paint one wall a deep color • Add floating shelves on that wall only • Position a reading chair in front • Add a floor lamp behind the chair The contrast of a dark, wrapped wall against the lighter rest of the room creates a visual pocket — a room-within-a-room feeling that makes the space feel larger and more thoughtfully designed. The reading nook is not just decoration. It gives the room a purpose, a rhythm, and a reason to sit down and stay.
Conclusion Your living room walls don’t have to be blank. They don’t have to be boring. And they definitely don’t have to cost a fortune to look intentional and personal. Every idea in this list can be started with under $100, completed in a weekend, and adjusted over time as your taste evolves. The best wall treatment isn’t the most expensive one — it’s the one that reflects how you actually live. Start with one wall. Pick the idea that made you stop scrolling. Buy the paint, order the tapestry, cut the first board. The momentum builds fast once you see the difference that a single changed wall can make. Your space is already yours. Now make the walls show it.
